
Making a blueberry delight recipe from scratch is one of those kitchen projects that looks fancy but actually comes together faster than you’d think. I’m talking about a dessert that’ll have folks asking for your secret, when really it’s just quality ingredients and a methodical approach—no culinary degree required.
Table of Contents
Ingredients You Need
Let’s start with what you’re actually working with. A solid blueberry delight recipe needs quality components—no shortcuts here. You’ll want 2 cups of graham cracker crumbs (about 16 crackers crushed), 1/2 cup melted butter, 3 tablespoons sugar for the crust, 16 ounces cream cheese at room temperature, 1 cup powdered sugar, 8 ounces whipped topping (like Cool Whip), 3 cups fresh blueberries, 1 cup blueberry pie filling, and 2 tablespoons lemon juice. The beauty of this recipe is that these are pantry staples—nothing exotic or hard to source.
Temperature matters here. Pull that cream cheese out of the fridge 30 minutes before you start. Cold cream cheese won’t blend smoothly, and you’ll end up with lumps that’ll ruin your texture. Same goes for the whipped topping—keep it cold until the last second.
Prepare Your Workspace
Before you touch a single ingredient, set yourself up right. Grab a 9×13 inch baking dish—this is your canvas. Line your counter with parchment paper for easy cleanup. Have your mixing bowls ready: you’ll need at least two large ones and one small one for blueberry prep. Grab a sturdy wooden spoon and an electric mixer if you’ve got one (though a whisk works in a pinch).
Clear your fridge space too. You’ll need room for the dish to chill for at least 4 hours, preferably overnight. Think of this like planning your workshop layout before tackling a project—good prep prevents frustration later.
Build the Crust Layer
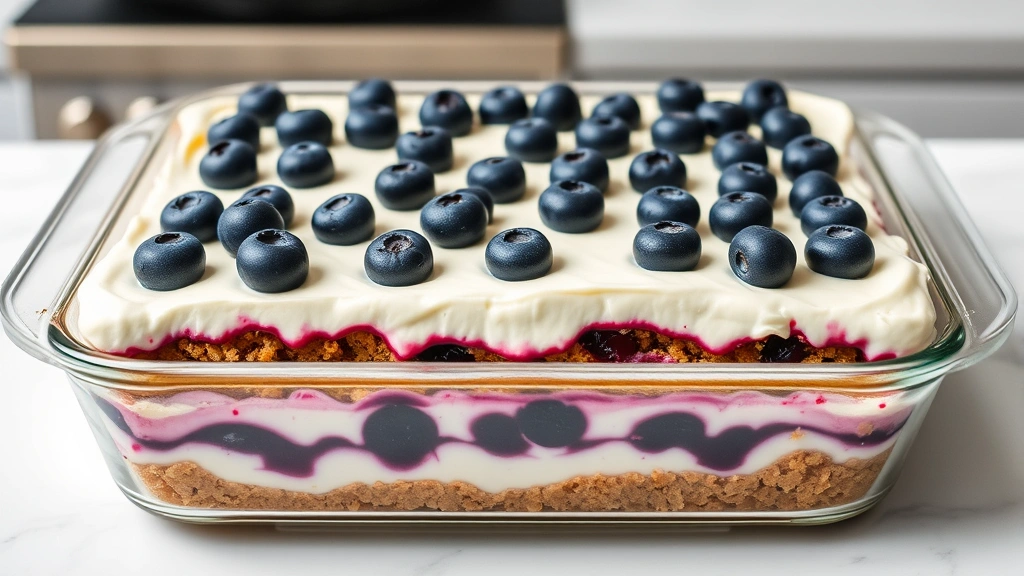
This is step one, and it’s dead simple. Combine your crushed graham crackers, melted butter, and sugar in a bowl. Mix until it looks like wet sand—every crumb should be coated with butter. If you’ve ever made a pie crust, this is the same concept.
Press this mixture firmly into the bottom of your baking dish. Use the flat bottom of a measuring cup to get it even and compact. Don’t be shy—you want a solid foundation. This crust layer needs to support everything that comes on top. Bake it at 350°F for 8-10 minutes until it’s lightly golden and set. Let it cool completely before moving to the next layer. This step takes about 15 minutes total, including cooling time.
Cream Cheese Magic
Once your crust is cool, it’s time to build the middle layer. Beat that room-temperature cream cheese until it’s smooth and fluffy—about 2-3 minutes with an electric mixer. Gradually add your powdered sugar while mixing. The texture should look like fluffy clouds, not dense paste.
Now here’s the key: fold in your whipped topping gently. Use a rubber spatula and work in thirds. Fold slowly, scraping from the bottom and rotating the bowl. This keeps air in the mixture, which gives you that light, cloud-like texture. If you’re familiar with folding techniques from baking, this is the same principle—respect the air you’ve already whipped in.
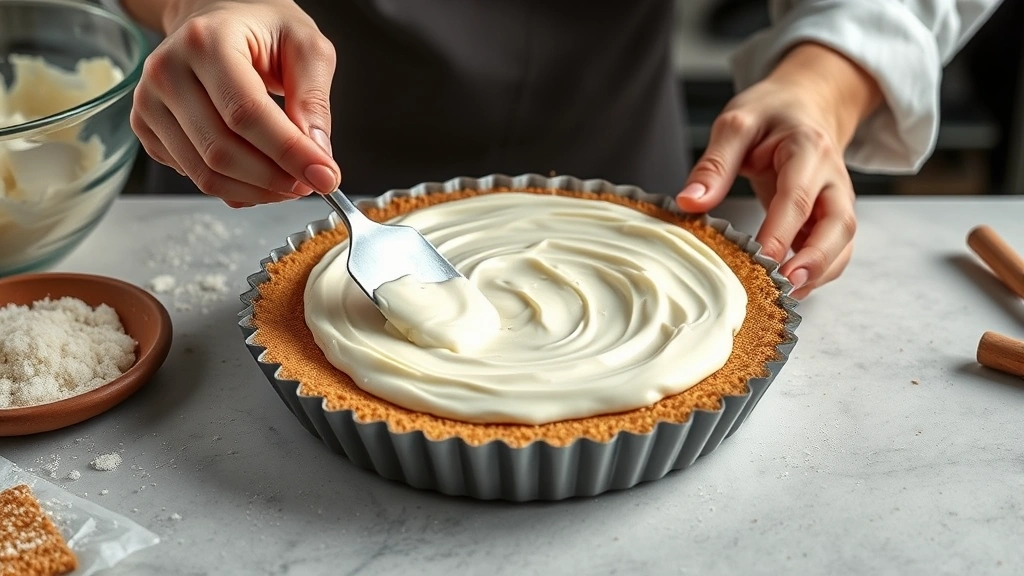
Spread this mixture evenly over your cooled crust. Use an offset spatula if you’ve got one, or just a regular spatula works fine. Make sure it reaches all the corners. This layer should be about 1/2 inch thick when you’re done.
Blueberry Topping Technique
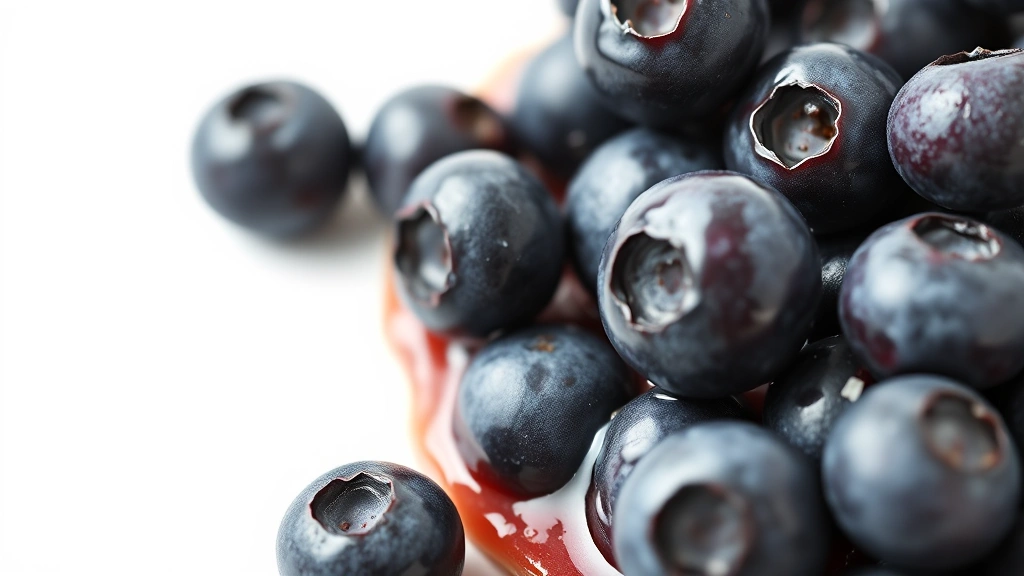
This is where your blueberry delight recipe gets its personality. Toss your fresh blueberries with lemon juice and let them sit for 5 minutes. The acid brightens the flavor and prevents browning. Arrange them evenly over the cream cheese layer—don’t just dump them in one spot. Distribute them so every bite gets berries.
Pour your blueberry pie filling over the fresh berries. The canned filling acts as a glaze and adds richness. It also helps keep the fresh berries from drying out during chilling. If you want extra blueberry flavor, you can add a tablespoon of cornstarch to the filling to thicken it slightly, though it’s not necessary.
Chill and Set
Cover your dish with plastic wrap and refrigerate for at least 4 hours. Overnight is better. This isn’t just about cooling—the flavors meld together during this time, and the whole thing sets up into sliceable portions. The cream cheese layer firms up, the crust absorbs some moisture and becomes cohesive, and everything reaches the right texture for serving.
Don’t skip this step thinking you can speed it up. I’ve seen people try to serve this warm, and it falls apart on the plate. The chill time is non-negotiable for proper structure.
Serving and Storage
When you’re ready to serve, use a sharp knife dipped in hot water and wiped clean between cuts. This prevents dragging and gives you clean slices. A 9×13 dish cuts into 12 nice portions. Serve cold, straight from the fridge.
Storage is straightforward. Keep it covered in the fridge for up to 3 days. If you need to store it longer, you can freeze individual portions wrapped in plastic wrap for up to 2 weeks. Just thaw in the fridge before serving—don’t leave it on the counter where the crust might get soggy.
Troubleshooting Common Issues
Your cream cheese layer is lumpy? That means it wasn’t at room temperature when you started. Next time, give it the full 30 minutes out of the fridge. If this happens now, strain it through a fine mesh sieve and start over with the beating.
The crust is soggy after chilling? You probably didn’t bake it long enough initially. Next time, aim for that light golden color and give it the full 10 minutes. A pre-baked crust creates a moisture barrier.
Blueberries sinking to the bottom? They’re heavier than the cream cheese layer. If this bothers you aesthetically, save some berries and press them into the top layer right before serving. Or embrace it—they look beautiful when you slice it anyway.
Frequently Asked Questions
Can I use frozen blueberries instead of fresh?
Yes, but thaw them completely and drain any excess liquid. Frozen berries release more water than fresh ones, which can make your filling runny. Pat them dry with paper towels before using.
What if I don’t have whipped topping?
You can whip heavy cream with powdered sugar instead. Use 1 cup heavy cream and whip it to stiff peaks, then fold it in like you would the whipped topping. The texture will be slightly different but still delicious.
Can I make this dairy-free?
Absolutely. Use dairy-free cream cheese and coconut whipped cream. The flavor profile changes slightly, but it still works. The crust and berry layers are naturally dairy-free already.
How far ahead can I make this?
You can prepare the crust and cream cheese layers up to 2 days ahead. Add the blueberry topping no more than 8 hours before serving to keep the fresh berries from getting mushy.
What’s the difference between this and a blueberry cheesecake?
This blueberry delight recipe is lighter and no-bake, while cheesecake requires baking and is denser. This one’s quicker and more forgiving for beginners. If you’re interested in other no-bake desserts, check out our Black Beans and Rice Recipe for a completely different direction, or explore how to tell if a pineapple is ripe for adding fresh fruit to your dessert repertoire.
Final Thoughts
A blueberry delight recipe is genuinely one of the easiest desserts to nail once you understand the layers and the importance of chilling time. There’s no baking required, no complicated techniques, just assembly and patience. The fact that it looks restaurant-quality when it’s actually a 20-minute hands-on project makes it perfect for impressing people without the stress. Make this once, and you’ll have it in your regular rotation. Your friends will ask for the recipe, and you can honestly tell them it’s easier than they think. For more cooking fundamentals, learn how long to steam broccoli to round out your kitchen skills, and don’t forget you can even add music to Google Slides if you’re sharing recipes digitally with family. Start with quality ingredients, follow the steps methodically, and you’ll have a dessert that tastes like you spent all day in the kitchen.


