
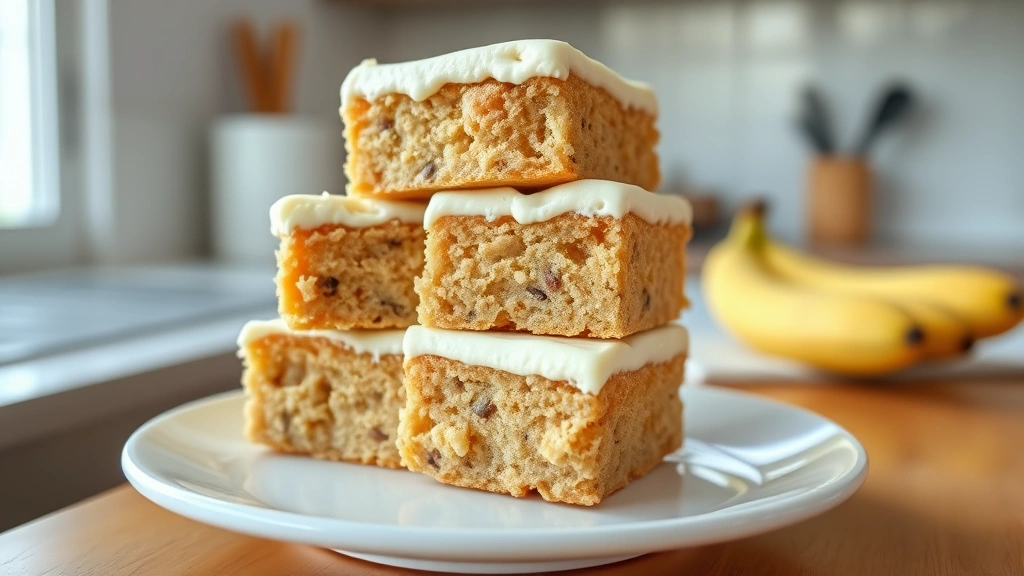
A banana bars recipe is your ticket to bakery-quality treats without the fuss—and honestly, once you nail the technique, you’ll wonder why you ever bought them from a store. These moist, tender bars hit that perfect sweet spot between cake and cookie, with natural banana flavor that doesn’t require any artificial nonsense. I’m going to walk you through the best method I’ve found after years of kitchen experiments, and trust me, this approach keeps them impossibly moist every single time.
Table of Contents
Why Banana Bars Win
Look, banana bars are the underdog of the dessert world. They don’t get the hype that chocolate brownies or sugar cookies do, but that’s exactly why they’re perfect. They’re forgiving, customizable, and honestly cheaper to make than most baked goods. The beauty of this banana bars recipe lies in its simplicity—you’re working with basic pantry staples that deliver maximum flavor with minimal effort. Plus, they’re the kind of treat that works for breakfast, dessert, or that 3 PM snack attack. The texture is what separates good banana bars from great ones, and we’re going for great.
Ingredients That Matter
Here’s the non-negotiable list for the best banana bars recipe:
- 3 ripe bananas (this is crucial—see below)
- 1/2 cup softened butter
- 1 1/2 cups granulated sugar
- 2 large eggs
- 1 teaspoon vanilla extract
- 2 cups all-purpose flour
- 1 teaspoon baking soda
- 1/2 teaspoon salt
- 1/2 cup sour cream or Greek yogurt
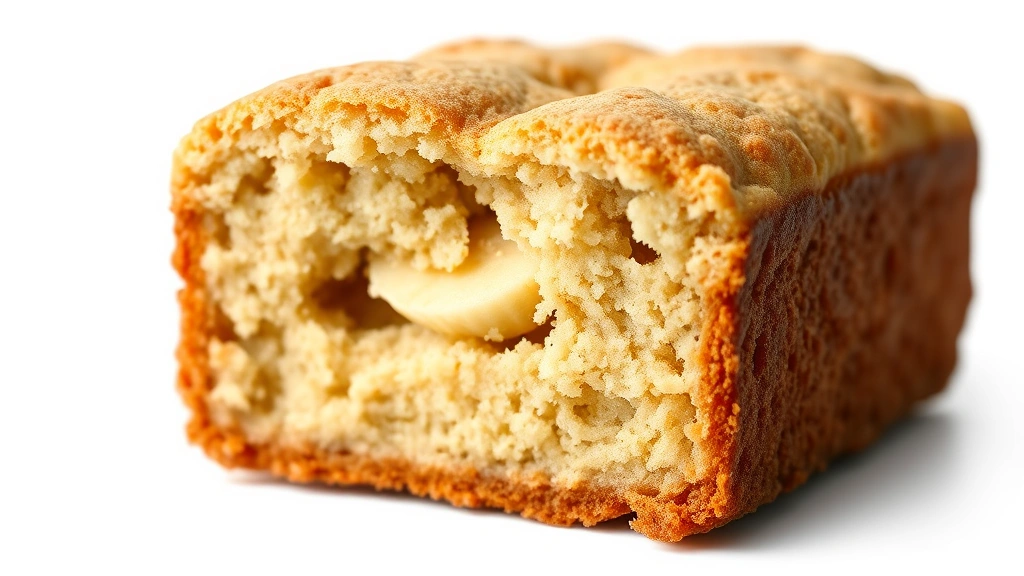
The secret weapon here is the sour cream. Most banana bars recipes skip this, but it’s what gives you that moist, tender crumb that stays fresh for days. The bananas need to be ripe—and I mean properly ripe. If they’re still yellow with a hint of green, wait another day or two. You want them spotted, almost to the point where you’d think twice about eating them raw. That’s when the starches have converted to sugars and you get maximum banana flavor and moisture.
The Prep Work Secret
Most home bakers rush the prep, and that’s where things go sideways. Here’s what separates this banana bars recipe from the mediocre ones:
Mash your bananas properly. Don’t just squish them with a fork until you think they’re done. Use a potato ricer or food mill if you have one—you want them completely smooth with no chunks. Chunks cook faster than the surrounding batter and create dry spots. If you don’t have specialty tools, use a fork but be thorough. This takes about two minutes per banana.
Measure your flour correctly. This is where so many recipes fail. Use the spoon-and-level method: spoon flour into your measuring cup and level it off with a knife. Don’t scoop directly from the bag—that compacts the flour and you’ll end up with too much, resulting in dense, dry bars.
Cream your butter and sugar properly. This isn’t optional. Beat them together for 3-4 minutes until the mixture is light, fluffy, and noticeably paler. This incorporates air, which helps your bars rise and stay moist. Use a stand mixer if you have one, or an electric hand mixer—your arm will thank you.
Mixing Method for Moisture
The order matters more than you’d think. Here’s the exact sequence for the best banana bars recipe:
- Cream butter and sugar until fluffy (3-4 minutes)
- Add eggs one at a time, beating well after each addition
- Add vanilla extract
- Fold in mashed bananas gently—don’t overmix
- In a separate bowl, whisk together flour, baking soda, and salt
- Alternate adding dry ingredients and sour cream, starting and ending with dry ingredients
- Mix until just combined—overmixing develops gluten and makes bars tough
That alternating step is crucial. It distributes the sour cream evenly without overdeveloping the gluten network. Each time you add something, mix just until you don’t see streaks of flour or liquid. This is the opposite of how you’d make bread—we want tenderness here, not structure.
Baking Science Breakdown
Understanding what’s happening in the oven helps you troubleshoot when things go wrong. Your banana bars recipe relies on a few chemical reactions:
Baking soda reacts immediately with the acidic bananas and sour cream, creating carbon dioxide bubbles. These bubbles are what make the bars rise and stay tender. This reaction happens fast, so don’t let your batter sit around—get it in the oven within 15 minutes of mixing.
Protein coagulation from the eggs sets the structure around those air bubbles. The sour cream also adds moisture that lingers in the finished product, keeping bars tender even after they cool completely.
Maillard reaction creates that golden-brown exterior and deep banana flavor. This is why you want a 350°F oven—hot enough to brown the outside before the inside overcooks, but not so hot that you get a hard crust.
Bake in a greased 9×13 inch pan for 35-40 minutes. The bars are done when a toothpick inserted in the center comes out with just a few moist crumbs—not completely clean. That residual moisture is what keeps them moist as they cool.

Frosting Options Explained
Your banana bars recipe can go several directions here, depending on your mood and dietary goals.
Cream cheese frosting is the classic move. Mix 8 oz softened cream cheese with 4 tablespoons softened butter, 2 cups powdered sugar, and 1 teaspoon vanilla. Spread on cooled bars. This adds richness and a slight tang that complements the banana perfectly.
Brown butter frosting is my personal choice. Melt 6 tablespoons butter in a saucepan over medium heat, swirling occasionally until it turns golden brown and smells nutty (about 5-7 minutes). Let it cool slightly, then whisk in 2 cups powdered sugar and a pinch of salt. The brown butter adds depth that regular frosting can’t touch.
No frosting is totally valid too. These bars are delicious on their own, especially if you dust them with cinnamon sugar right after they come out of the oven while still warm. The sugar sticks to the moisture and creates a light crust.
If you’re making a special frosting, check out our guide on how to make edible cookie dough for tips on working with raw ingredients safely if you’re making any uncooked toppings.
Storage Tips for Freshness
This is where your banana bars recipe really shines—they keep well for days.
Room temperature: Cover with plastic wrap or store in an airtight container for up to 3 days. The sour cream keeps them moist throughout.
Refrigerator: They’ll last up to 5 days covered. They actually taste better cold—the flavors develop and the texture becomes more fudgy.
Freezer: Wrap individual bars in plastic wrap, then aluminum foil. They’ll keep for up to 3 months. Thaw at room temperature for about an hour before eating. You can also thaw them in the microwave for 20-30 seconds per bar.
Pro tip: Don’t frost them before freezing if you’re using cream cheese frosting. Frost them after thawing for the best texture. Brown butter frosting freezes fine on the bars.
Troubleshooting Guide
Bars came out dry: You likely overbaked them or used underripe bananas. Next time, pull them out when a toothpick has moist crumbs, not when it’s completely clean. Also, make sure your bananas are properly spotted.
They’re too dense: This usually means overmixing or packing the flour when measuring. Use the spoon-and-level method and mix just until combined in the final steps.
Uneven browning: Your oven might have hot spots. Rotate the pan halfway through baking. If the edges are getting too dark, tent the pan loosely with foil for the last 10 minutes.
They sink in the middle: The batter might have been overmixed, or your baking soda was old and lost potency. Check your baking soda—if it’s more than 6 months old, replace it. Also, don’t open the oven door before 30 minutes have passed.
Bars are gummy inside: They need more baking time. Banana bars are forgiving, so an extra 5 minutes won’t hurt. Remember, the toothpick test is your friend—a few moist crumbs are good, but gummy is too far.
Mix-Ins and Variations
Once you master the basic banana bars recipe, you can get creative. Fold in 1/2 cup of chocolate chips, nuts, or shredded coconut before baking. Some people add 1/4 teaspoon of nutmeg or cinnamon to the dry ingredients for extra warmth. You could even make a chocolate chip version by melting 1/2 cup chocolate chips and swirling them into the batter before baking—it creates a marbled effect that looks impressive but requires zero extra skill.
If you’re interested in understanding ingredient conversions for scaling recipes, our article on how to convert pounds to kilograms can help when you’re adapting this banana bars recipe for different batch sizes.
Final Thoughts
This banana bars recipe isn’t complicated, but it is intentional. Every ingredient, every step, and every timing detail exists to give you bars that are moist, tender, and packed with banana flavor. The sour cream is your secret weapon, ripe bananas are non-negotiable, and proper mixing technique is what separates these from the dense, dry bars you might have made before. Start here, master the basics, and then feel free to experiment with mix-ins and frostings. Once your friends taste these, you’ll be making them constantly—and honestly, that’s not a bad problem to have.
Frequently Asked Questions
Can I use overripe bananas with brown spots?
Absolutely—in fact, that’s exactly what you want. Brown spots mean the starches have converted to sugars, giving you maximum sweetness and moisture. The only exception is if the banana is actually rotting or has mold, which you should never use.
What if I don’t have sour cream?
Greek yogurt works as a direct substitute—use the same amount. Regular yogurt also works but might make the bars slightly less dense. In a pinch, you can use buttermilk, but reduce the amount to 1/3 cup and add 1 tablespoon of melted butter to compensate for the fat content.
Can I make these in a 9×9 pan instead?
Yes, but they’ll be thicker and need about 5 extra minutes of baking time. Check with a toothpick starting at 40 minutes. Thicker bars are actually nice because they stay moister longer.
How do I know when they’re perfectly done?
Insert a toothpick in the center. It should come out with a few moist crumbs clinging to it, but no wet batter. If it’s clean, you’ve overbaked them. If it has wet batter, they need more time. This is more reliable than a timer because every oven is different.
Can I halve this banana bars recipe?
Yes, use a 9×9 or 8×8 pan and bake for 25-30 minutes. All the proportions scale down evenly. Just remember that smaller batches bake faster, so start checking at 20 minutes.
Why did my frosting crack when I spread it?
The bars were too warm. Always let them cool completely to room temperature before frosting. If you’re using cream cheese frosting, make sure both the frosting and bars are cool—warm frosting on warm bars will slide right off.
Can these be made gluten-free?
Yes. Use a 1:1 gluten-free flour blend and reduce the baking soda to 3/4 teaspoon. The texture will be slightly different but still excellent. Some people add 1/4 teaspoon of xanthan gum to improve structure, but it’s not required with a good gluten-free blend.
What’s the best way to cut clean bars?
Let them cool completely, then use a sharp knife dipped in hot water and wiped dry between each cut. This prevents frosting from sticking to the blade. If they’re unfrosted, a bench scraper works even better.


