
Building an Astrid from How to Train Your Dragon cosplay is one of the most rewarding character projects you can tackle. Whether you’re prepping for your first convention or you’re a seasoned cosplayer looking to level up, this guide walks you through every step—from sourcing materials to nailing those signature details that make Astrid instantly recognizable. We’ll cover armor construction, fabric selection, weapon crafting, and styling tips that’ll have people doing double-takes on the convention floor.
Table of Contents
Character Breakdown & Reference
Before you buy a single piece of material, spend time studying Astrid from How to Train Your Dragon across all three films. She’s evolved significantly—her armor, clothing, and overall aesthetic change as she grows from a competitive Viking teen into a confident warrior and leader. Most cosplayers focus on her appearance from the first or second film, which features her signature blonde braids, leather armor, and that killer axe.
Grab screenshots from multiple angles. Notice how her armor sits on her shoulders, where the straps connect, and how the leather pieces overlap. Pay attention to color—her armor has metallic accents, her clothing is earthy-toned, and her accessories have that authentic Viking warrior vibe. Create a reference board with at least 10-15 high-quality images showing front, side, and back views.
Building Functional Armor Pieces
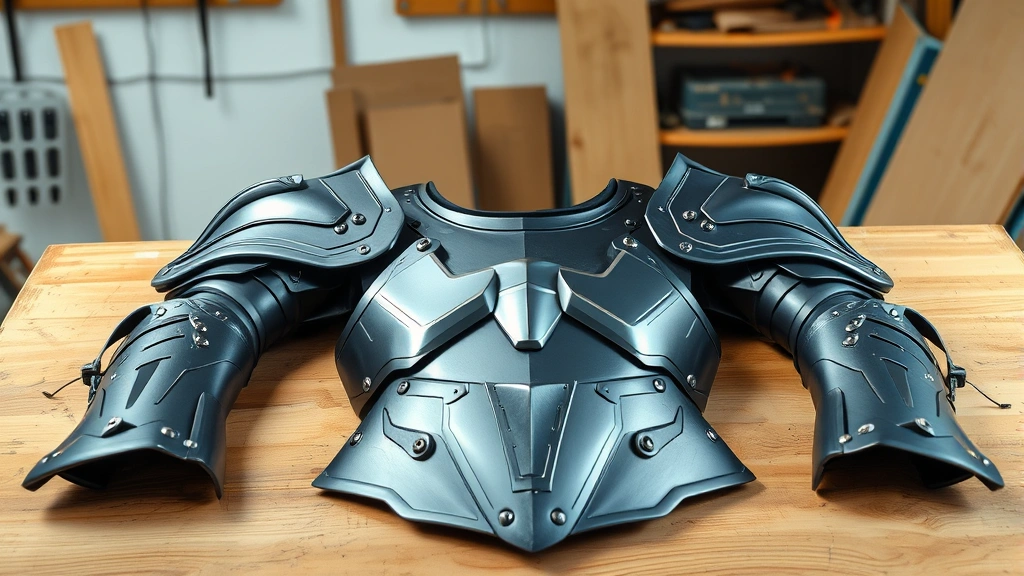
This is where your cosplay transforms from costume into character. Astrid’s armor consists of several key pieces: shoulder pauldrons, chest plate, and arm guards. The best approach is using EVA foam—it’s lightweight, durable, and forgiving for beginners.
Materials you’ll need: EVA foam sheets (¾ inch thickness), contact cement or spray adhesive, heat gun, Worbla thermoplastic (for detailing), paint, and sealing spray.
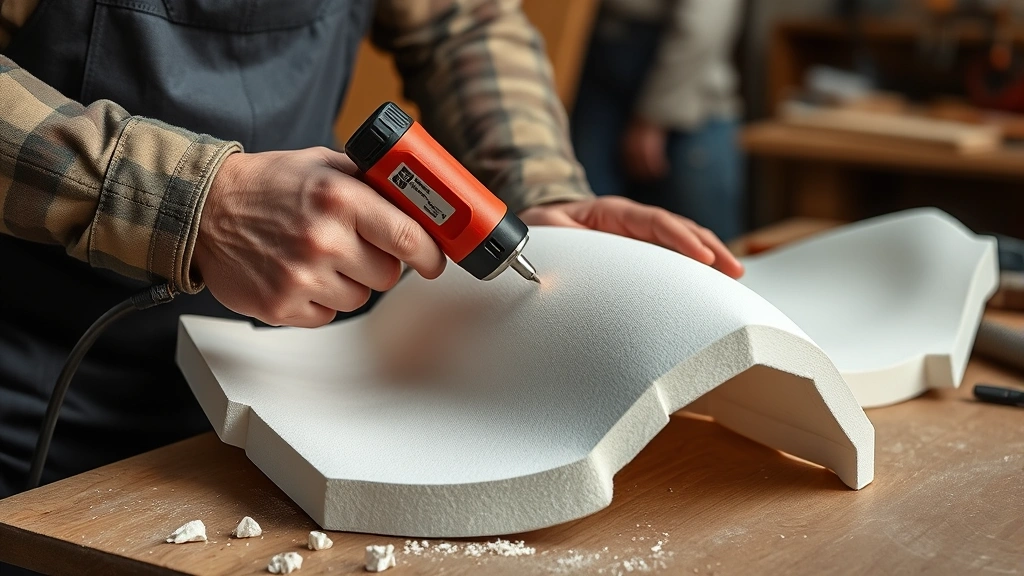
Start with the shoulder pauldrons. Cut your EVA foam using templates you’ve sketched from reference images. Heat the foam gently with a heat gun to shape it into curved pieces that’ll sit naturally on shoulders. Use contact cement to attach layers for dimension. The key is making pieces that look heavy and protective while remaining comfortable enough to wear for 8+ hours.
For the chest plate, consider whether you want it fully functional or panel-based. Panel-based armor (attaching pieces to a bodysuit) is easier for first-timers. Create your pattern on paper first, then transfer to foam. Build up layers to create that dimensional, battle-worn look. Sand edges smooth with a Dremel tool or fine-grit sandpaper.
Choosing the Right Fabrics
Astrid’s base costume requires specific fabrics that balance authenticity with wearability. You’ll need: stretch leather or faux leather for form-fitting pieces, heavy canvas or linen for tunic elements, and metallic trim for accents.
For the main tunic, use a sturdy cotton-linen blend in cream or light tan. This fabric holds shape, photographs well, and breathes during long con days. Avoid thin cotton—it’ll look flimsy and won’t support your armor pieces properly.
Faux leather works better than real leather for cosplay—it’s cheaper, easier to work with, and more ethical. Look for stretch faux leather with some give; you’ll need it for arm pieces and leg wraps. Test your fabric choices by draping them over your body. Take photos in different lighting to see how colors interact.
Crafting Astrid’s Iconic Axe
Astrid’s axe is her signature weapon, and it’s the piece that screams “I know this character.” Convention rules require foam or PVC construction, so we’ll focus on safe, legal methods.
Build approach: Use a PVC pipe core (1.5 inch diameter) for the handle. For the axe head, carve EVA foam into shape, then cover with Worbla or thermoplastic for durability. The blade should be roughly 12-14 inches wide and 10 inches tall—proportional to Astrid’s frame but not so massive it’s unwieldy.
Laminate foam layers to build up the axe head thickness. Use a heat gun to shape Worbla over the foam base. Paint with metallic silver for the blade and dark brown or black for the handle. Add weathering with dry brushing—use dark gray or black paint applied lightly to create battle-worn texture.
Test the weight distribution. Your axe should balance naturally in hand. If it’s too heavy, it’ll tire your arms and look awkward in photos. A properly balanced foam axe weighs 3-5 pounds maximum.
Assembling Base Clothing
Your base clothing layers create the foundation everything else sits on. Start with fitted black pants (leggings work fine) and a long-sleeved black shirt. These are your underbase.
Over that, construct the tan tunic. Use a simple A-line pattern—it should hit mid-thigh and have a slightly relaxed fit that allows armor attachment. Add a dark brown belt at the waist using heavy canvas or leather. This belt is functional; it’ll hold your costume together and provide anchor points for armor pieces.
Arm wraps are crucial for authenticity. Use tan or cream-colored linen strips (2-3 inches wide) and wrap them around your forearms from wrist to elbow, securing with small stitches. These wraps sit under your arm guards and add that Viking warrior texture.
For leg wraps, use similar material but wrap from ankle to knee. This creates visual interest and breaks up the silhouette. Secure wraps with thread or small safety pins hidden on the inside.
Adding Signature Details
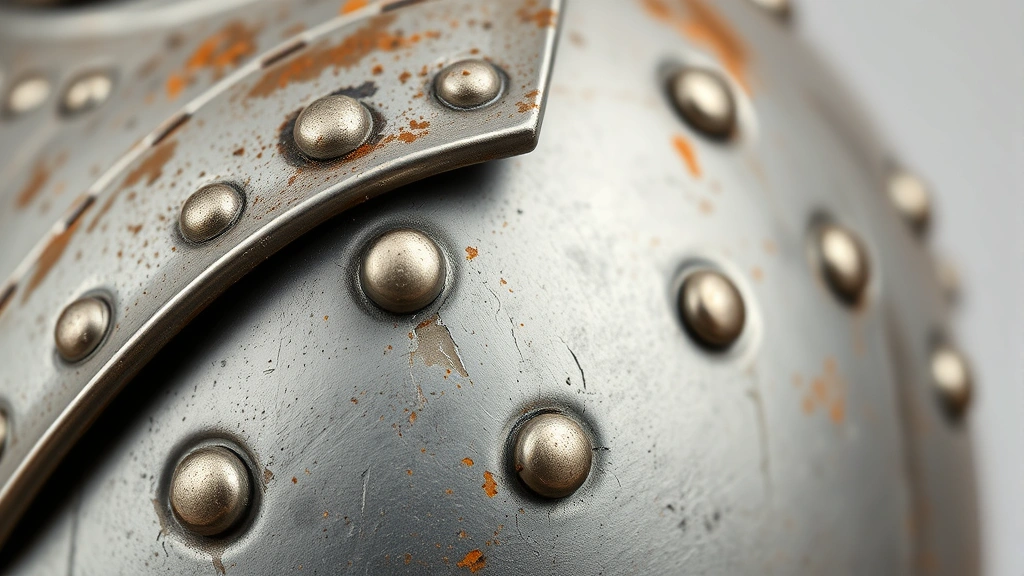
Details separate good cosplays from show-stopping ones. Astrid has several signature elements: metal cuff bracelets, leather straps, and decorative rivets throughout her armor.
Create cuff bracelets using Worbla or thermoplastic formed over foam cores. Paint with metallic silver and add detail lines with black paint. These should fit snugly but comfortably around your wrists.
Add rivets to armor pieces using paint or actual small metal studs (if convention rules allow). Space them evenly and consistently. This detail work takes time but dramatically increases realism. Use a metallic paint pen for precision.
Create leather straps using faux leather strips. These can be functional (holding armor together) or decorative (adding visual breaks). Attach with contact cement or stitching. Weather them with dark paint to suggest age and battle use.
Wig Styling & Hair Work
Astrid’s blonde hair with those signature braids is instantly recognizable. A quality wig is non-negotiable—cheap wigs look cheap, and Astrid deserves better.
Purchase a long blonde wig (24-28 inches) with a natural wave. Lace front wigs photograph better but cost more. Style the wig on a wig head using T-pins to secure it while you work.
Create two thick braids starting from the front hairline and running back. Use synthetic hair styling techniques: gently brush sections, braid tightly, and secure with clear elastic bands. Spray with wig-safe hairspray to hold shape throughout the day.
Add small decorative elements to the braids—metal cuffs, beads, or leather wraps. These details make the wig feel custom and character-specific. Test the wig’s stability by gently tugging different sections. It should feel secure enough for movement and photos.
Makeup & Face Paint Techniques
Astrid has a naturally fierce appearance—strong brows, defined cheekbones, and that warrior intensity. Your makeup should enhance these features without looking theatrical.
Start with a good primer and full-coverage foundation that matches your skin tone exactly. Build coverage where needed but keep most of the face natural. Astrid doesn’t wear heavy makeup; she wears warrior confidence.
Define brows strongly—use a brow pencil or powder to create bold, slightly angled brows. This single element changes your entire face’s expression. Apply a warm brown eyeshadow across the lid and blend upward. Add a touch of shimmer in the inner corner for dimension.
Contour cheekbones subtly with a warm bronzer. The goal is definition, not drama. Line upper lashes with brown or black liner—keep it natural-looking. Mascara on upper lashes only, applied generously.
Use a warm peachy-brown lip color. Astrid isn’t a pink-lips character. Set everything with setting spray designed for cosplay—it’ll hold through photos, hugs, and convention floor walking.
Assembly & Wearing Tips
On convention day, assemble your costume in logical order: underbase first, then tunic and belt, then arm and leg wraps, then armor pieces, then weapons last.
Use safety pins strategically to secure armor to your clothing base. This prevents shifting during the day. Pin armor at multiple points—shoulders, sides, and back—creating a stable structure.
Wear a supportive undergarment (sports bra or compression shirt) under everything. Armor weight needs proper support. Test your full costume at home for at least 2-3 hours before the convention. Walk around, sit down, reach overhead. Make adjustments based on comfort and visibility.
Bring a small repair kit: extra safety pins, black thread and needle, duct tape, contact cement, and touch-up paint. Convention day surprises happen—a loose strap or small paint chip can be fixed quickly.
Take care of your feet. Wear comfortable shoes (black boots work great) and bring blister prevention supplies. You’ll be standing and walking for hours, and sore feet ruin the experience.
Frequently Asked Questions
How long does it take to build an Astrid cosplay?
Expect 40-60 hours for a quality build if you’re new to cosplay. Experienced makers might finish in 25-30 hours. This includes research, material sourcing, construction, painting, and styling. Don’t rush—quality takes time.
What’s the best foam for armor construction?
EVA foam (ethylene-vinyl acetate) in ¾ inch thickness is ideal for beginners. It’s affordable, lightweight, and forgiving. Some advanced makers use Worbla or thermoplastics, but EVA is more accessible and still looks fantastic.
Can I wear this costume multiple times?
Absolutely. Properly constructed EVA foam armor lasts years with basic care. Store in a cool, dry place away from direct sunlight. Avoid crushing or excessive bending. Your costume will be convention-ready season after season.
Do I need to be able to actually fight with the axe?
No. Your foam axe should be safe and convention-compliant, but you don’t need combat skills. Pose with confidence, let photographers direct action shots, and practice your character’s attitude in the mirror.
What if my armor doesn’t fit right on convention day?
This is why you test at home. If something shifts during the day, use safety pins to adjust. Bring your repair kit. Small adjustments between photo sessions keep everything looking perfect.
Is faux leather better than real leather for cosplay?
For most cosplayers, yes. Faux leather is cheaper, easier to work with, more ethical, and photographs identically. Real leather is heavier and requires special care. Save real leather for future projects when you’re experimenting with advanced techniques.
How do I make my axe look battle-worn?
Use dry brushing techniques. Apply dark gray or black paint to a nearly-dry brush, then lightly drag across foam surfaces. Focus on edges, crevices, and areas that would naturally wear. This creates depth and authenticity without looking overdone.
What conventions are best for Astrid cosplay?
Any convention works, but animation-focused or general pop culture conventions are ideal. DragonfCons, anime cons, and comic cons all welcome How to Train Your Dragon cosplays. Check the convention’s cosplay policy beforehand regarding weapon props.
Final Thoughts
Building an Astrid from How to Train Your Dragon cosplay is a journey that teaches real crafting skills while creating something you’ll wear with pride. You’re not just making a costume—you’re embodying a character who represents strength, growth, and warrior spirit. Take your time with each step, don’t skip the details, and remember that every experienced cosplayer started exactly where you are now. Your first Astrid cosplay will be amazing, and each future version will be even better. Now get out there and build something incredible.


