
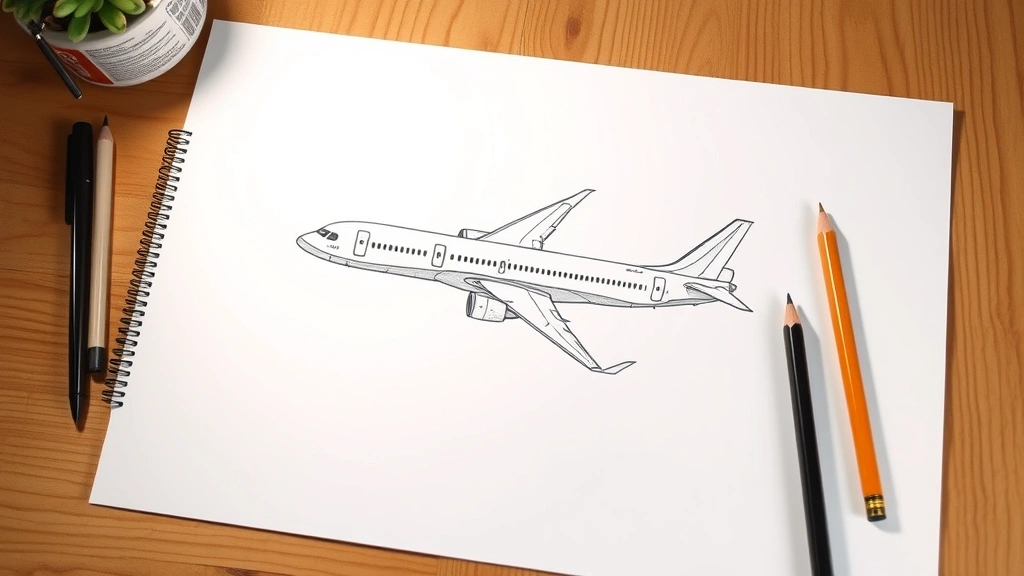
Learning aeroplane how to draw is easier than you’d think, and I’m here to walk you through it like we’re hanging out in a workshop together. Whether you’re sketching for fun, helping your kids with homework, or just want to add something cool to your portfolio, drawing a plane is a satisfying project that builds real skills. No fancy art degree needed—just a pencil, some paper, and the willingness to follow along.
Table of Contents
Gather Your Materials First
Before you start sketching, let’s get your workspace ready. You’ll need pencils—I recommend having HB, 2B, and 4B grades on hand. The HB is perfect for light guidelines, while the softer 2B and 4B grades give you richer tones for shading. Grab some quality drawing paper; it doesn’t have to be expensive, but it should have enough tooth to hold graphite without tearing when you erase. A good eraser is non-negotiable—get a kneaded eraser for subtle corrections and a regular eraser for bigger mistakes. You’ll also want a ruler for straight edges, a blending stump for smooth shading, and maybe some colored pencils if you’re feeling ambitious. Set up near natural light or a good lamp. This simple preparation makes the entire process smoother and more enjoyable.
Start With the Basic Fuselage
The fuselage—that’s the main body of the plane—is your foundation. Start by lightly drawing a long, slightly tapered oval or cylinder shape. Use your HB pencil and keep the pressure light; you’re building a skeleton here, not the final drawing. The fuselage should be roughly three times longer than it is wide. Think of it like a cigar shape that’s slightly flattened on the bottom. Position it in the center of your paper, leaving room for wings on both sides. This basic shape is where everything else attaches, so take your time getting it roughly right. Don’t worry about perfection at this stage—light, loose lines are your friend. You’re essentially creating a roadmap that guides everything that comes next.
Add Wings and Tail Section
Now we’re getting somewhere. Add two wings extending from the sides of your fuselage, roughly in the middle section. Wings should be long and relatively narrow—they’re like elongated triangles or rectangles. For a commercial plane, the wings extend pretty far out; for a fighter jet, they’re shorter and more angular. Add a horizontal stabilizer (the small wing at the tail) and a vertical fin sticking up from the back. These tail components are proportionally smaller than the main wings but crucial for the plane’s silhouette. Sketch these shapes lightly first, then refine them. The angle of the wings affects whether your plane looks like it’s diving, climbing, or cruising level. Experiment with different angles to get the feel you want. This is where your drawing starts looking unmistakably like an aircraft.
Draw the Cockpit Details
The cockpit is what brings personality to your drawing. On the fuselage, near the front, sketch a small windshield area. For commercial planes, this is typically a series of small rectangular windows. For fighter jets, it’s often one large, teardrop-shaped canopy. Add a slight bulge or dome shape to show the 3D nature of the cockpit. Include a small door line if you’re feeling detailed. The cockpit is where pilots sit, and getting this right makes your plane feel alive and purposeful. You can also add a few small windows along the fuselage body to suggest passenger seating. These details don’t take long but dramatically improve the realism. Remember, you’re still working lightly—these are guides that you’ll refine in later steps.
Include Landing Gear
Landing gear is surprisingly important for making your plane look grounded and realistic. Most commercial planes have three wheels: two main gear under the wings and one nose gear at the front. Sketch these as simple circles with thin lines connecting them to the fuselage. The nose gear is typically shorter and positioned well forward, while the main gear is positioned under the wings and slightly back. For a plane in flight, you can retract the gear (hide it inside the fuselage) or show it extended. If you’re drawing a fighter jet, the landing gear is often more compact and angular. Don’t overthink this—simple circles and lines work fine. This detail is what separates a floating blob from an actual aircraft. It grounds your drawing, literally.
Refine Your Proportions
Step back and look at your sketch. Does the fuselage look right relative to the wings? Are the tail components proportionally correct? Now’s the time to make adjustments before you commit to darker lines. Commercial jets typically have a fuselage-to-wingspan ratio of about 1:3. Fighter jets are more compact, maybe 1:2. Use your ruler to check if things line up symmetrically—planes are mirror images on both sides. Erase and redraw any sections that feel off. This refinement stage is where amateur sketches become polished drawings. You’re not erasing failure; you’re sculpting excellence. Take your time here. Once you’re happy with the proportions, you can start applying darker lines and moving toward your final drawing. If you’re planning to add color or shading later, like adding multimedia elements to presentations, having solid proportions now saves frustration later.

Master Shading Techniques
Shading transforms a flat sketch into a three-dimensional object. Start by identifying your light source—decide where light is coming from (usually top-left for convention). The side facing the light should be lighter, while the opposite side gets darker. Use your 2B pencil for medium tones and 4B for shadows. Apply light, even strokes in the direction that makes sense for the surface. For the fuselage, shade gradually darker as you move away from the light source. Wings cast shadows on the fuselage beneath them. The underside of the plane is typically darker than the top. Use your blending stump to smooth out harsh lines and create gradual transitions. Don’t make everything dark—the contrast between light and shadow is what creates dimension. Start light and build up gradually. You can always add more shadow, but removing it is harder. This is where your drawing really comes alive.
Add Final Touches and Details
Now we’re in the home stretch. Add details that make your plane unique: engine intake lines, panel lines along the fuselage, rivets if you’re going for hyper-realism, or racing stripes if you’re having fun. Add subtle highlights using your eraser on the brightest surfaces—a small white line on the fuselage or wing edge catches light beautifully. Darken your outlines slightly to make the plane pop off the page. If you’re using colored pencils, now’s the time to add them carefully, layering light colors first. Add shadows under the plane to suggest it’s not floating in a void. These finishing touches take your drawing from good to impressive. They’re also the most forgiving part—you can add as much or as little detail as you want depending on your style and patience.
Avoid Common Drawing Mistakes
Let me save you some frustration. The biggest mistake beginners make is drawing the fuselage too thick—planes are sleek, not chunky. Keep it tapered and relatively narrow. Second mistake: wings that aren’t symmetrical. Use your ruler and check both sides match. Third: proportions that are wildly off. Reference photos constantly. Fourth: shading too dark too fast—build it up gradually. Fifth: forgetting that the tail section is smaller than the main wings. Sixth: making the cockpit area too large. Seventh: inconsistent light source in your shading—pick one direction and stick with it. Eighth: not leaving enough white space for highlights. Study real aircraft photos and notice how light actually plays on them. These aren’t rules carved in stone, but they’re patterns that work. Breaking them intentionally is fine; breaking them accidentally makes your drawing look amateur. Learn the rules, then play with them.
Practice Different Variations
Once you’ve nailed the basic approach, try different aircraft types. Commercial jets have wide fuselages and swept-back wings. Fighter jets are sleeker with delta wings or canards. Vintage propeller planes have that nostalgic charm with visible engines and struts. Cargo planes are boxy and utilitarian. Helicopters have rotors instead of wings. Each type teaches you something new about form and proportion. Draw the same plane from different angles—head-on, from below, banking in a turn. These variations build your spatial reasoning and understanding of how planes actually look in three dimensions. You’ll find that once you understand the basic structure, adapting it to different aircraft types becomes intuitive. This is where drawing becomes less about following steps and more about understanding the subject. That’s when things get really fun. You might also want to document your progress—like making copies of your work—to track improvement over time.
Frequently Asked Questions
What’s the easiest airplane to draw for beginners?
Start with a simple commercial jet like a Boeing 747 or Airbus A380. They have straightforward proportions, symmetrical designs, and clear fuselage-wing-tail structure. Once you master this basic shape, other aircraft types become much easier because you understand the fundamental structure.
Do I need to be able to draw before learning this?
Not at all. This guide is designed for absolute beginners. You just need basic pencil control and the patience to follow steps. Drawing is a learnable skill, not a mysterious talent. Anyone can do it with practice.
How long does it take to draw a good airplane?
A basic sketch takes 15-20 minutes. A detailed drawing with shading takes 45 minutes to an hour. A highly detailed, photorealistic piece might take several hours. Speed improves with practice—your tenth plane will be faster than your first.
Should I use references or draw from memory?
Use references, especially when starting. Photos of real planes teach you proportions, details, and how light plays on surfaces. As you get comfortable, you can work more from memory or imagination, but references always make better drawings.
What if my plane doesn’t look right?
This is normal. Check proportions against a reference photo. Is the fuselage too thick? Are wings the right size? Is the tail section too large? Identify the specific issue and correct it. Every mistake teaches you something. Professional artists still reference constantly.
Can I draw planes digitally using this method?
Absolutely. The principles are identical. Use a stylus and digital drawing app. You get the advantage of unlimited undos and adjustable brush opacity. The learning process is the same; the tools are just different.
How do I add color to my airplane drawing?
Wait until your pencil drawing is complete and shaded. Then add colored pencils lightly, layering colors gradually. Respect your existing shading—color should enhance it, not cover it up. Or scan your drawing and color it digitally for more control.


