
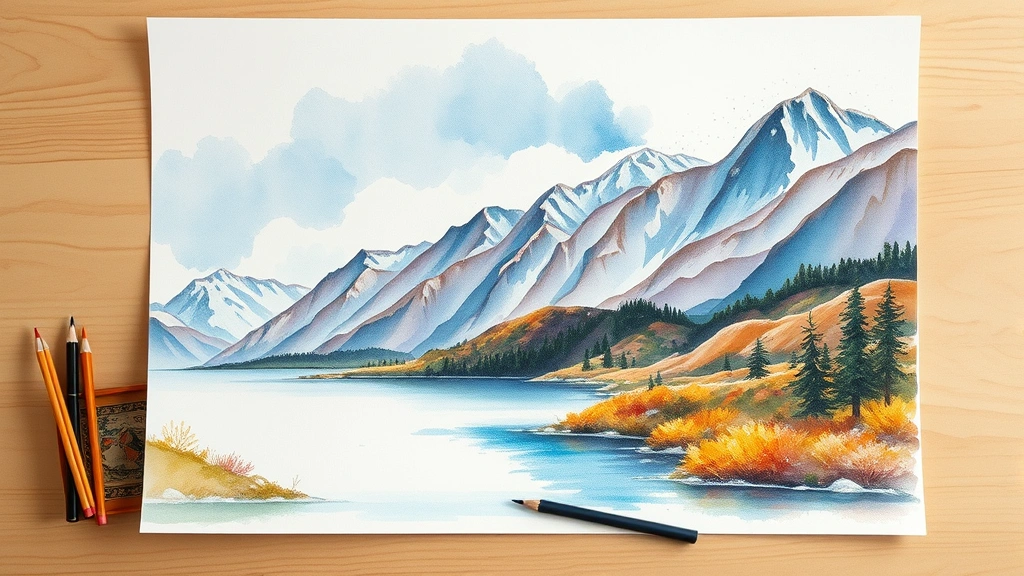
Learning how to use watercolor pencils opens up a whole new world of creative possibilities that sits perfectly between traditional colored pencils and watercolor painting. These hybrid tools let you sketch with precision, then transform your work with a wet brush for stunning blended effects that’ll make you look like you’ve been doing this for years.
Table of Contents
What Are Watercolor Pencils?
Watercolor pencils are basically the Swiss Army knife of the art world. They look like regular colored pencils, but their cores contain water-soluble pigments that behave completely differently once you introduce moisture. You can use them dry for crisp lines and detailed work, or activate them with water to create soft, flowing washes that rival traditional watercolor paints.
The magic happens because the pigment binds differently than in standard colored pencils. When dry, they perform like regular pencils. Add water, and those same pigments dissolve and flow across your paper, creating luminous, transparent layers. It’s this dual nature that makes them so versatile and genuinely fun to experiment with.
Choosing the Right Pencils
Not all watercolor pencils are created equal, and your choice here really matters. Budget brands might seem tempting, but they often have weaker pigmentation and won’t give you those rich, vibrant washes you’re after. Brands like Faber-Castell, Caran d’Ache, and Staedtler are industry standards for good reason—their pigments are concentrated and perform consistently.
For beginners, you don’t need a massive set. A starter set of 24-36 colors gives you plenty of range without overwhelming your workspace or wallet. Look for sets specifically labeled as watercolor pencils, not water-soluble colored pencils—there’s a difference in how they’re formulated. Higher-quality pencils have better lightfastness too, meaning your artwork won’t fade after a few years sitting on a shelf.
Essential Supplies You’ll Need
Beyond the pencils themselves, you’ll want to gather a few key items before diving in. Quality watercolor paper is non-negotiable—regular printer paper will buckle and fall apart when wet. Look for paper with at least 140 lb (300 gsm) weight and a cold-pressed finish, which has just enough texture to hold the pigment beautifully.
You’ll need brushes designed for watercolor work. Round brushes (sizes 8-12) work great for general washes, while flat brushes handle larger areas efficiently. A spray bottle for misting keeps your palette wet during longer sessions. Keep a water container nearby—many artists use two, one for rinsing and one for clean water. Paper towels or cotton rags are essential for blotting and controlling water flow. A mixing palette, even a simple ceramic plate, helps you create custom colors before applying them to paper.
Dry Application Technique
Start by treating your watercolor pencils like regular colored pencils. Sharpen them to a fine point and apply light pressure for delicate lines and details. This dry application phase is where you establish your composition and add those crisp elements that give your final piece definition. Think of it as your pencil sketch, except you’re using actual color.
The key here is layering. Apply one color, then lightly layer another on top. Don’t press hard—gentle, consistent strokes build color gradually. This technique, called burnishing, creates richer tones than trying to force color onto paper with pressure. You’ll notice the pencil marks remain visible at this stage, which is exactly what you want. These marks give your piece character and keep it from looking too smooth and artificial.
Wet Brush Activation Method
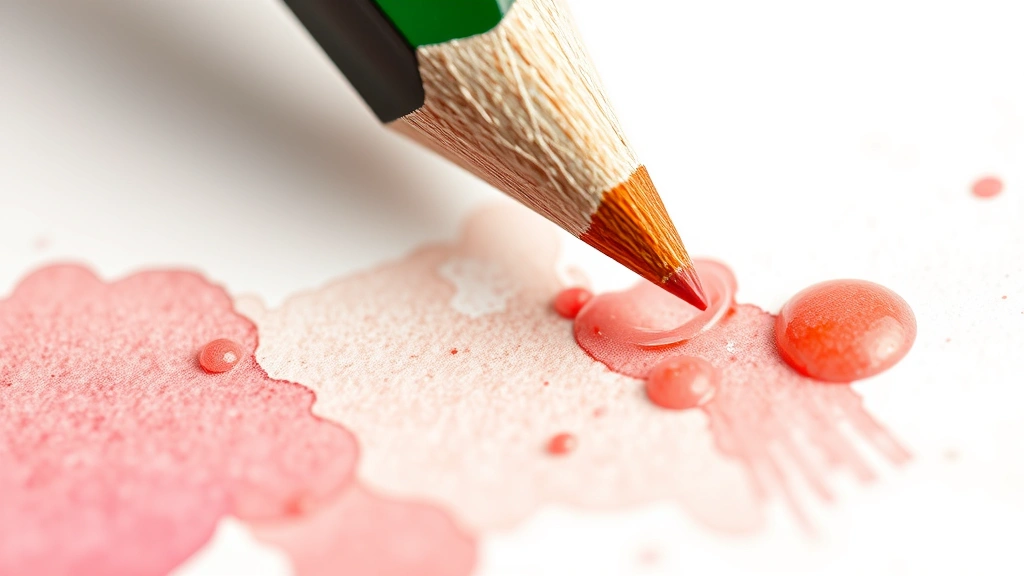
Once you’re happy with your dry layers, it’s time to activate the magic with water. Dip your brush in clean water—not soaking wet, just nicely damp. The water-to-pigment ratio is crucial here. Too much water creates weak, pale washes. Too little and nothing happens. You’re looking for a balance where the pigment dissolves smoothly without pooling.
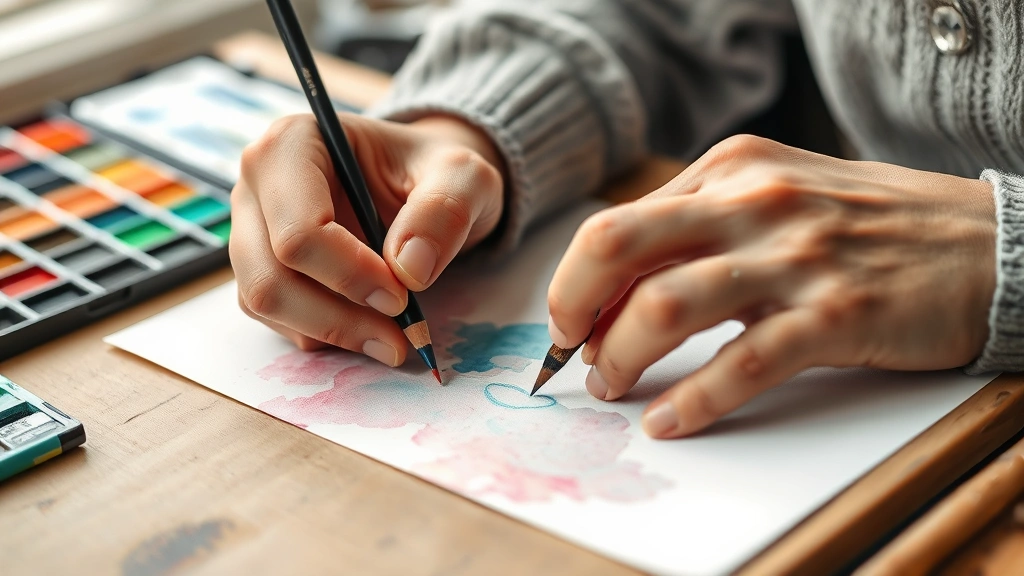
Gently brush over your pencil work with light, flowing strokes. Watch as the color transforms from solid pencil marks into flowing pigment. The paper texture guides the water and pigment naturally, creating organic-looking effects you can’t achieve any other way. Work quickly but deliberately—you’ve got maybe 30 seconds before the pigment starts setting. If you want to blend multiple colors, apply them while the paper is still wet, letting them merge naturally at their edges.
Layering and Blending Colors
The real artistry comes from understanding how colors interact when wet. Apply your first color dry, activate it with water, then while it’s still damp, add a second color pencil directly onto the wet area. The water dissolves it immediately, and the two colors blend beautifully where they meet. This creates transitions that look hand-painted, not mechanical.
You can also apply pencil to dry paper, then activate with water to create a wash, let it dry completely, then add another layer on top. This builds depth and complexity that captivates viewers. The transparency of watercolor means lighter colors can show through darker ones, creating luminosity that solid colored pencil work can’t match. Experiment with layering complementary colors—red over green, blue over orange—to create sophisticated neutral tones that feel more natural than using brown or gray straight from the pencil.
Common Beginner Mistakes
The biggest rookie error is using too much water. Your paper gets oversaturated, colors become muddy, and the whole piece looks washed out. Remember, you’re adding water as a tool, not drowning your artwork. Start with less water than you think you need—you can always add more.
Another common trap is pressing too hard with dry pencil work. Heavy pressure creates a waxy buildup that resists water activation. Light, gentle layers work better and give you more control. Don’t skip the paper quality either. I’ve seen beginners frustrated with results when the real culprit was cheap paper that couldn’t handle moisture. Also, resist the urge to overwork areas. Watercolor loves spontaneity—the happy accidents often look better than calculated perfection.
Advanced Techniques and Tips
Once you’ve mastered basics, try dry-brush technique. Use minimal water on your brush and drag it across pencil marks for texture and broken color effects. This creates interesting patterns perfect for foliage, water, or fabric. Spattering adds energy—load your brush with pigment, tap it to flick droplets across your paper for dynamic effects.
Try wet-on-wet work by pre-wetting your paper with clean water before adding any pencil marks. Drop color onto the wet surface and watch it bloom and spread organically. This unpredictable technique creates beautiful atmospheric effects. Glazing—layering transparent washes over dried layers—builds rich, complex color that looks professional. Combine these techniques in one piece for maximum impact. Also, remember that how long does it take for oil paint to dry is different from watercolor, which dries quickly, letting you layer repeatedly without waiting hours.
Keep a spray bottle handy to keep your pencil tips damp between uses—this helps them activate more easily on paper. Store pencils horizontally to prevent leads from breaking inside the wood. Some artists swear by using a water brush pen, which has a reservoir built in, for more controlled water application. Experiment with different brush types too. Mop brushes create soft washes, rigger brushes handle fine details, and natural hair brushes hold more water than synthetic ones.
Frequently Asked Questions
Can you use watercolor pencils on regular paper?
Technically yes, but you’ll get disappointing results. Regular paper isn’t designed to handle moisture and will buckle, tear, or pill up. Watercolor paper’s sizing and weight let it absorb water without falling apart. The texture also helps pigment adhere properly. Invest in decent watercolor paper—it’s worth the difference in your final product’s quality and longevity.
How do you keep watercolor pencils sharp?
Use a standard pencil sharpener, just like regular pencils. Keep your sharpener clean and sharp itself—a dull sharpener will crush the lead. If you’re doing lots of detail work, sharpen frequently. Some artists prefer mechanical sharpeners for consistency, while others use traditional wood sharpeners for more control. Don’t press the pencil hard into the sharpener or you’ll snap the lead inside.
Are watercolor pencils permanent once dry?
Yes, watercolor pigment sets as it dries and won’t reactivate if you add water later. However, if you’re still working on a piece and the area is only partially dry, additional water can still move the pigment slightly. This is actually useful for blending. Once fully dry (usually 24 hours), you can layer on top without disturbing what’s underneath.
What’s the difference between watercolor pencils and water-soluble colored pencils?
Water-soluble colored pencils have some water-soluble binder but aren’t formulated specifically for watercolor effects. Watercolor pencils are engineered to dissolve and flow like true watercolor paints. Watercolor pencils typically have higher pigment concentration and create more vibrant washes. If you want the full watercolor experience, choose true watercolor pencils, not the water-soluble variety.
Can you blend watercolor pencils without water?
You can layer them and create blended effects using dry techniques like burnishing, but it won’t look like watercolor blending. The colors stay more distinct and the texture remains visible. Water is what creates that smooth, flowing blend that makes watercolor pencil work special. That said, dry blending is useful for adding texture and detail on top of wet washes.
How long does a watercolor pencil last?
A single pencil lasts quite a while since you’re not using intense pressure like with regular colored pencils. A well-used pencil might last through dozens of artworks. The lifespan depends on how much you use each color and your sharpening frequency. Higher-quality pencils with more pigment tend to last longer and provide better color throughout their life.
Final Thoughts
Learning how to use watercolor pencils isn’t complicated, but it does require patience and practice to develop feel for water control and color mixing. The beautiful part is that mistakes often turn into happy accidents that look better than your original plan. Start simple—maybe a landscape or still life with just a handful of colors. Let yourself play and experiment without pressure to create gallery-worthy pieces immediately.
The combination of precision pencil control and fluid watercolor effects gives you creative options that neither medium alone provides. You’ll find yourself reaching for watercolor pencils again and again once you experience how satisfying they are to work with. Check out tutorials from established artists, grab some decent supplies, and most importantly, just start making art. Your hands will learn what your brain can’t fully understand until you’ve felt the pencil on paper and watched the water bring your colors to life. For more creative inspiration, you might enjoy exploring lavender how to projects that combine artistry with practical skills.


