
Learning how to use a pizza stone is one of those game-changing kitchen skills that transforms your homemade pizza from mediocre to genuinely impressive. Whether you’re working with a traditional oven, grill, or even a home pizza oven, mastering the pizza stone technique will give you that crispy, perfectly-charred crust that rivals your favorite pizzeria.
Table of Contents
Choosing the Right Stone
Not all pizza stones are created equal, and picking the wrong one can sabotage your efforts before you even start. You’ve got three main material options: ceramic, cordierite, and cast iron. Ceramic stones are affordable and widely available, but they’re prone to cracking if exposed to sudden temperature changes. Cordierite is the gold standard—it handles thermal shock better and distributes heat more evenly. Cast iron works too, though it requires seasoning like a skillet.
Size matters as well. A 14-16 inch stone works for most home ovens and fits standard pizza sizes. If you’re working with a larger oven or grill, go bigger. Thickness is another consideration: thicker stones (around 1.5 inches) retain heat better and take longer to preheat, while thinner ones heat up faster but cool down quicker. For most home bakers, a medium-thickness cordierite stone is your sweet spot.
The Preheating Process
This step separates the amateurs from the pros. Your pizza stone needs adequate time to reach full thermal capacity—we’re talking at least 30-45 minutes in a home oven, sometimes longer depending on thickness and material. Place the stone on the lowest oven rack or directly on the oven floor if your model allows it. This position captures the most radiant heat from below, which is critical for achieving that signature crispy bottom crust.
Set your oven to the highest temperature it reaches. Most home ovens max out around 500°F, though some newer models hit 550°F. If you’re using a grill, place the stone on the grates and preheat the grill to medium-high heat (around 450-500°F). Don’t skimp on preheating time—a stone that hasn’t fully heated will absorb moisture from your dough instead of crisping it. You’ll know you’re ready when the oven has maintained its target temperature for at least 15 minutes after the stone reaches temperature.
Prep Your Dough Properly
While your stone heats, prepare your dough. Whether you’re using store-bought or homemade, your pizza dough should be at room temperature—cold dough won’t stretch easily and can shock the hot stone, potentially causing cracking. Let it sit out for 30 minutes before shaping if it’s been refrigerated.
Here’s the critical part: dust your work surface and the back of a wooden peel (or baking sheet) generously with cornmeal or flour. This acts as a bearing surface that lets your pizza slide smoothly onto the stone without sticking. Don’t skip this step—it’s the difference between a successful transfer and a doughy disaster. Stretch your dough to your desired thickness, keeping it slightly thicker at the edges for a nice crust. Add your toppings, but remember: less is more. Too many toppings trap moisture and prevent crisping. A thin, even layer of sauce and modest cheese and toppings is your goal.
Transfer Without the Mess
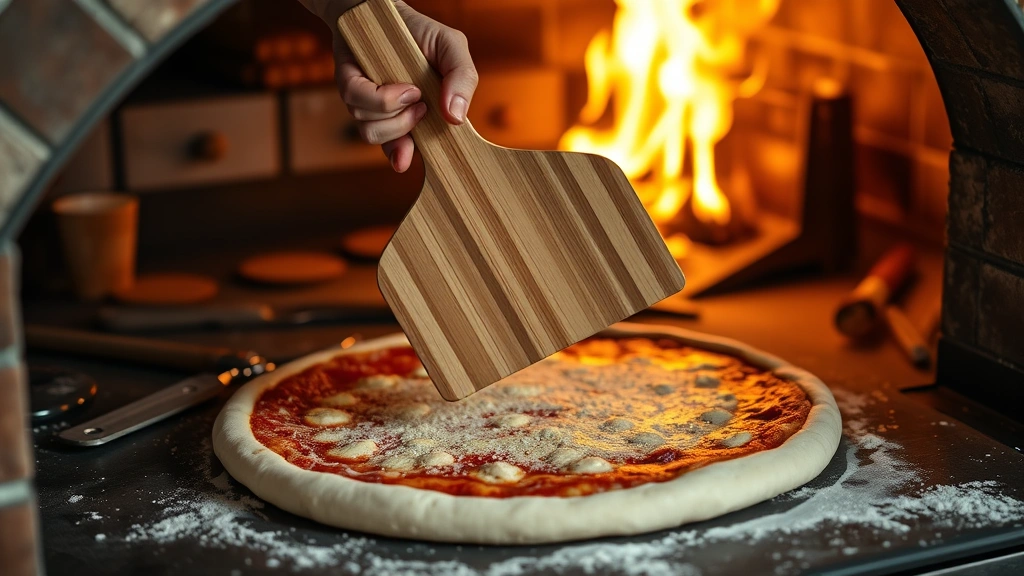
The transfer is where most home cooks lose their confidence. Here’s the technique that works: place your assembled pizza on the floured peel, then give it a gentle shake to ensure it slides freely. If it sticks, lift that edge and add more flour underneath. When your stone is fully preheated and ready, open your oven carefully and quickly.
Hold the peel at a slight angle (about 45 degrees) and slide it onto the stone as far as it will go. Then, in one smooth motion, pull the peel back toward you while gently shaking it. The pizza should stay on the stone. If it doesn’t slide smoothly, you either didn’t use enough flour or your dough was too cold. Practice makes perfect here—most folks nail it after 2-3 attempts. Close the oven door immediately to maintain temperature.
Baking Time and Temperature
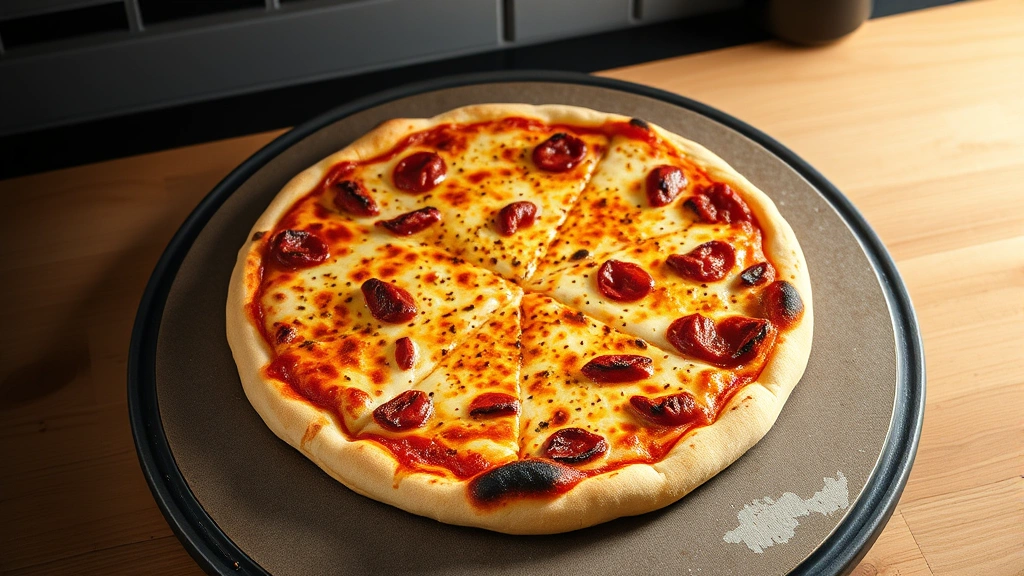
At 500°F, most pizzas bake in 12-15 minutes. At 550°F, you’re looking at 8-12 minutes. The key is watching for visual cues rather than relying solely on time. You want the crust to be golden brown with some light char on the bottom, and the cheese should be bubbling and slightly browned. If you’re concerned about the bottom, use a metal peel to lift one edge and peek underneath.
Rotate your pizza halfway through if your oven has hot spots. This ensures even browning and prevents one side from charring while the other stays pale. If your stone is doing its job, you should see some slight browning on the bottom by the 6-8 minute mark. If the bottom isn’t browning, your stone either wasn’t preheated long enough or your oven temperature is off. Consider using an oven thermometer to verify actual temperature—many home ovens run cooler than their dial suggests.
Cooling and Storage Tips
After your pizza comes out, let it rest on a cooling rack for a few minutes. This prevents the bottom from getting soggy as steam escapes. Once your pizza is removed, leave the stone in the oven to cool completely—don’t try to clean it while hot. Rapid cooling can cause cracking, especially with ceramic stones.
When fully cooled, wipe the stone with a damp cloth to remove any stuck-on bits. Never use soap or submerge it—these can damage the stone and affect seasoning. For stubborn spots, make a paste of water and baking soda and scrub gently. Store your stone in a dry place, preferably in a pizza stone bag or wrapped in cloth to protect it from moisture and impacts. A well-maintained stone will last for years and improve with use as it develops a natural seasoning.
Common Mistakes to Avoid
The biggest mistake is not preheating long enough. Your stone needs time to reach thermal equilibrium, not just surface temperature. Another common error is using too much sauce or toppings, which traps steam and prevents crisping. Keep it minimal—quality over quantity.
Don’t use metal utensils on your stone, as they can scratch and damage the surface. Stick with wooden peels and silicone scrapers. Avoid sudden temperature changes—don’t move a hot stone to a cold surface or vice versa. Never use cooking spray on your stone; it can create a sticky residue. And resist the urge to wash your stone with soap—water and a gentle scrub are all you need. Finally, don’t preheat your stone in a cold oven and then crank the heat. Place it in the oven before preheating so it heats gradually and evenly.
Frequently Asked Questions
Can I use my pizza stone on the grill?
Absolutely. Cordierite and cast iron stones work great on grills. Place it on the grates and preheat just like you would in an oven. Grills often run hotter, so watch your baking time carefully—you might need 8-10 minutes instead of 12-15.
What’s the difference between a pizza stone and a baking steel?
Baking steel is made from metal and conducts heat much faster than stone, resulting in faster, crispier crusts. Stones heat slower but retain heat longer. Both work well; steel is better for quick, high-heat cooking, while stone is more forgiving for beginners.
How do I prevent my dough from sticking to the stone?
Use cornmeal or flour on your peel as a bearing surface. Make sure your dough is at room temperature and that you dust generously. If sticking still happens, you either need more flour or your dough needs to rest longer before topping.
Can I put a cold pizza stone in a hot oven?
No. Always place your stone in the oven before preheating. Sudden temperature changes can cause thermal shock and cracking, especially with ceramic stones.
How often should I replace my pizza stone?
With proper care, a quality pizza stone lasts many years. You only need to replace it if it develops large cracks that affect its structural integrity or if it’s damaged beyond repair.
Final Thoughts
Mastering how to use a pizza stone opens up a world of pizza-making possibilities. The investment in a good stone pays dividends in every pie you bake. Start with quality equipment—a cordierite stone in the 14-16 inch range—and commit to proper preheating and technique. Your first few pizzas might not be perfect, but by your fifth or sixth attempt, you’ll be producing restaurant-quality results at home.
The beauty of pizza stone cooking is that it’s forgiving once you understand the fundamentals. Temperature, preheating time, proper dough prep, and careful transfer are your four pillars of success. From there, it’s just practice and tweaking based on your oven’s quirks. Before long, you’ll be the person your friends ask for pizza-making advice. And if you’re looking to expand your cooking skills beyond the pizza oven, check out guides like how to make gravy from drippings or how to steam carrots to round out your culinary toolkit.
For more detailed oven techniques and troubleshooting, the experts at Family Handyman offer excellent guidance on kitchen equipment maintenance. You can also find comprehensive pizza-making resources at This Old House and Bob Vila for both traditional and modern approaches.


