
You’re staring at your car’s engine bay and wondering: “How hard can this be?” Well, removing a car battery sounds simple until you accidentally short-circuit something, drain your vehicle’s memory, or worse—get a nasty shock. The truth is, how to remove car battery safely requires more than just yanking cables. You need to understand the order of operations, the tools involved, and the real risks lurking under that hood.
This guide walks you through the exact process mechanics use, minus the intimidating jargon. Whether you’re replacing a dead battery, doing electrical work, or just need the space to access other components, you’ll learn the safest, most reliable method to disconnect your car’s power source.
Before we dive into the five steps, let’s be clear: a car battery is heavy (30–50 pounds depending on your vehicle), electrically charged, and capable of causing serious injury if you’re careless. But with the right approach, this is absolutely a DIY task you can handle in 10–15 minutes.
Step 1: Prep Your Workspace and Gather Tools
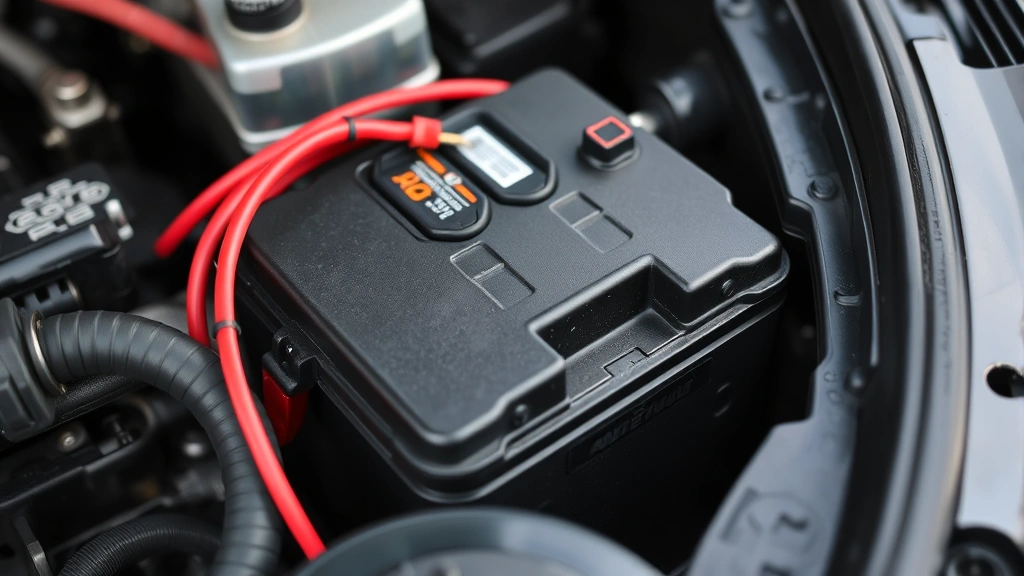
Your first job isn’t touching the battery—it’s setting yourself up for success. Open your hood and locate the battery. Most cars have it on one side of the engine bay (driver’s side or passenger’s side). Take a moment to see how it’s positioned and what’s around it.
Tools you’ll need:
- Socket wrench set (usually 8mm, 10mm, or adjustable wrench)
- Work gloves (nitrile or leather—battery terminals can be corroded and nasty)
- Safety glasses
- Battery terminal puller (optional but incredibly useful; prevents damage to the cables)
- Container for small bolts and hardware
- Battery terminal cleaner or wire brush (for after removal)
Wear your safety glasses. Seriously. Battery acid is real, and it will mess up your eyes faster than you can blink. If you wear contacts, consider switching to glasses for this job.
Check your vehicle’s manual if you have it handy. Some cars have additional steps—like disconnecting a battery monitoring sensor or removing a protective cover. Most don’t, but it’s worth a 30-second check.
Pro Tip: If your car has an alarm system or aftermarket electronics, removing the battery will reset those systems. Your radio might lose its presets, and security systems may need reprogramming. Take a photo of your radio settings before you start, and plan to reprogram your key fob afterward (here’s a guide on how to program a key fob if you need it).
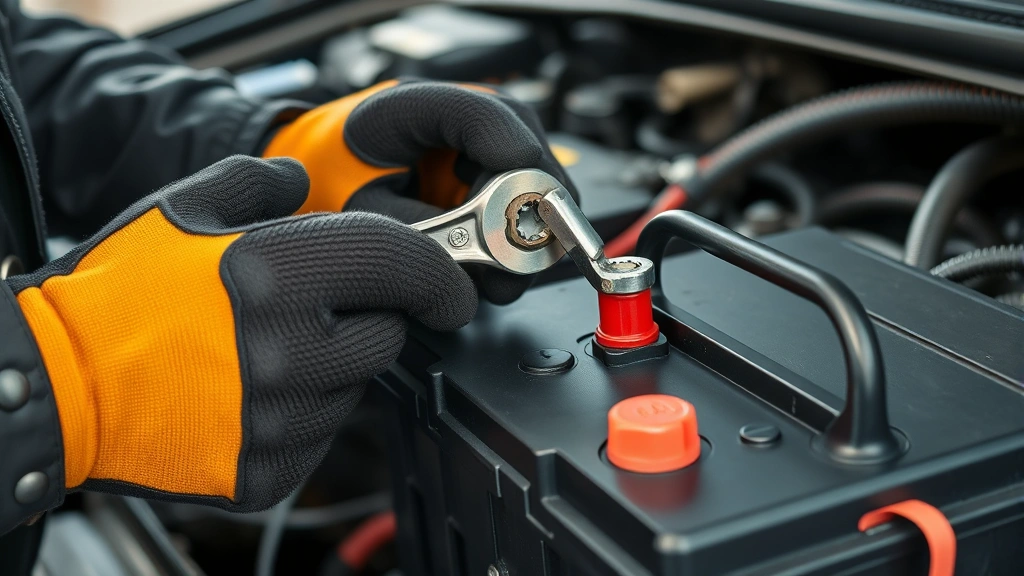
Step 2: Disconnect the Negative Terminal First
This is the critical step that separates people who know what they’re doing from people who get surprised by sparks. Always disconnect the negative (black) terminal first. This is non-negotiable.
Here’s why: If you disconnect the positive terminal first and then accidentally touch the negative terminal to any metal part of the car, you’ve just created a direct short circuit. The negative terminal is your safety. Disconnect it, and even if you’re clumsy with the positive terminal, the worst that happens is nothing—there’s no complete circuit.
Locate the negative terminal. It’s marked with a minus sign (−) or a black cap. The cable attached to it is also black.
- Put on your safety glasses and work gloves.
- Using your wrench, loosen the nut on the negative terminal bolt. Turn counterclockwise.
- Once loose enough to turn by hand, remove the nut completely and set it aside in your container.
- Gently wiggle the cable terminal off the battery post. It should slide off with minimal effort. If it’s stuck, use a battery terminal puller to avoid damaging the cable.
- Move the disconnected negative cable away from the battery. Tuck it to the side so it can’t accidentally touch the battery post again.
Don’t skip this step or reverse the order. I’ve seen people ignore this advice, and the result is always the same: a loud pop, sparks, and a burned-out alternator or damaged electronics. It’s not worth the risk.
Step 3: Disconnect the Positive Terminal
Now that the negative terminal is safely out of the way, you can disconnect the positive (red) terminal. The process is identical, but the stakes feel lower because the circuit is already broken.
- Locate the positive terminal. It’s marked with a plus sign (+) or a red cap. The cable is red.
- Using your wrench, loosen the nut on the positive terminal bolt. Turn counterclockwise.
- Remove the nut and set it aside with the negative terminal nut.
- Gently wiggle the positive cable off the battery post. Again, if it’s stubborn, use a terminal puller.
- Move the positive cable away from the battery. You now have both cables disconnected and safely tucked to the sides.
At this point, your battery is electrically isolated. You could theoretically touch both terminals together and nothing would happen. That’s how you know the disconnection is complete.
Step 4: Remove the Battery Hold-Down Bracket
Car batteries are heavy, and they slide around during acceleration, braking, and turns. To keep them in place, manufacturers secure them with a metal or plastic hold-down bracket, usually bolted across the top or sides of the battery.
- Locate the hold-down bracket. It’s almost always bolted to the battery tray with one or two bolts.
- Using your wrench, loosen and remove these bolts. Set them aside in your container with the terminal nuts.
- Lift the bracket away from the battery. You may need to wiggle it slightly if it’s tight.
Some vehicles have a bracket on the bottom of the battery tray instead of on top. If you can’t find it easily, check your manual or look at the underside of the engine bay. It’s always there somewhere.
Safety Warning: Do not attempt to lift the battery out until the hold-down bracket is completely removed. Batteries are designed to sit securely, and fighting against the bracket is how people strain their backs or drop the battery.
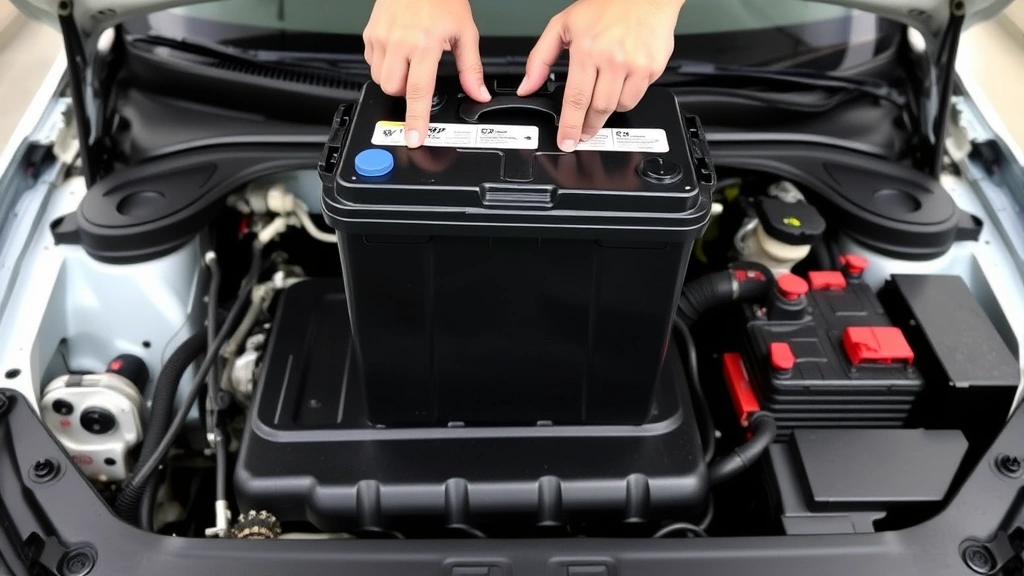
Step 5: Lift Out the Battery Safely
This is the moment where weight and physics take over. A car battery weighs 30–50 pounds depending on your vehicle’s size and engine. That’s not light, and dropping one is a genuine hazard—to your feet, your car’s components, and the battery itself (which can crack and leak acid).
- Position yourself so you have a clear path to lift the battery straight up and out of the engine bay. Remove any hoses, brackets, or components that might be in the way.
- Grip the battery firmly on both sides. Use both hands. Do not attempt to carry it with one hand.
- Lift straight up with your legs, not your back. Think of it like a deadlift—bend your knees, keep your back straight, and drive through your heels.
- Once the battery is clear of the engine bay, carry it to a safe location. Set it down gently on a flat surface, away from children and pets.
- If you’re replacing the battery, set the old one aside for proper recycling. Most auto parts stores accept old batteries and may even credit you $10–$15 toward a new one.
That’s it. Your car battery is now removed. If you’re installing a new one, reverse these steps: place the new battery in the tray, secure the hold-down bracket, connect the positive terminal, then the negative terminal. Always install in the opposite order of removal.
Why the Order Matters (This Isn’t Arbitrary)
You might be wondering why the order of disconnection is so critical. After all, both cables need to come off eventually, right? The answer lies in electrical circuits and the path electricity takes.
A car’s electrical system is a closed loop. The positive terminal supplies power, the negative terminal completes the circuit back to the battery. When both terminals are connected, you have a live circuit. If you disconnect the positive terminal first and then accidentally create a path from the positive to the negative (by touching a wrench to both, for example), you’ve just created a short circuit through your body or your tools.
By disconnecting the negative terminal first, you break the circuit immediately. Even if you’re clumsy with the positive terminal afterward, there’s no complete path for electricity to flow. It’s like cutting the return wire on a light switch—the light can’t turn on even if you flip the switch.
This principle applies whether you’re working on a 2005 Honda or a brand-new Tesla. The physics doesn’t change.
For more on electrical systems and diagnostics, check out this guide on how to clear the codes of a check engine light, which covers related electrical concerns.
Common Mistakes That Cause Real Problems
Mistake 1: Disconnecting the Positive Terminal First
This is the number-one way people damage their cars. A stray wrench, a fumbled cable, or a moment of inattention creates a short circuit. The result: blown fuses, damaged alternators, fried computer modules, or worse. Don’t do it. Negative first, always.
Mistake 2: Forgetting to Disconnect Before Removing the Hold-Down Bracket
Some people remove the bracket while the cables are still connected. This doesn’t cause immediate damage, but it’s sloppy. You’re working with live electrical components unnecessarily. Disconnect first, then remove the bracket. It takes 30 extra seconds and eliminates risk.
Mistake 3: Lifting the Battery Incorrectly
Herniated disks and crushed toes are no joke. Lift with your legs, not your back. Use both hands. If the battery feels stuck, stop and figure out why before forcing it. Usually, a cable or bracket isn’t fully disconnected.
Mistake 4: Not Securing Small Hardware
Those terminal nuts and bracket bolts are easy to lose. Use a container or ziplock bag to keep them together. Losing them means a trip to the auto parts store and delays when you’re ready to reinstall.
Mistake 5: Ignoring Battery Corrosion
If your battery terminals are covered in blue, white, or green crusty buildup (corrosion), clean them before reinstalling. Use a wire brush and a solution of baking soda and water. Corroded terminals create poor electrical connections and can cause starting problems. For a deeper dive into car maintenance, check out how often to change cabin air filter—it covers the broader maintenance mindset.
Mistake 6: Not Checking Your Vehicle’s Manual
Some vehicles have quirks. A few luxury cars have battery disconnect switches. Some hybrids have additional steps. A 30-second manual check saves you from surprises. According to Family Handyman’s battery replacement guide, checking your manual is the first step even experienced DIYers recommend.
What Happens After You Remove the Battery?
Once your battery is out, you’ll notice a few things:
- Your car won’t start. Obviously. But if you have a digital clock or radio, they’ll lose power and reset.
- Security systems may activate. Some cars have alarms triggered by battery disconnection. This is normal and usually stops after a few minutes.
- Your engine computer will lose its learned settings. Modern cars have computers that learn your driving patterns and adjust fuel injection, transmission shift points, and other parameters. Removing the battery resets this. Your car will run slightly rough for a few days as the computer relearns. This is harmless.
- Key fobs may need reprogramming. Some vehicles require you to reprogram key fobs after a battery disconnect. Check your manual for the procedure, or follow this guide on how to program a key fob.
None of these are problems. They’re just expected side effects of disconnecting your car’s power source.
Tools and Safety Equipment Worth Buying
If you plan to do this job more than once, invest in a few items:
- Battery terminal puller ($15–$30): Prevents damage to cables and makes removal easier. It’s a simple tool that grips the terminal and pulls it straight off.
- Battery hold-down clamp ($20–$50): If your hold-down bracket is damaged, a universal clamp works on most vehicles.
- Battery terminal cleaner ($10–$15): A wire brush attachment for a drill makes corrosion removal fast and thorough.
- Work gloves and safety glasses: Non-negotiable. Battery acid is caustic, and metal shavings are sharp.
For more context on working safely in engine bays, This Old House’s automotive section covers general vehicle maintenance safety principles.
How Long Does This Take?
For someone doing it for the first time, expect 15–20 minutes. If you’re experienced, 5–10 minutes. The time varies based on:
- How corroded your terminals are (corrosion makes removal slower)
- How tight the bolts are (some cars use very tight fasteners)
- Whether your battery is in an awkward location (some vehicles tuck it under a wheel well or behind other components)
If your car has a battery in an unusual spot or you encounter significant corrosion, take your time. Rushing leads to mistakes.
Frequently Asked Questions
Can I remove a car battery without disconnecting the cables?
– No. The cables must be disconnected before you remove the battery. Attempting to lift out a battery with cables still attached risks damaging the cables, straining the connectors, or creating an accidental short circuit as the battery shifts.
What happens if I disconnect the positive terminal first?
– You risk creating a short circuit if you accidentally touch metal tools or your body to both the positive and negative terminals. This can cause sparks, blown fuses, damaged alternators, or harm to you. Always disconnect the negative terminal first.
Do I need to disconnect the battery to replace other car parts?
– For most electrical work, yes. If you’re replacing the alternator, starter, or any component connected to the battery, disconnecting the battery prevents accidental short circuits and protects your car’s computer. For non-electrical work (like brake pads or air filters), it’s not necessary but often a good safety practice.
How long can a car sit without a battery?
– Indefinitely, as long as the battery is disconnected. A car with a disconnected battery won’t drain anything and can sit for months or years without issues. However, the alternator won’t charge, so if you reconnect the battery after a long period, it may be dead and need a jump start.
Will removing the battery erase my car’s computer codes?
– Yes. Removing the battery clears the computer’s RAM, which erases any stored diagnostic trouble codes. This is useful if you’ve fixed a problem and want to clear the check engine light. However, the codes will return if the underlying problem isn’t actually fixed. For more on this, see our guide on how to clear the codes of a check engine light.
Can I touch the battery terminals with bare hands?
– Technically, yes. The voltage (12V) is too low to cause electrocution. However, battery terminals are often corroded with acid buildup, which can irritate or burn your skin. Wear gloves. It’s not worth the risk.
What’s the best way to store an old car battery?
– Store it upright in a cool, dry place away from children and pets. Don’t leave it in direct sunlight or extreme heat. Most importantly, take it to an auto parts store or recycling center for proper disposal. Car batteries contain lead and sulfuric acid and must be recycled, not thrown in the trash.
Do I need to buy a new battery right away?
– Not necessarily. If you’re removing the battery for maintenance or to access other components, you can leave it out temporarily. However, if the battery is dead or dying, replace it as soon as possible. A dead battery strands you and can damage your alternator if you try to jump-start repeatedly.
Can I remove a car battery in the rain?
– Yes, but be cautious. Water doesn’t conduct electricity at 12V, but wet conditions make tools slippery and increase the risk of dropping something. Wear gloves and take your time. If there’s lightning, wait. Never work on electrical components during an electrical storm.
What’s the difference between removing a battery and disconnecting it?
– Disconnecting means removing the cables but leaving the battery in place. Removing means taking the battery out entirely. For most maintenance work, disconnecting is sufficient. You only need to remove the battery if you’re replacing it, cleaning the battery tray, or accessing components underneath the battery.
Final Thoughts: You’ve Got This
Removing a car battery is straightforward once you understand the sequence and the reasoning behind it. Negative terminal first. Positive terminal second. Hold-down bracket third. Lift carefully. That’s it.
The key is respecting the electrical system. A car battery is powerful enough to start a multi-ton engine, and that power demands respect. But with the right approach, it’s a completely manageable task that saves you money and gives you confidence for future DIY work.
If you’re uncomfortable at any point, stop and consult your vehicle’s manual or a trusted mechanic. There’s no shame in asking for help, but there’s also no reason to be intimidated by this job. Thousands of people do it every day, and now you know exactly how.


