
Getting window measurements wrong is one of those mistakes that costs real money. You order custom windows, they arrive, and they don’t fit. Or you’re planning a renovation and your budget blows up because you miscalculated square footage. I’ve seen it happen, and it’s painful.
Here’s the truth: how to measure windows isn’t complicated, but it requires patience and the right approach. This guide walks you through every method—from basic interior measurements to exterior frame checks—so you get it right the first time.
Tools You Need to Measure Windows Accurately
You don’t need fancy equipment. In fact, most pros rely on simple, durable tools that have worked for decades.
- 25-foot tape measure – Non-negotiable. Get one with a 1-inch blade width; it’s stiff enough to extend without drooping.
- Laser measure – Optional but worth it if you’re doing multiple windows. Eliminates the need for a helper and gives digital readouts you can photograph.
- Notebook or tablet – Write everything down immediately. Memory is the enemy of accuracy.
- Pencil – Not pen. Pencil marks erase if you mess up.
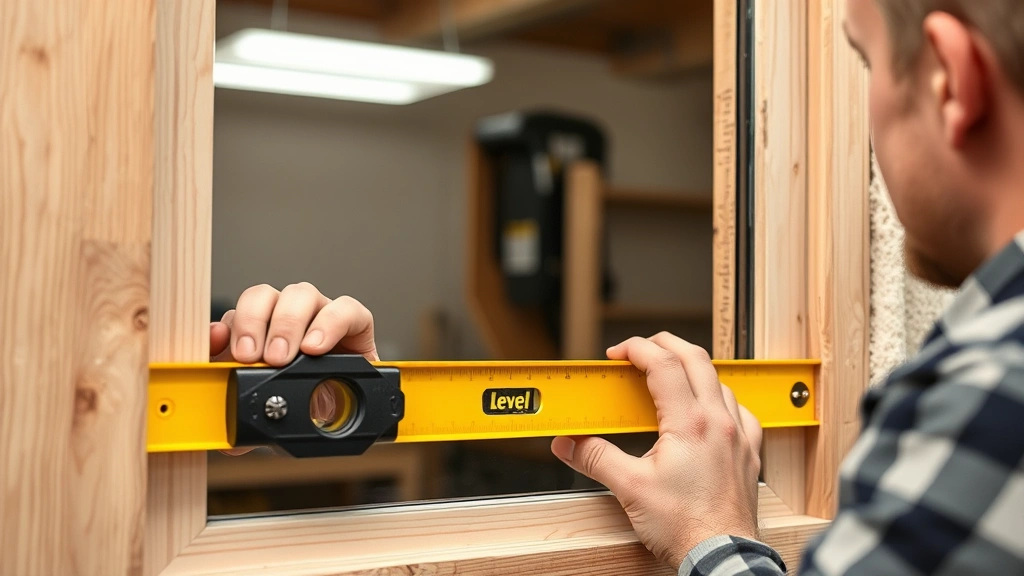
- Level – A 2-foot level tells you if the window frame is plumb (vertical) and level (horizontal). Crooked frames affect how windows operate.
- Straightedge or level – Check if the window sill is flat or sloped.
- Camera or phone – Photograph each window with measurements visible. This catches details you might forget.
That’s it. You’re ready to measure windows like a professional.
Interior Window Measurements: The Standard Method
Interior measurements are what most people think of first, and they’re your baseline. This is how to measure windows for ordering new ones or planning a project.
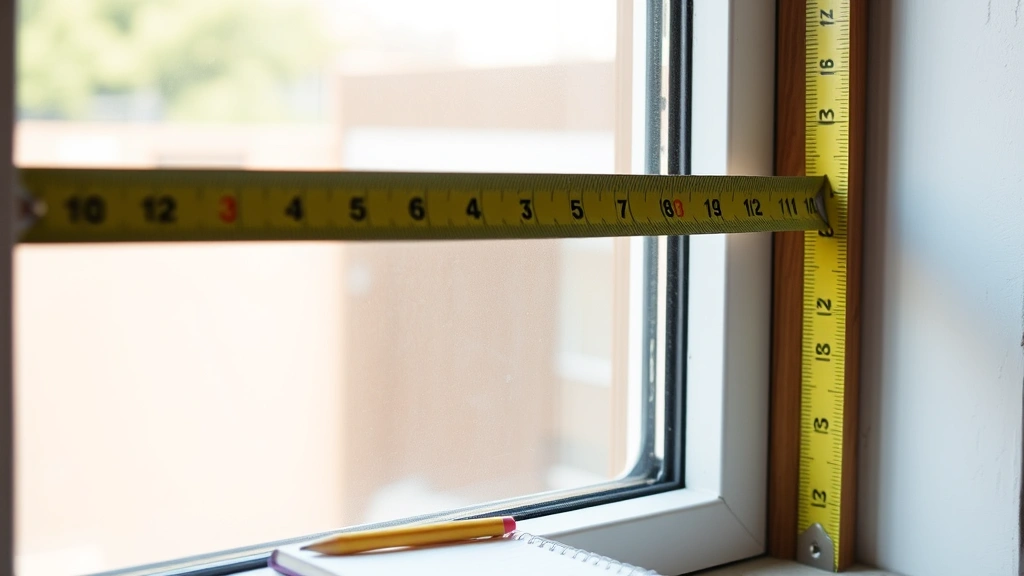
Step 1: Measure the Width
- Start at the inside left edge of the window frame (the jamb).
- Run your tape measure horizontally to the inside right edge.
- Record this measurement to the nearest 1/8 inch. Don’t round up or down—be exact.
- Repeat at three points: top, middle, and bottom of the window opening.
- If these three measurements differ, write down all three. The smallest measurement is your working width.
Why three measurements? Because old houses settle unevenly. Walls aren’t always plumb. A window that’s 36 inches wide at the top might be 35 7/8 inches at the bottom. You need to know that.
Step 2: Measure the Height
- Measure from the inside top of the frame (header) straight down to the inside bottom (sill).
- Take measurements at three points: left side, center, and right side.
- Record all three. Again, use the smallest number as your working height.
- Pay attention to the sill—is it flat or sloped? A sloped sill (common in older homes) affects how you measure.
Step 3: Check for Square
A window that’s out of square is a headache. Measure diagonally from top-left to bottom-right, then from top-right to bottom-left. If these diagonal measurements match, the window is square. If they differ by more than 1/4 inch, you have a problem.
Pro Tip: If a window is significantly out of square, photograph it and note the diagonal measurements on your form. A professional installer needs to know this before they start work.
Exterior Window Measurements: Why They Matter
Interior measurements tell you the glass or sash size. Exterior measurements tell you the actual frame dimensions, including the trim and any casing. Both matter for different reasons.
When to Take Exterior Measurements
- You’re replacing the entire window frame (not just the sash).
- You’re installing vinyl siding or exterior trim—you need to know the full frame width.
- You’re planning exterior work like how to install vinyl siding around windows.
- The window sits in a wall with existing brick, stone, or stucco that you need to work around.
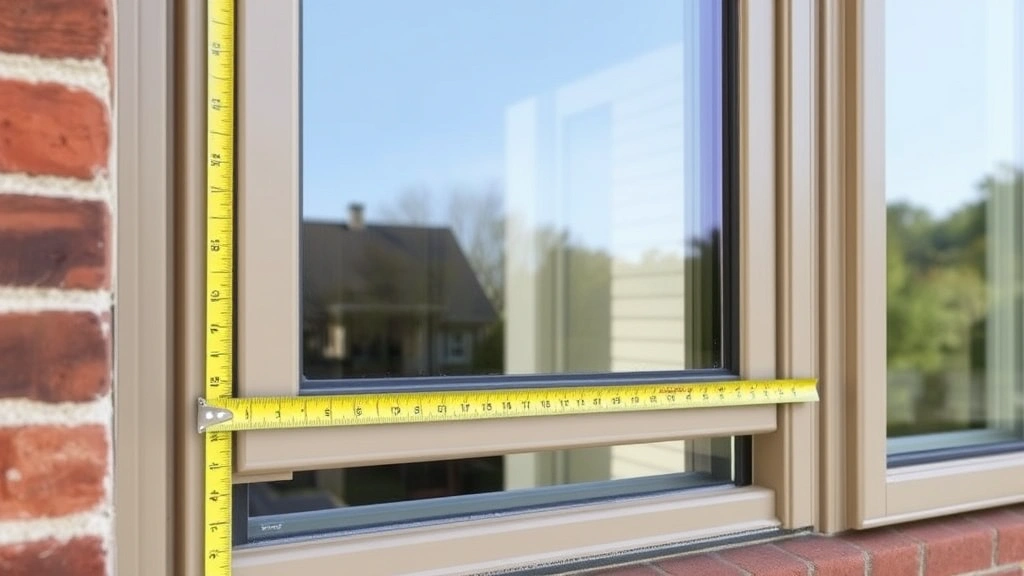
How to Measure the Exterior Frame
- Go outside and locate the outer edge of the window frame (the part that sits against the house).
- Measure width from the outside left edge to the outside right edge. Take three measurements: top, middle, bottom.
- Measure height from the top of the frame to the bottom. Again, three points: left, center, right.
- Note any trim, casing, or brick molding that extends beyond the frame. Measure that separately.
The exterior measurement is almost always larger than the interior measurement because it includes the frame thickness and any trim.
Safety Warning: If you’re measuring second-story windows from outside, use a sturdy ladder and have someone spot you. Don’t reach or lean. If you can’t safely access the exterior, measure from inside and add the frame thickness (usually 1 to 2 inches) to your calculations.
Rough Opening Measurements for Replacements
The rough opening is the hole in the wall before the window frame goes in. If you’re replacing windows, this is critical information.
Why Rough Opening Matters
When contractors build a house or cut a window opening, they don’t make it exactly the size of the window. They leave small gaps (called “reveals”) on all sides so the window frame can be shimmed, leveled, and secured. These gaps are typically 1/2 inch on all sides, but they vary.
How to Find the Rough Opening
- Remove any interior trim or casing around the window.
- Measure from the inside of the framing studs on the left to the inside of the framing studs on the right. This is your rough opening width.
- Measure from the header (top framing) down to the sill (bottom framing). This is your rough opening height.
- The new window frame should be slightly smaller than these measurements—typically 1/2 inch smaller on each side.
If you’re ordering a replacement window, the manufacturer will ask for rough opening dimensions, not interior dimensions. Get this wrong and the window won’t fit.
Common Mistakes When You Measure Windows
I’ve made most of these. You don’t have to.
Mistake 1: Measuring Only Once
This is the biggest one. You measure the width at the top, feel confident, and move on. Then the window arrives and it’s 1/4 inch too wide at the bottom. Take three measurements at each dimension. Always.
Mistake 2: Including the Sill in the Height
Some people measure from the bottom of the sill (the exterior edge) instead of the inside top of the sill. This adds an extra inch or more to your height measurement. Be clear about where you’re measuring from, and be consistent.
Mistake 3: Forgetting to Account for Existing Trim
If you’re installing new windows and keeping the old trim, you need to know how much space that trim takes up. Measure from the outside of the trim, not the inside of the frame.
Mistake 4: Rounding Your Measurements
“It’s close enough to 36 inches” is not close enough. Windows are manufactured to exact tolerances. A 36-inch window and a 36 1/4-inch window are not interchangeable. Write down the exact measurement.
Mistake 5: Not Checking for Plumb and Level
A window frame that’s out of plumb (leaning) or not level (tilted) will cause the sash to stick or bind. Use a level to check both directions. If the frame is significantly out of plumb, you might need to shim it during installation, or you might need to order a custom window.
Mistake 6: Measuring Over Paint or Caulk Buildup
Old paint and caulk can add 1/8 inch or more to your measurements. Scrape away buildup before measuring, especially around the edges where old caulk accumulates.
Special Cases: Arched, Bay, and Specialty Windows
Arched Windows
These are trickier. You need the width at the widest point (usually the bottom) and the total height from the bottom to the peak of the arch. For the arch itself, measure the radius (distance from the center point to the curve). If you can’t calculate it, photograph the window and send the photo to the manufacturer. Many will custom-make arched windows based on photos.
Bay Windows
Measure each individual pane as if it’s a separate window. Also measure the angle where the windows meet (usually around 135 degrees for a standard bay). Measure the depth of the bay from the wall to the furthest point. Bay windows are expensive and custom, so accuracy is absolutely critical.
Sliding Glass Doors
Treat these like windows, but measure the opening where the door frame will sit. Measure width and height at three points each. Also check the floor—is it level? A sloped floor affects how the door slides and locks.
Skylights
Measure the rough opening (the hole in the roof), not the finished opening. Skylights are installed into the framing, and the flashing wraps around the opening. Get the rough opening dimensions from the manufacturer’s specs, then measure your roof opening to match.
Recording Your Measurements: Templates and Systems
Here’s where most DIYers fall apart. You measure everything, write some numbers on a scrap of paper, and three weeks later you can’t read your own handwriting.
Create a Measurement Form
Make a simple template for each window. Include:
- Window location (Living Room, Master Bedroom, etc.)
- Interior width (top, middle, bottom)
- Interior height (left, center, right)
- Exterior width and height (if applicable)
- Rough opening dimensions (if replacing)
- Notes about condition, plumb/level, special features
- Diagonal measurements (to check for square)
- Photo of the window
Use the same form for every window. This creates consistency and makes it easy to catch missing data.
Digital vs. Paper
Paper is reliable and doesn’t need batteries, but it’s easy to lose. Digital (spreadsheet or app) is searchable and backs up automatically. Use both: write on paper on-site, then transfer to a spreadsheet that evening while details are fresh.
Photo Documentation
Take a photo of each window with your tape measure visible in the frame. This gives you a visual reference and proves what you measured. If a question comes up later, you have documentation.
According to Family Handyman’s guide on measuring windows, photographing measurements is one of the most reliable ways to avoid costly mistakes.
Double-Check Before Ordering
Before you place an order, review all your measurements. Call the manufacturer if anything seems off. A five-minute phone call beats a $500 reorder.
Frequently Asked Questions
What’s the difference between interior and exterior window measurements?
– Interior measurements are taken inside the window frame and tell you the glass or sash size. Exterior measurements include the frame and any trim, giving you the total width and height of the window unit. Both are useful for different purposes: interior for ordering new sashes, exterior for planning renovations or installing trim.
Should I measure in inches or centimeters?
– Use inches and fractions (inches and eighths). Most window manufacturers in North America work in inches. If you measure in centimeters, you’ll have to convert, which introduces errors. Stick with inches: 36 1/4 inches, not 92 centimeters.
How accurate do my measurements need to be?
– Accurate to the nearest 1/8 inch. Windows are manufactured to tight tolerances, and even 1/4 inch can cause fit problems. Many modern windows have tolerances of plus or minus 1/8 inch, so your measurements need to match that precision.
What if my window frame is out of square?
– Measure the diagonals and note them. If the frame is out of square by more than 1/4 inch, tell the window manufacturer or installer before ordering. They may recommend a custom window or suggest shims to correct the frame during installation. Don’t ignore this—it affects how the window operates.
Can I measure a second-story window from inside?
– Yes. Interior measurements are safe and usually sufficient. If you absolutely need exterior dimensions and can’t safely access them, add the frame thickness (usually 1 to 2 inches) to your interior measurements. For safety, never lean out a window or overextend on a ladder.
Do I need to measure the sill separately?
– If the sill is sloped or has a special profile, photograph it and note the slope. For standard windows, the sill is part of the frame and doesn’t need separate measurement. But if you’re replacing just the sash (the moving part), you might need sill dimensions.
What’s a rough opening and why does it matter?
– The rough opening is the hole in the wall framing before the window is installed. It’s larger than the window frame itself to allow for shimming and leveling. If you’re replacing a window, the manufacturer needs rough opening dimensions, not interior dimensions. Confusing the two is a common and expensive mistake.
How do I measure a bay window?
– Measure each pane individually as if it’s a separate window. Measure the angle where the panes meet (usually 135 degrees). Measure the depth from the wall to the furthest point. Document everything clearly because bay windows are custom and expensive—accuracy is critical.
Should I use a laser measure or a tape measure?
– Both work. A tape measure is cheaper and never needs batteries. A laser measure is faster and eliminates parallax error (measuring at a slight angle). For a few windows, a tape measure is fine. For a whole-house project, a laser measure saves time and reduces fatigue.
What if I measure wrong and the window doesn’t fit?
– Call the manufacturer immediately. Some allow returns or exchanges if the window hasn’t been installed. If the window has been installed, you’re usually stuck with it. This is why measuring twice (or three times) matters. Prevention is cheaper than correction.


