

Vinyl siding intimidates a lot of homeowners. You’re looking at your house’s exterior, thinking about ladders, flashing, and whether you’ll mess up the whole job. Real talk: how to install vinyl siding is actually one of the more forgiving exterior projects you can tackle, especially if you take your time and understand the fundamentals. The biggest mistake people make isn’t the installation itself—it’s rushing or skipping the prep work.
This guide walks you through everything: from measuring and planning, to nailing techniques that won’t cause buckling, to dealing with corners and trim. We’ll cover safety too, because working at height is no joke. By the end, you’ll know whether this is a DIY job for you or if you need to call a pro.
Planning and Measurements
Before you buy a single panel, measure your house accurately. This sounds obvious, but I’ve seen people show up at the lumber yard with rough estimates and end up $500 short on material or with way too much leftover.
Measure the height from the foundation to the soffit (where the roof overhang ends). Do this on all four sides—your house might not be perfectly square. Measure the width of each wall. For gable ends, you’ll need to calculate the triangular area separately. Write everything down. Take photos. Sketch it out.
Once you have measurements, add 10% to your total linear footage. Waste happens. You’ll cut panels, make mistakes, and some pieces just won’t work out. Better to have extra than to be one panel short halfway through a Saturday.
Check your substrate (the wall underneath). If you’re installing how to install vinyl siding over existing siding, make sure it’s structurally sound. Soft spots, rot, or loose boards will cause problems down the road. Vinyl siding needs a firm, flat surface. If the old siding is wavy or deteriorating, consider removing it. Yes, it’s more work upfront, but you’ll have a better result.
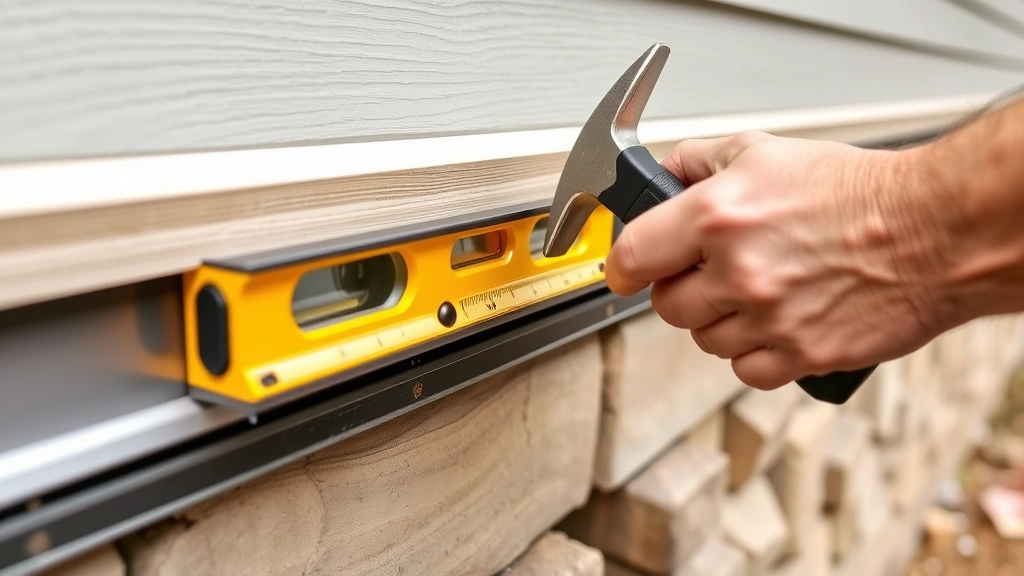
Pro Tip: Use a level to check your walls for high and low spots. Mark them. You can shim out low areas with felt or foam underlayment before installing vinyl siding.
Tools and Materials You’ll Need
Don’t cheap out on tools here. A bad tape measure or dull utility knife will slow you down and create mistakes.
- Ladder: Extension ladder (24-28 feet is typical for two-story homes). A quality ladder with stabilizer bars is worth the investment. Avoid wobbly ladders.
- Measuring tape: 25-foot minimum. Get one with a standout of at least 10 feet.
- Circular saw or miter saw: For crosscutting vinyl panels. A fine-toothed blade designed for vinyl works best.
- Utility knife: For lengthwise cuts and trimming. Keep blades sharp.
- Nail gun or hammer: Coil roofing nailer works great, or go old-school with a 16-ounce hammer. If using a nail gun, practice first.
- Roofing nails or siding nails: 1.25-inch galvanized or stainless steel. Never use drywall screws—they’ll cause buckling.
- Caulk gun and caulk: Silicone or acrylic latex designed for siding.
- Chalk line: For marking starter strip height.
- Level: 4-foot is standard. Use it constantly.
- Vinyl siding panels, starter strip, J-channel, corner posts, and trim: Buy everything from the same manufacturer to ensure color match.
Materials-wise, you’re looking at vinyl panels (usually sold by the square—100 square feet), starter strip, corner posts, J-channel for windows and doors, and finishing trim. Budget roughly $3–$8 per square foot installed, depending on your region and panel quality. According to Family Handyman’s siding cost breakdown, mid-range vinyl is a solid value.
Safety First: Working at Height
This isn’t optional. Falls are the leading cause of serious home injuries. Treat ladder safety like it’s a structural load-bearing issue—because it is.
- Set your ladder on level ground. Use a level to check. If the ground is uneven, use shims or adjust the ladder position.
- Maintain the 4-to-1 rule: For every 4 feet of ladder height, the base should be 1 foot away from the wall. This keeps the angle safe.
- Wear a harness if possible. Roof brackets and safety harnesses are cheap compared to a hospital bill.
- Never stand on the top rung. Your center of gravity shifts. Keep at least two rungs below the top.
- Use a ladder stabilizer bar. It distributes weight and prevents the ladder from sliding sideways.
- Have a spotter. Someone to hold the ladder and keep an eye on you makes a huge difference.
- Don’t overreach. Move the ladder instead. Reaching sideways is how people fall.
According to OSHA’s ladder safety guidelines, proper setup prevents the majority of ladder-related injuries. Take it seriously.
Safety Warning: Never install vinyl siding in extreme weather. Wind makes ladder work dangerous and can damage panels. Avoid temperatures below 40°F or above 85°F—vinyl becomes brittle in cold and too flexible in heat.
Removing Old Siding (If Necessary)
If you’re installing vinyl siding over asbestos-containing siding (common before the 1980s), do not disturb it. Hire a licensed abatement contractor. Asbestos fibers are a serious health hazard. This is not a DIY situation.
For other siding types, removal is straightforward but tedious. Use a pry bar to gently work panels loose from the bottom up. Vinyl and aluminum siding usually nails at the top, so leverage from underneath. Wood siding might be nailed every 16 inches—work methodically. Take breaks. This job is more about patience than strength.
Once the old siding is off, inspect the sheathing. Look for soft spots, water damage, or rot. Tap with a hammer—solid wood sounds different from spongy wood. Replace any damaged sections. This is also a good time to add house wrap or felt underlayment if your current substrate is bare wood. It improves water resistance and gives you a smoother surface for vinyl.
Installing the Starter Strip
The starter strip is your foundation. Get this wrong, and every panel above it will be off. Think of it like setting the first course of bricks in a wall—everything else depends on it being level and straight.
The starter strip goes at the bottom of the wall, usually 1 to 1.5 inches above the foundation or bottom trim. Use a chalk line to mark this height all the way around the house. Check with a level every 6 feet. Adjust as needed.
- Measure and mark: Snap a chalk line at the correct height. Use a 4-foot level to verify it’s plumb.
- Cut the starter strip to length: It should fit snugly between corners but leave about 1/4 inch for expansion at each end. Use a utility knife for lengthwise cuts or a saw for crosscuts.
- Nail it down: Use 1.25-inch roofing nails, spaced 16 inches apart. Nail through the center of the nail slots. Do not nail at the edges of the slots—this prevents the strip from moving when vinyl expands and contracts.
- Check for level: After every 4 feet of starter strip, verify it’s still level. A wavy starter strip will cause wavy panels above it.
Starter strip is critical because it locks the bottom of your first vinyl panel in place. Without it, panels can slip down, especially in wind or heat.
Hanging Your Vinyl Panels
Now the real work begins. This is where how to install vinyl siding becomes an actual skill—not because it’s hard, but because you need to understand how vinyl moves.
Vinyl expands and contracts with temperature. A 100-foot run of vinyl can expand or contract by up to 1 inch depending on the season. If you nail it too tight, it’ll buckle. If you nail it too loose, it’ll rattle and eventually fail. The sweet spot is nailing it so it can move freely side-to-side but stays in place vertically.
The nailing technique:
- Nail in the center of the slot. Not at the top, not at the bottom. Dead center. This gives the panel room to move.
- Drive nails straight. A nail at an angle will bind the panel. Use a level or mark a line if you’re hand-nailing.
- Leave 1/32 inch of clearance. The nail should go through the slot hole but not be so tight it prevents movement. Think of it like a washer on a bolt—snug but not crushed.
- Space nails 16 inches apart. This is standard. Some installers go 12 inches for extra security, but 16 is the industry standard.
- Nail every course. Don’t skip rows thinking you’ll save time. Each panel needs to be nailed.
Start at the bottom and work your way up. The bottom of each panel locks into the top of the panel below it. Make sure the lock is fully seated before you nail. A panel that’s not fully locked will hang loose and look bad.
For the first panel, snap it firmly into the starter strip. You should hear a click. Pull up slightly to make sure it’s seated. Then nail. For subsequent panels, overlap the previous panel by about 1.25 inches (this is the lock area), push it up until it clicks, and nail.
Pro Tip: If a panel doesn’t snap into the lock properly, check if the previous panel is fully seated. A misaligned panel below will throw everything off. Tap it with a rubber mallet if needed.
According to This Old House’s vinyl siding installation guide, the most common mistake is over-nailing. Resist the urge to hammer it hard. Let the nail do the work, and stop when it’s snug.
Corners, Trim, and Transitions
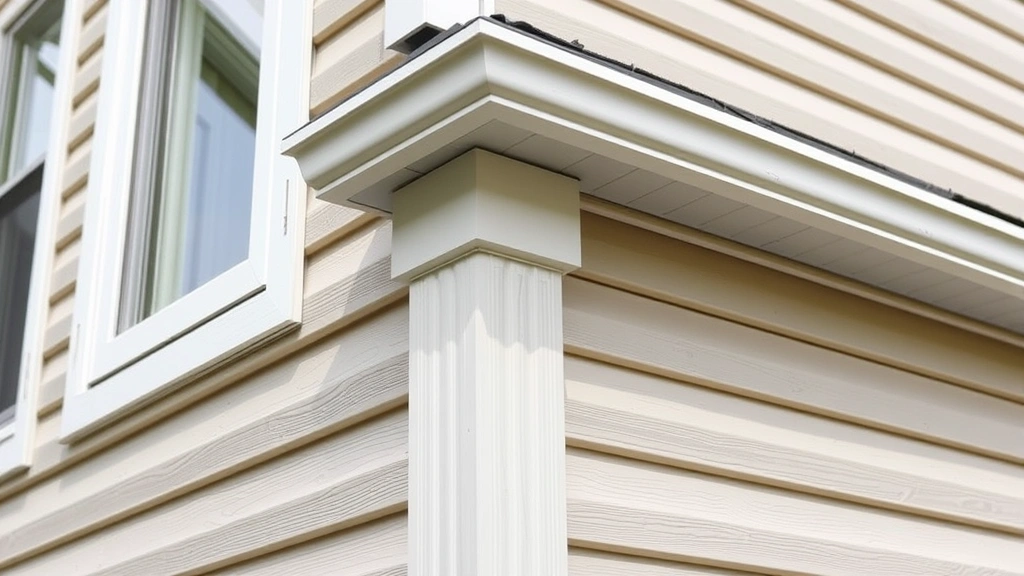
Corners are where a lot of DIY installs look amateur. The key is understanding that vinyl needs to be able to move, and corners are where movement gets tricky.
Outside corners: Use corner posts (also called corner trim). These are U-shaped pieces that frame the corner. Install them plumb (vertically straight) before you hang any panels adjacent to them. Leave 1/4 inch at the top and bottom for expansion. Nail them every 8 inches, in the center of the nail slot, just like panels.
Inside corners: Use inside corner trim or J-channel. Same principle—install first, leave room for expansion, nail in the center of slots.
Panels at corners: Panels should slide into the corner post or J-channel. Cut panels to length so they fit snugly but leave about 1/4 inch of clearance on each end. This expansion space is critical. If you force a panel into a corner with no room to move, it’ll buckle.
Windows and doors: Use J-channel around the perimeter. Measure carefully. The J-channel should sit on top of the window frame and extend down the sides. Install the top piece first, then the sides, then the bottom. Caulk the seams to prevent water infiltration.
For panels that need to be cut around windows or doors, use a utility knife for straight cuts and a jigsaw for curves. Measure twice. Cut once. A bad cut wastes material and looks terrible.
Transitions between vinyl and other materials (brick, wood trim, etc.) should be sealed with caulk. Use a color-matched silicone caulk and apply it smoothly with a caulk gun. This prevents water from getting behind the vinyl.
Finishing Touches and Caulking
You’re almost done. The last step is sealing everything up so water can’t sneak in.
Caulking strategy:
- Caulk all seams where vinyl meets trim, windows, doors, or other materials.
- Caulk where corner posts meet the top trim.
- Do not caulk the seams between vinyl panels. They need to move. Caulk here will crack and fail.
- Use 100% silicone or acrylic latex caulk rated for exterior use. Cheap caulk fails fast.
- Apply caulk in a smooth, continuous bead. Use a wet finger or caulk tool to smooth it out. This looks professional and helps it adhere.
Once caulk is dry (usually 24 hours), walk around and inspect your work. Look for gaps, misaligned panels, or nail pops. Fix any issues now rather than dealing with them later.
Clean up. Remove all nails, scraps, and packaging. Pressure wash if there’s dust or debris. Your house should look fresh and clean.
For maintenance going forward, rinse your siding annually with a garden hose. Dirt and pollen can accumulate. If you need to clean stubborn stains, use a soft brush and mild detergent. Never use a pressure washer on vinyl siding—it can force water behind the panels.
Frequently Asked Questions
Can I install vinyl siding over existing siding?
– Yes, but only if the existing siding is structurally sound and flat. If it’s wavy, soft, or deteriorating, remove it first. Installing vinyl over damaged substrate will cause problems and void warranties.
What’s the best time of year to install vinyl siding?
– Spring or fall, when temperatures are moderate (50–75°F). Vinyl is brittle in cold and too flexible in heat, making it hard to work with. Avoid extreme weather.
How long does vinyl siding last?
– Quality vinyl siding lasts 20–40 years, depending on climate and maintenance. UV exposure, temperature swings, and wind all affect lifespan. Regular cleaning extends life significantly.
Can I use screws instead of nails?
– No. Screws bind vinyl and prevent it from moving, causing buckling and warping. Use only galvanized or stainless steel roofing nails, 1.25 inches long, spaced 16 inches apart.
What do I do if a panel buckles?
– Remove the nails (use a pry bar gently), pull the panel out, and check the substrate for high spots or debris. If the wall is uneven, shim it out. Reinstall the panel and nail it in the center of the slots, not tight against the edges.
Is vinyl siding fire-resistant?
– Vinyl is not fireproof, but modern vinyl siding meets building codes for fire resistance. In high-fire-risk areas, check local codes. Some jurisdictions require Class A fire-rated materials.
How much does it cost to install vinyl siding?
– Material costs $3–$8 per square foot. Labor adds another $2–$5 per square foot if you hire professionals. A 2,000-square-foot house typically costs $10,000–$25,000 installed, depending on complexity and region.
What if I have gaps between panels?
– Small gaps (less than 1/8 inch) are normal and allow for expansion. Larger gaps indicate misalignment. Check if panels are fully locked into the course below. If not, tap them up with a rubber mallet.
Can I paint vinyl siding?
– Yes, but it’s not recommended. Vinyl is designed to last without paint. If you do paint, use exterior-grade latex paint and expect to repaint every 5–7 years. Painting voids most warranties.
How do I handle vinyl siding around a chimney?
– Use J-channel or metal flashing to frame the chimney. Caulk all seams with silicone. The goal is to direct water away from the chimney, not trap it. If you’re unsure, consult a professional—improper flashing causes serious water damage.


