
Corroded battery terminals are one of those sneaky problems that’ll strand you faster than you’d expect. You go to start your car, and nothing. Or your device just won’t power on. The culprit? White, blue, or green crusty buildup on the metal posts. Learning how to clean corroded battery terminals is honestly one of the easiest fixes you can do yourself—no special skills required, just the right approach and a little patience.
This guide walks you through the process safely, whether you’re dealing with a car battery, a power tool, or any other battery-powered equipment. We’ll cover what causes the corrosion, why it matters, and exactly how to restore those terminals to working order.
What Causes Battery Terminal Corrosion
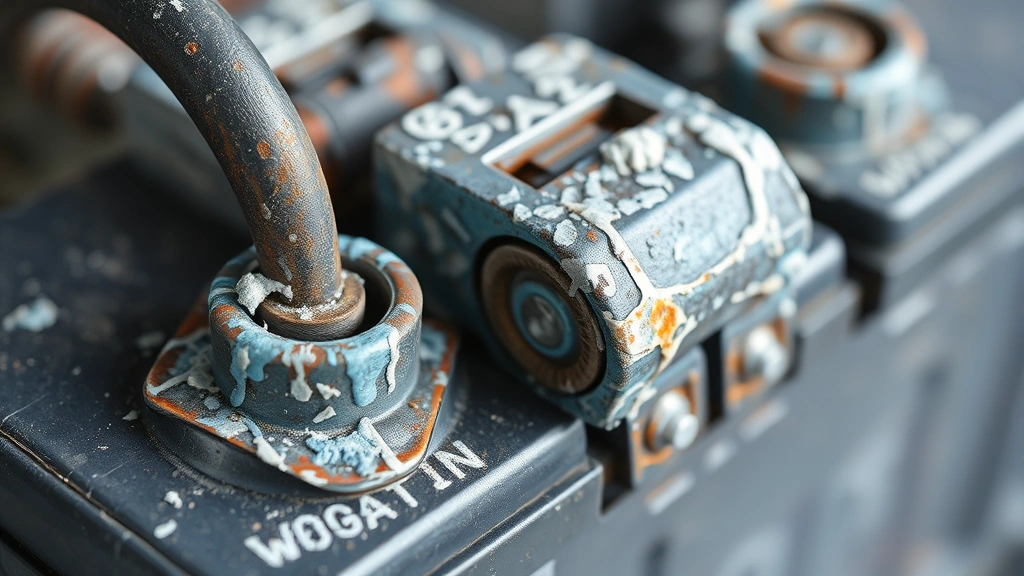
Before you start cleaning, it helps to understand what you’re actually looking at. Battery corrosion happens because of a chemical reaction between the battery’s terminals and the surrounding environment. The terminals are typically made of lead or lead alloy, and when exposed to moisture and oxygen, they oxidize. Add in some battery acid vapor (which happens naturally as batteries charge and discharge), and you get that crusty, crusty buildup.
The color of the corrosion tells you something too. White or light blue corrosion usually means it’s just oxidation—the least aggressive type. Green corrosion typically indicates copper oxidation, which happens when the terminal clamps are made of copper or have copper plating. Red or pink corrosion is rarer but suggests oxidation of the lead itself. No matter the color, the end result is the same: reduced electrical conductivity, which means your battery can’t deliver power efficiently.
This is especially common in cars that sit for extended periods, vehicles in humid climates, or batteries that are already aging. The corrosion acts like an electrical insulator, blocking the current from flowing properly. That’s why your engine cranks slowly or won’t start at all, even though the battery itself might be perfectly fine.
Safety First: Gear and Precautions
Let’s be real: battery acid is nothing to mess with. Even though the corrosion itself isn’t pure acid, you’re still dealing with a caustic environment. Here’s what you need to do before touching anything:
- Wear safety glasses or a face shield. Corrosion particles can flake off and irritate your eyes. Not fun.
- Wear nitrile gloves. These protect your hands from acid residue and battery corrosion particles. Latex works too, but nitrile is more resistant.
- Work in a well-ventilated area. Battery acid vapors exist, and you don’t want to breathe them in for extended periods.
- Never smoke or create sparks near the battery. Battery acid can produce hydrogen gas, which is flammable. This is critical.
- Disconnect the negative terminal first. Always. This cuts the circuit and prevents accidental sparks or shorts.
Safety Warning: If you’re working on a car battery, disconnect the negative (black) terminal before doing anything else. If you accidentally touch both terminals with a metal tool, you’ll create a short circuit that can cause sparks or even an explosion. It sounds dramatic, but it’s real. Take it seriously.
For more detailed safety information, check out OSHA’s guidelines on battery safety, which covers proper handling and protective equipment.
Gather Your Supplies
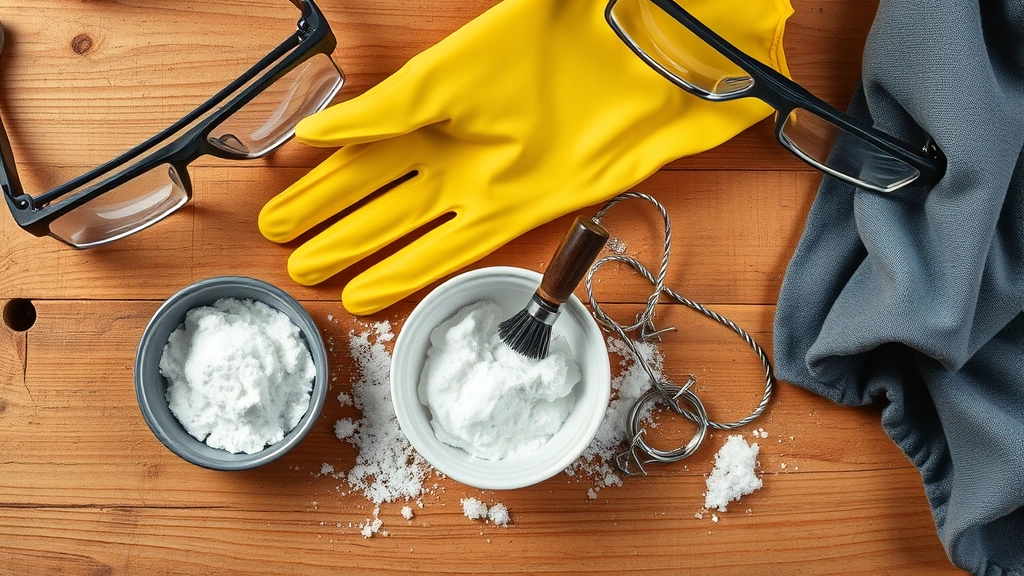
You don’t need much, and most of this stuff is already in your garage or kitchen. Here’s the full list:
- Baking soda – The MVP of corrosion removal. It’s mildly abrasive and neutralizes acid.
- Water – Distilled water is ideal, but tap water works if that’s all you have.
- A wire brush or old toothbrush – For scrubbing away the crusty stuff. A wire brush is more aggressive; a toothbrush is gentler.
- A small bowl or cup – To mix your baking soda paste.
- Nitrile gloves and safety glasses – Non-negotiable.
- A wrench or socket set – To disconnect and reconnect the terminal clamps. Usually a 6mm, 8mm, or 10mm wrench depending on your battery.
- A clean rag or paper towels – For wiping and drying.
- Petroleum jelly or dielectric grease (optional but recommended) – To coat the terminals after cleaning to prevent future corrosion.
That’s it. If you want to get fancy, you can grab a battery terminal cleaner tool (they’re like $5-10), but it’s absolutely not necessary. A wire brush does the job just fine.
How to Remove Corroded Terminals
This is where you need to be methodical. Rushing this step is where most people mess up.
- Turn off the device or vehicle. If it’s a car, make sure the engine is completely cold and the ignition is off.
- Locate the battery. In cars, it’s usually under the hood. In smaller devices, you might need to open a battery compartment.
- Identify the negative terminal. It’s marked with a minus sign (-) and usually has a black cable attached. The positive terminal is marked with a plus sign (+) and has a red cable.
- Disconnect the negative terminal first. Use your wrench to loosen the nut on the negative terminal clamp. Wiggle the clamp gently side to side until it comes free. Don’t yank it—you could damage the terminal post.
- Then disconnect the positive terminal. Same process: loosen the nut, wiggle gently, remove the clamp.
- Set the cables aside. Make sure they don’t touch each other or the battery. If you’re working on a car, you can tuck them away or wrap them loosely with a rag.
Now you’ve got clear access to the corroded terminals. Take a moment and assess the damage. Light corrosion? You’re golden. Heavy corrosion that’s thick and crusty? You’ll need a bit more elbow grease, but it’s still manageable.
The Cleaning Method That Works
Here’s the process that actually works without damaging the battery or the terminal posts:
- Make a paste. In a small bowl, mix baking soda with a little water until you get a thick paste—think peanut butter consistency. You want it thick enough to stick to the terminals without running everywhere.
- Apply the paste generously. Spread it all over the corroded terminals, the cable clamps, and any corroded metal you can see. Don’t be shy. The baking soda will neutralize the acid and start breaking down the corrosion.
- Let it sit for 5-10 minutes. This gives the chemical reaction time to work. You’ll actually see the paste start to bubble slightly as it reacts with the corrosion.
- Scrub with your wire brush. Use firm, circular motions to scrub away the corrosion. You’re not trying to be gentle here—you want to remove as much crusty buildup as possible. The paste will turn darker as it collects the corrosion particles.
- Rinse with water. Use a spray bottle or pour a little distilled water over the terminals to rinse away the paste and loosened corrosion. A damp rag works too if you don’t have a spray bottle.
- Dry thoroughly. This is important. Use a clean rag to dry everything completely. Any moisture left behind can cause corrosion to start again. Don’t skip this step.
- Repeat if necessary. If there’s still visible corrosion after the first round, repeat steps 1-6. Sometimes stubborn corrosion needs two passes.
Pro Tip: If the corrosion is really thick and crusty, you can soak the terminal clamps in a baking soda solution for 15-20 minutes before scrubbing. Just mix baking soda and water in a cup and let the clamps sit in it. This softens the corrosion and makes scrubbing way easier. Just make sure to dry them completely afterward.
For a visual walkthrough of this process, Family Handyman has an excellent step-by-step guide with photos that shows exactly what clean terminals should look like.
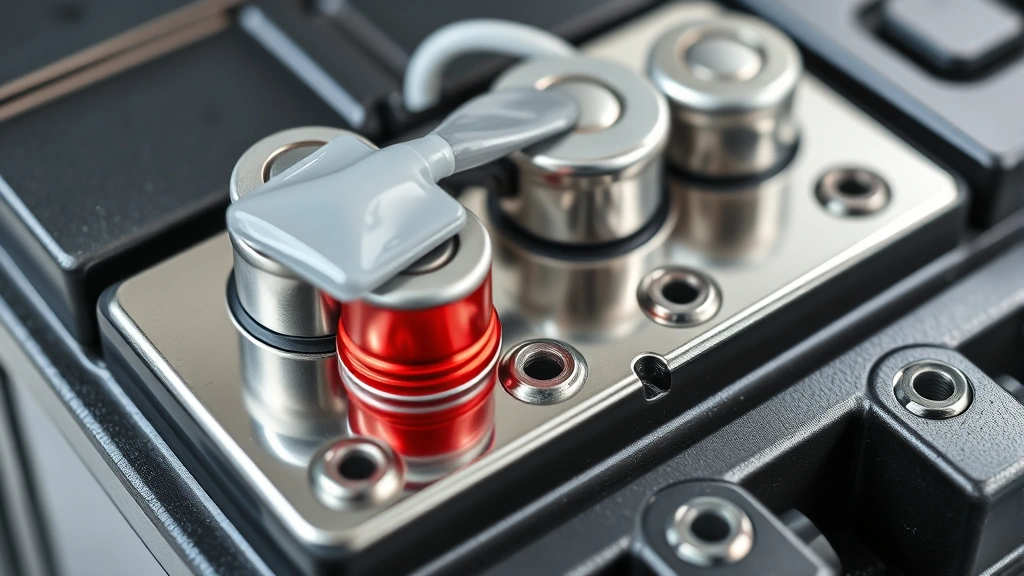
Once you’re done scrubbing and rinsing, the terminals should be shiny and metallic-looking again. If they’re not completely shiny, that’s okay—some light discoloration is fine. What matters is that the crusty corrosion is gone.
Reinstall and Protect
Now that your terminals are clean, it’s time to reconnect everything and add a protective layer to prevent future corrosion.
- Apply dielectric grease (optional but highly recommended). This is a non-conductive, waterproof grease that creates a barrier between the terminal and the environment. Squeeze a small amount onto the clean terminal posts and spread it around with your finger or a rag. This step alone will dramatically reduce future corrosion. If you don’t have dielectric grease, a thin coat of petroleum jelly works too—not as good, but better than nothing.
- Reconnect the positive terminal first. Slide the positive cable clamp onto the positive terminal post. Tighten the nut with your wrench until it’s snug. You want it tight enough that the clamp doesn’t wiggle, but don’t crank it so hard that you crack the terminal post.
- Reconnect the negative terminal. Same process: slide the clamp on, tighten the nut until it’s snug.
- Test the connection. For a car, try starting the engine. For other devices, turn them on and make sure they power up normally. If everything works, you’re done.
The whole reinstallation takes about 5 minutes. The key is making sure the clamps are tight enough to maintain good electrical contact but not so tight that you damage anything.
Prevention Tips to Avoid Future Corrosion
The best part about how to clean corroded battery terminals is that once you’ve done it, you can prevent it from happening again with a few simple habits:
- Keep the battery dry. If you live in a humid climate or your vehicle sits outside, consider a battery cover or terminal cover. These are cheap ($5-15) and dramatically reduce corrosion.
- Apply dielectric grease annually. Once a year, pop open the hood and reapply a thin coat of dielectric grease to the terminals. This is a 5-minute job that pays huge dividends.
- Check the battery regularly. Every few months, take a quick look at the terminals. Catching early corrosion is way easier to deal with than waiting until it’s thick and crusty.
- Keep the battery secure. A loose battery can vibrate and cause the cables to move, which creates micro-abrasions that expose fresh metal to corrosion. Make sure your battery is held firmly in place.
- Address charging issues quickly. If your battery is constantly overcharging or undercharging, it produces more acid vapor, which accelerates corrosion. If you notice your battery is corroding repeatedly, have it tested. It might be a charging system issue, not a battery issue.
- Use a battery charger with a smart mode. Modern chargers prevent overcharging, which reduces acid vapor production and corrosion. If you’re storing a vehicle for the winter, a smart charger is worth the investment.
For more insights on battery maintenance, This Old House’s battery charger reviews include recommendations for keeping your battery in top condition.
Think of dielectric grease like a raincoat for your terminals—it doesn’t stop all weather, but it definitely reduces the damage. That’s the philosophy behind prevention. Small, consistent actions prevent big problems.
Frequently Asked Questions
Can I use vinegar or Coca-Cola to clean corroded battery terminals instead of baking soda?
– Technically, yes. Vinegar and Coca-Cola are both acidic and can dissolve corrosion. But here’s the thing: battery corrosion is already acidic, so adding more acid doesn’t neutralize it—it just dissolves the corrosion into a liquid mess. Baking soda is alkaline, so it actually neutralizes the acid and makes the corrosion easier to remove mechanically. Vinegar and Coke work in a pinch, but baking soda is genuinely better. Plus, baking soda doesn’t smell like vinegar or sticky soda residue afterward.
Is it dangerous to clean battery terminals myself, or should I take it to a professional?
– If you follow the safety steps (disconnect the negative terminal first, wear gloves and glasses, work in a ventilated area), it’s absolutely safe to do yourself. Professionals charge $50-150 for this job, and it takes them 20 minutes. You can do it in your driveway for the cost of baking soda and maybe some dielectric grease. The only time you should take it to a professional is if the corrosion is so severe that the terminal post is damaged or cracked, or if you’re not comfortable working with the battery.
What if the corrosion comes back immediately after I clean it?
– This usually means one of two things: either you’re not applying dielectric grease or a protective coating (which you should do every time), or there’s an underlying issue with your charging system. If the corrosion comes back within a few weeks even with protective grease, have your battery and alternator tested. Overcharging or a failing battery can produce excess acid vapor, which accelerates corrosion. It’s worth diagnosing because it might save you from a dead battery down the road.
Can I clean battery terminals while the battery is still connected?
– No. Absolutely not. If you accidentally touch both terminals or a terminal and the metal frame with a metal tool while the battery is connected, you’ll create a short circuit. This can cause sparks, damage to the tool, or even an explosion if hydrogen gas is present. Always disconnect the negative terminal first, and don’t reconnect anything until you’re completely done cleaning.
What’s the difference between battery corrosion and sulfation?
– Corrosion is the crusty buildup on the outside of the terminals caused by oxidation and acid vapor. Sulfation is a chemical process inside the battery itself where lead sulfate crystals form on the battery plates. You can see corrosion; sulfation happens inside and reduces battery capacity. Cleaning the terminals won’t fix sulfation, but it will restore electrical connection if corrosion was preventing power delivery. If your battery is sulfated, you typically need to replace it.
Do I need to replace the battery after cleaning the terminals?
– No, not unless the battery itself is dead or dying. Cleaning the terminals restores electrical connection, which often makes an old battery work again. However, if the battery won’t hold a charge or only works when the engine is running, cleaning the terminals won’t fix that. The battery itself is the problem, and it needs to be replaced. A Bob Vila battery comparison can help you choose a replacement if needed.
Can I use a power drill with a wire brush to speed up the cleaning?
– You can, but be careful. A power drill is fast, but it’s also easy to apply too much pressure and damage the terminal post. If you go this route, use a low speed and let the brush do the work—don’t press hard. Hand scrubbing with a wire brush is slower but gives you better control and is less likely to cause damage. For most people, hand scrubbing is the safer choice.


