
A dead GPU can wreck more than just your graphics. When a graphics card fails—whether from power surges, overheating, or physical damage—it can take your motherboard with it. Knowing how to check motherboard damage from GPU issues is critical if you want to avoid dropping $300+ on a new board when a simple fix might work. This guide walks you through the inspection process like a technician would, no guessing required.
Visual Inspection: What to Look For
Before you touch anything, power down completely and unplug the system. Wait 5 minutes—seriously. Capacitors hold charge and can zap you or damage components if you’re careless. Once it’s safe, remove the GPU carefully and set it aside.
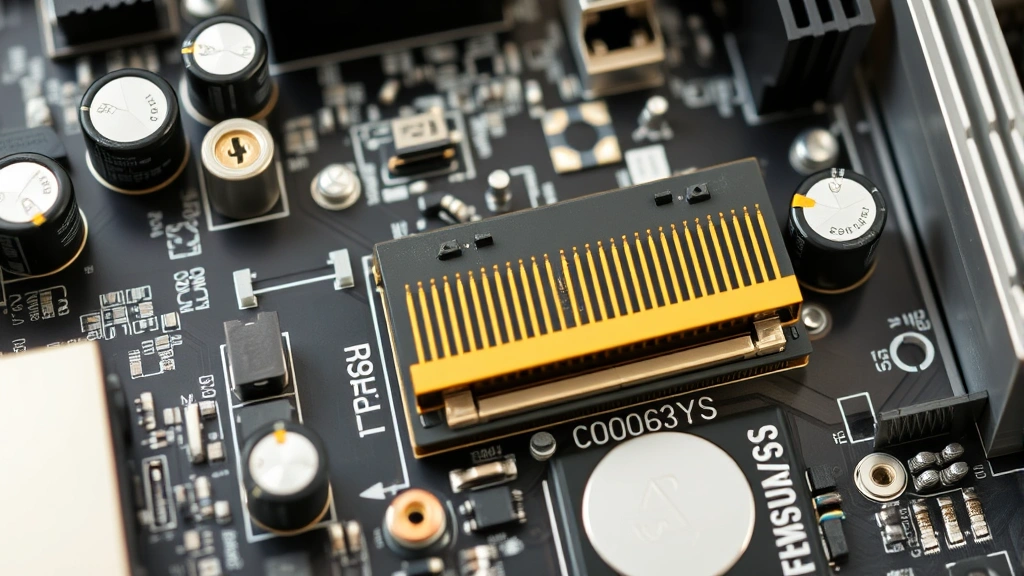
Now grab a flashlight (your phone’s light works) and look at the motherboard around the PCIe slot where the GPU was installed. You’re hunting for:
- Scorch marks or blackening on the PCIe slot or nearby circuitry—this is a dead giveaway of electrical arcing or short circuits
- Melted plastic on the slot itself or on the retention clip—heat damage from power delivery failures
- Visible cracks in the circuit board traces around the slot
- Corrosion or white/green crusty buildup on capacitors or power delivery components (VRMs) near the slot
- Bent or missing pins on the motherboard’s connector contacts
Look especially hard at the power delivery area—the capacitors and inductors clustered near the GPU slot. A failed GPU often pulls too much current or causes voltage spikes that fry these components first. Think of them like circuit breakers; they take the hit so the rest of the board doesn’t.
Pro Tip: Use a magnifying glass if you have one. Hairline cracks in traces are easy to miss with the naked eye, but they’ll kill your motherboard just as dead as a scorched component.
Don’t assume a clean-looking board is fine. Damage can be internal or on the back side of the PCB (printed circuit board). You’ll need to test it to be sure.
Testing Power Delivery to the GPU Slot
The PCIe slot gets power from the motherboard’s voltage regulator module (VRM)—a cluster of capacitors and inductors that deliver stable power to the GPU. If the GPU shorted out or drew excessive current, it likely damaged this section.
Here’s how to test it without a fancy multimeter (though one helps):
- Locate the VRM components near the PCIe slot. They’re usually labeled on the motherboard silkscreen (the white text) or visible as small cylindrical (capacitors) and cube-shaped (inductors) components.
- Check for physical damage to these parts—leaking capacitors look like they’ve burst open or have brown gunk leaking out. That’s a hard failure.
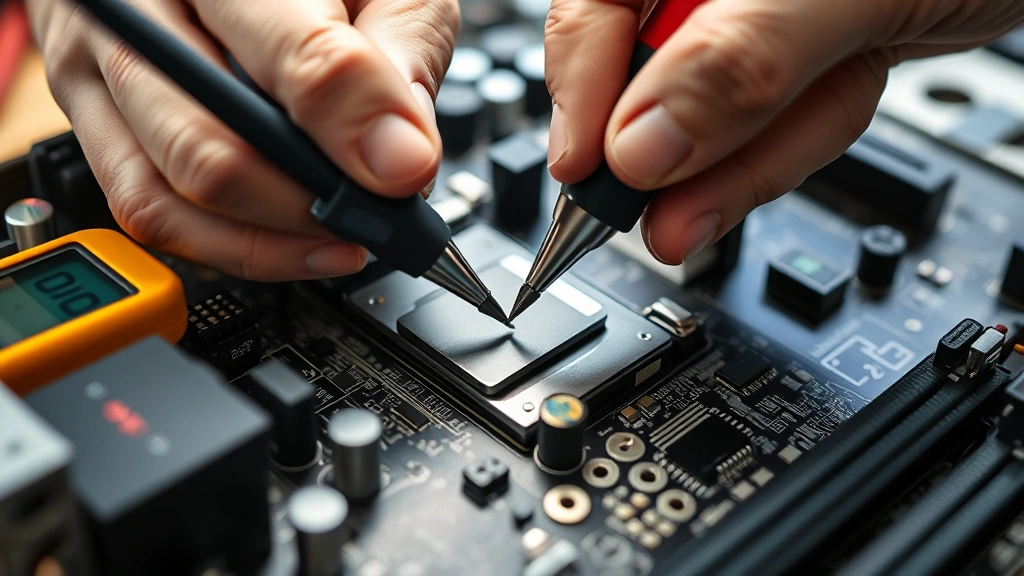
- If you have a multimeter: Set it to resistance mode (Ohms). Probe across a capacitor’s leads. A healthy capacitor reads infinite resistance (∞) or very high resistance. A shorted one reads near zero.
- Listen for beeps or pops when you power on (if you dare try). A dying VRM often produces audible coil whine or even buzzing sounds—that’s inductors vibrating under stress.
If capacitors are leaking or a multimeter shows low resistance across the VRM, that section is toast. You’re looking at a motherboard replacement or a risky component-level repair.
For a deeper dive into power delivery and component testing, Family Handyman’s electronics section has solid foundational guides on reading electrical components, though they focus more on household circuits.
Checking for Thermal and Burn Damage
GPU failure often means the card overheated before it died. That heat conducts to the motherboard, especially around the PCIe slot and power delivery area. Thermal damage can be subtle or catastrophic.
What thermal damage looks like:
- Discoloration around the slot—yellowing, browning, or darkening of the PCB material itself
- Solder joints that look dull or grainy instead of shiny (cold solder joints—they’ve cracked internally)
- Delamination—the layers of the PCB separating from each other, visible as bubbling or peeling
- Burnt smell when you power on (that acrid, plastic-burning odor)
Here’s the real talk: thermal damage is often irreversible. The PCB material (usually FR4 fiberglass composite) loses structural integrity when overheated. Even if components still work, the board becomes fragile and prone to future failures.
Safety Warning: If you smell burning when you power on, stop immediately. Disconnect power and let the board cool. A burning smell means active electrical failure—continuing to power it risks fire or toxic fumes.
If you find thermal damage, document it with photos. You’ll need this for warranty claims or to justify a replacement to yourself.
Capacitor and Component Failure Signs
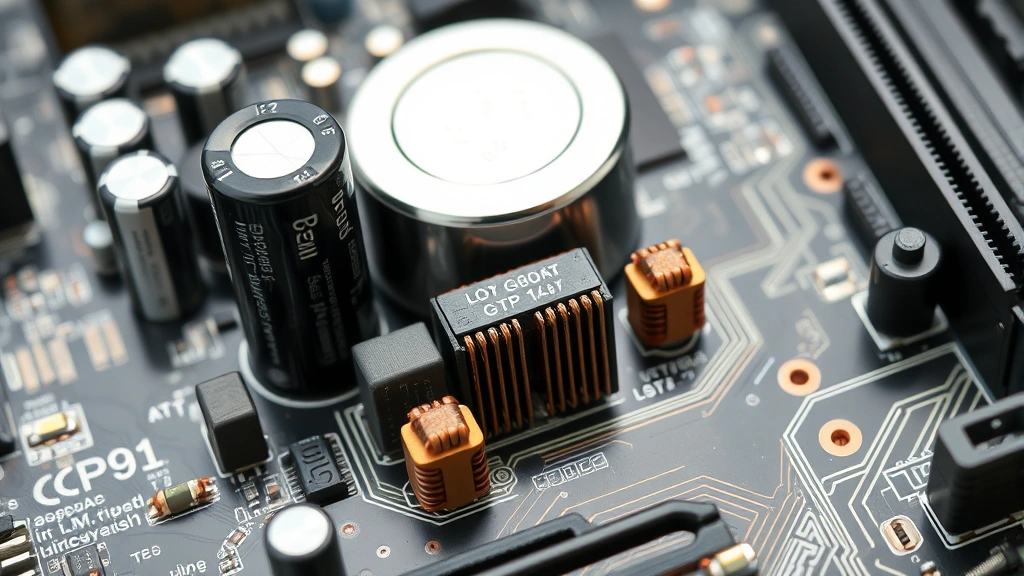
Capacitors are the first casualties when a GPU goes bad. They’re designed to smooth out voltage fluctuations, and a shorted GPU sends wild voltage spikes through them. When they fail, they either leak or explode.
Signs of capacitor failure:
- Bulging top—the cylindrical cap looks swollen, like it’s about to pop
- Leaking electrolyte—brown or clear liquid oozing from the top or bottom
- Burst or cracked casing—the component is literally broken open
- Discoloration—the component looks charred or darkened
One or two bad capacitors might be replaceable by someone with soldering skills, but if you see multiple failures, the damage is systemic. The motherboard took a serious hit.
Also check inductors (the small cube-shaped components) and resistors. They’re less obvious when they fail, but a burnt resistor will look blackened or cracked. Use your multimeter to test them if you’re comfortable with electronics—a burnt resistor reads open circuit (infinite resistance) instead of its rated value.
For a primer on component-level electronics, This Old House isn’t the obvious choice, but their electrical guides cover circuit fundamentals that apply here too.
Software Diagnostics and BIOS Testing
If the visual inspection looks okay, the board might have hidden damage. Software diagnostics can catch electrical failures that aren’t visible.
Step 1: Try booting without the GPU.
Install the motherboard in the case (if it isn’t already) and boot it up without the GPU installed. Use integrated graphics if your CPU has it (most modern ones do). If the system boots and runs normally, that’s a good sign—the motherboard’s core power delivery isn’t completely fried.
Step 2: Check BIOS for PCIe errors.
Enter BIOS (usually Del or F2 during startup) and look for:
- PCIe slot status—some boards report whether slots are detected
- Power delivery warnings or errors in the System Information section
- Voltage readings for the PCIe power rails (if your BIOS shows them)
Abnormal voltages (way too high or too low) suggest VRM damage.
Step 3: Run CPU-Z or GPU-Z (without the GPU).
These free tools show real-time voltage and power delivery data. Run them and watch for:
- Voltage spikes or instability in PCIe-related rails
- Error messages about power delivery
- System crashes when the software probes the PCIe bus
If the system crashes when scanning PCIe, the slot or its power delivery is damaged.
Step 4: Test with a different GPU (if possible).
Borrow a cheap, old GPU from a friend and try installing it. If it works, the motherboard is likely fine—your original GPU just failed. If the system crashes or doesn’t detect the new card, the PCIe slot or its power delivery is damaged.
PCIe Slot Damage Assessment
The PCIe slot itself can be damaged in several ways: physical trauma (bent pins from rough installation), corrosion (moisture or oxidation), or electrical damage (power surges or shorts).
Visual checks:
- Look down the slot with a flashlight. The gold connector pins should be straight and evenly spaced. Bent or misaligned pins are visible damage.
- Check for corrosion—white, green, or blue crusty buildup on the pins. This happens when moisture gets into the slot.
- Look for debris or foreign objects stuck in the slot—solder splatter, dust, or broken pieces of the GPU connector.
Electrical checks:
If you have a multimeter, test continuity between the slot pins and the corresponding traces on the motherboard. A broken trace (from heat or physical damage) will show open circuit. This requires some circuit board knowledge, so only attempt if you’re comfortable with it.
Bent pins can sometimes be carefully straightened with a precision tool, but it’s risky. Broken traces are permanent—you’d need to jumper them with tiny wires, which is advanced repair work.
Pro Tip: If the slot has bent pins but no thermal damage, straightening them is worth trying. Use a small jeweler’s screwdriver or a dental pick to gently push the pin back into alignment. Do this with the board powered off and unplugged.
What to Do If You Find Damage
So you’ve inspected the motherboard and found damage. Here’s your action plan:
Minor damage (one or two bad capacitors, slight discoloration):
If you’re comfortable soldering, you can replace individual capacitors. Order the exact replacement parts (check the capacitor’s markings for value and voltage rating) and desolder the old one using a solder sucker or desoldering braid. This is risky—you can damage the board further if you overheat it—but it’s cheaper than a new motherboard.
For someone without soldering experience, this isn’t worth attempting. A botched repair is more expensive than a replacement board.
Moderate damage (multiple capacitors, minor scorch marks, PCIe slot issues):
The board is likely not worth repairing. A replacement motherboard costs $150–$300 depending on the model. Even if a repair shop could fix it, labor costs will exceed the board’s value.
Check if your board is still under warranty. If the GPU failure caused the damage and the GPU was defective, the GPU manufacturer might cover it. Document everything with photos.
Severe damage (massive scorch marks, multiple failed components, melted plastic, burnt smell):
The board is dead. Recycle it responsibly (electronics recyclers will take it) and buy a replacement. Don’t attempt repair.
Before buying a new board, figure out what killed the GPU in the first place. Was it overclocking? Poor cooling? A power supply failure? If you don’t fix the root cause, your new GPU and motherboard will fail the same way. For overclocking damage specifically, check out our guide on how to overclock CPU to understand safe practices.
Also, inspect your power supply. A failing PSU can send dirty power to the GPU and motherboard, causing cascading failures. If your PSU is old (5+ years) or shows signs of failure, replace it too.
Prevention for next time:
- Keep your GPU clean and cool. Dust buildup causes overheating, which stresses the motherboard.
- Don’t overclock aggressively. The motherboard’s power delivery has limits, and pushing it causes capacitor failure.
- Use a quality PSU rated for your system’s power draw. Cheap PSUs deliver unstable power that damages components.
- Ensure proper case airflow. Hot GPUs heat the motherboard, accelerating component degradation.
For more on power-related issues, our guide on cleaning battery corrosion covers electrical damage and corrosion assessment principles that apply to motherboards too.
If you’re dealing with a system-wide failure and need to diagnose multiple components, Bob Vila’s electronics troubleshooting section has practical diagnostic approaches.
Frequently Asked Questions
Can a failed GPU destroy a motherboard?
– Yes, absolutely. A shorted GPU can send power surges through the PCIe slot, frying the motherboard’s power delivery components (capacitors, inductors, voltage regulators). It’s one of the most common ways motherboards fail. The damage usually concentrates around the GPU slot and power delivery area.
How do I know if the PCIe slot is damaged or just the GPU?
– Test with a different GPU. If the new GPU works, your slot is fine and only the original GPU failed. If the new GPU doesn’t work or the system crashes, the slot or its power delivery is damaged. You can also visually inspect the slot for bent pins, corrosion, or scorch marks.
Is it worth repairing a motherboard with capacitor damage?
– Only if it’s one or two capacitors and you can solder. If multiple capacitors failed, the damage is systemic and the board is likely to fail again soon. A replacement motherboard ($150–$300) is usually cheaper than professional repair labor.
What does thermal damage to a motherboard look like?
– Discoloration (yellowing or browning) around the GPU slot, dull or grainy solder joints, delamination (bubbling or peeling of the PCB layers), and a burnt smell when powered on. Thermal damage is usually permanent and makes the board fragile.
Can I use the motherboard if it has minor scorch marks?
– Maybe, but it’s risky. Minor scorch marks suggest the board survived an electrical event, but internal damage might not be visible. Test it thoroughly with software diagnostics and a borrowed GPU before trusting it with expensive hardware. If it crashes or behaves erratically, it’s not safe to use.
What causes a GPU to fail and damage the motherboard?
– Overheating, power surges from a failing PSU, aggressive overclocking, manufacturing defects, or physical damage (dropping the card or bending it during installation). Overheating and power delivery issues are the most common culprits.
Should I replace the power supply too?
– If your PSU is old (5+ years) or shows signs of failure (fan not spinning, coil whine, burning smell), yes. A failing PSU delivers unstable power that damages GPUs and motherboards. It’s not worth gambling with a new motherboard if the PSU is suspect.
Can I straighten bent PCIe slot pins?
– Maybe. If the pins are bent but not broken, you can carefully straighten them with a small jeweler’s screwdriver or dental pick. Do this with the board powered off and unplugged. It’s risky—you can damage the board further—but it’s cheaper than replacing the slot or the whole board.
What’s the difference between a shorted GPU and a failed GPU?
– A shorted GPU has an internal electrical short that causes it to draw excessive current, which damages the motherboard. A failed GPU simply stops working but doesn’t necessarily damage the motherboard. A shorted GPU is much worse because the damage spreads to the board.
How do I prevent this from happening again?
– Keep your GPU clean and cool, don’t overclock aggressively, use a quality PSU rated for your system, ensure proper case airflow, and monitor temperatures regularly. Most GPU and motherboard failures are preventable with basic maintenance and conservative settings.


