
McAfee antivirus is one of those programs that installs easy but leaves like it owns your computer. You hit uninstall, restart your machine, and boom—leftover files, registry entries, and lingering processes are still hanging around like an unwanted houseguest. This guide walks you through how to uninstall McAfee properly, whether you’re ditching it for another antivirus or just want a clean slate.
The frustration is real. McAfee buries itself deep in Windows, and a standard uninstall often leaves behind fragments that slow down your system or conflict with new security software. I’ve seen people reinstall Windows just to get rid of McAfee completely. We’re not doing that. Instead, we’ll use McAfee’s own removal tool, manual cleanup, and some registry tweaking to get your system completely free of it.
Why McAfee Is Hard to Remove
McAfee isn’t intentionally evil—it’s just aggressive about protecting your system. The software integrates into Windows at multiple levels: kernel drivers, scheduled tasks, browser extensions, and registry entries. When you uninstall, Windows only removes the visible program folder. Everything else? Still there, running in the background.
Think of it like removing a tree. You can cut down the trunk (uninstall), but the roots are still in the ground (system files), and seeds are scattered everywhere (registry entries). A proper removal gets the whole tree out.
The real problem is that McAfee sometimes locks its own files while running, preventing a clean uninstall. And if you’re switching to another antivirus, having McAfee fragments left behind can cause conflicts—both programs trying to protect your system creates slowdowns and errors.
Before we start, check your Windows version because the removal process has slight differences between Windows 10 and Windows 11.
Method 1: Standard Uninstall (The Easy Way)
Start here. Sometimes the simple approach actually works. If you’re lucky, McAfee will uninstall cleanly without leaving junk behind.
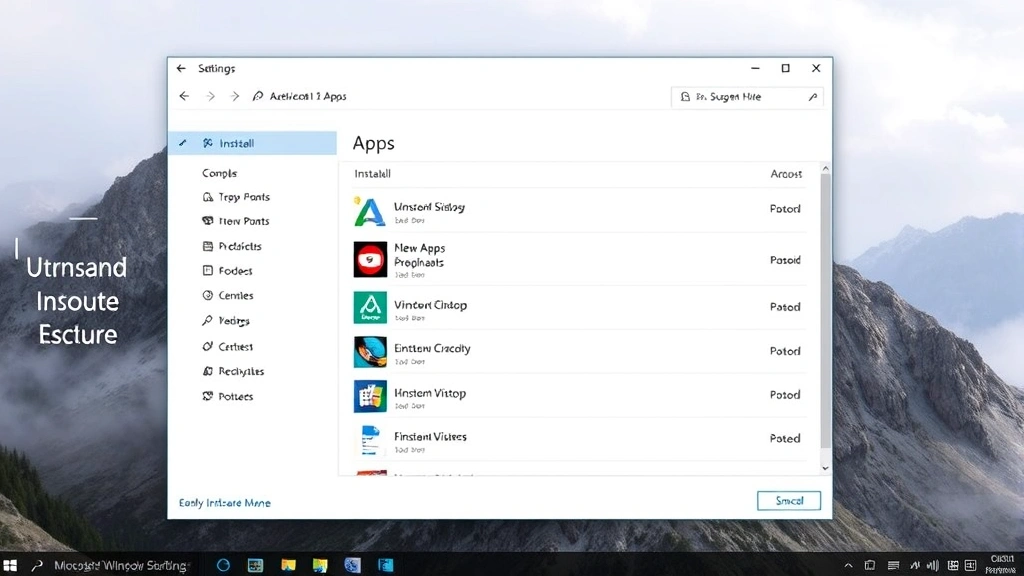
- Open Settings. Press Windows Key + I or click the Start menu and search for “Settings.”
- Navigate to Apps. Click “Apps” in the left sidebar, then “Installed apps.”
- Find McAfee. Scroll down until you see McAfee Total Protection, McAfee LiveSafe, or whatever McAfee product you have. (There might be multiple entries—McAfee WebAdvisor, McAfee Security, etc.)
- Click the three dots. Next to the McAfee entry, click the menu button (three vertical dots).
- Select Uninstall. A dialog appears asking if you’re sure. Confirm.
- Follow the prompts. McAfee’s uninstaller will run. Let it complete fully—don’t interrupt it.
- Restart your computer. This is critical. Restart before moving to the next step.
After restart, open Settings again and verify McAfee is gone from the installed apps list. If it is, you might be done. But don’t celebrate yet—move to the verification section below to make sure no remnants are hiding.
Method 2: McAfee Removal Tool (The Right Way)
If Method 1 didn’t fully work, or if you want to be thorough from the start, use McAfee’s official removal tool. This is what tech support actually recommends.
Important: You need to disable McAfee’s real-time protection before running this tool, otherwise it might block the removal process. Here’s how:
- Open McAfee. Click the McAfee icon in your system tray (bottom right of taskbar) or search for “McAfee” in the Start menu.
- Find Settings or Preferences. Look for a gear icon or “Settings” button.
- Disable Real-Time Scanning. Find “Real-Time Scanning” or “On-Access Scanning” and toggle it off. McAfee will ask why—select “Temporarily” or set a time limit.
- Download the MCPR tool. Go to McAfee’s official support page and search for “MCPR” (McAfee Consumer Product Removal). Download the tool directly from McAfee—don’t trust third-party sites.
- Run as Administrator. Right-click the downloaded MCPR.exe file and select “Run as Administrator.”
- Accept the license agreement. Read it (or don’t—it’s boilerplate), then click “Accept and Remove.”
- Wait for completion. The tool will remove McAfee files. This takes 5-15 minutes depending on how deeply McAfee installed itself.
- Restart immediately. When the tool finishes, restart your computer right away. Don’t skip this.
The MCPR tool is more aggressive than the standard uninstaller. It removes more registry entries and system files. This is the nuclear option that actually works most of the time.
Method 3: Manual Cleanup (The Thorough Way)

After using Method 1 or 2, there are still things you can clean up manually. This is optional but recommended if you want a truly spotless system.
Step 1: Remove Leftover Folders
McAfee leaves behind folders even after uninstalling. You need to delete these manually:
- Open File Explorer. Press Windows Key + E.
- Navigate to Program Files. In the address bar, type: C:\Program Files
- Look for McAfee folders. Search for any folder starting with “McAfee” or “Common Files\McAfee.” Right-click and delete. If Windows says a file is in use, skip it for now and try again after restart.
- Check Program Files (x86). Repeat the process in C:\Program Files (x86)
- Check AppData. Type C:\Users\[YourUsername]\AppData\Local and look for McAfee folders. Delete them.
If you get “access denied” errors, don’t force it. Some files are protected by Windows. They’ll eventually become harmless after a few restarts.
Step 2: Clean the Registry
This is where McAfee really hides. Registry entries can cause slow startups and conflicts with other antivirus software. Use the built-in Registry Editor:
- Open Registry Editor. Press Windows Key + R, type regedit, and press Enter. Click “Yes” when Windows asks for permission.
- Backup the registry first. This is important. Go to File > Export. Save a backup to your Desktop. If something goes wrong, you can restore it.
- Use Find function. Press Ctrl + F and search for “McAfee.”
- Delete entries carefully. When you find a McAfee entry, right-click and delete it. Do NOT delete anything else. Only delete keys and values that have “McAfee” in the name.
- Search multiple times. After deleting an entry, press F3 or Ctrl + F again to find the next one. Keep going until no more McAfee entries exist.
Safety Warning: The registry is powerful and dangerous. One wrong deletion can break Windows. If you’re not comfortable with this, skip it. The MCPR tool already cleaned most of what matters.
Step 3: Remove Browser Extensions
McAfee installs browser extensions in Chrome, Firefox, and Edge. These can slow down browsing:
- Chrome: Click the three dots (top right) > “Extensions” > Find McAfee WebAdvisor or similar > Click the trash icon.
- Firefox: Click the menu button (top right) > “Add-ons” > “Extensions” > Find McAfee > Click “Remove.”
- Edge: Click the three dots (top right) > “Extensions” > Find McAfee > Click the three dots next to it > “Remove.”
While you’re in browser settings, check your homepage and search engine. McAfee sometimes changes these. Reset them back to your preference.
Step 4: Disable Scheduled Tasks
McAfee creates Windows scheduled tasks that run in the background even after uninstall:
- Open Task Scheduler. Press Windows Key + R, type taskschd.msc, and press Enter.
- Navigate to Task Scheduler Library. In the left panel, expand “Task Scheduler Library.”
- Search for McAfee tasks. Look through the folders for anything with “McAfee” in the name. Right-click and select “Delete.”
- Check common locations: Look in “Microsoft\Windows\Application Experience,” “Microsoft\Windows\Autochk,” and “Microsoft\Windows\Defrag.” McAfee sometimes hides tasks here.
If you’re unsure about a task, don’t delete it. Only delete tasks you’re confident are McAfee-related.
Checking Your Windows Version First
Before diving into removal, knowing your Windows version helps because some steps vary slightly. Check your Windows version quickly:
- Press Windows Key + R.
- Type winver and press Enter.
- Look at the “Version” line. You’ll see “Windows 10” or “Windows 11.”
Windows 11 has a slightly cleaner Settings interface, but the uninstall process is essentially identical. The registry and file locations are the same.
Post-Removal Verification Steps
After uninstalling, verify that McAfee is truly gone. Leftover processes can still run in the background.
Check Task Manager
- Open Task Manager. Right-click the taskbar and select “Task Manager” (or press Ctrl + Shift + Esc).
- Look at running processes. Click the “Processes” tab. Search for anything with “McAfee” in the name. If you find any, right-click and select “End Task.”
- Check startup programs. Click the “Startup” tab. If McAfee appears here, right-click it and select “Disable.”
Check Services
McAfee runs background services that might persist:
- Open Services. Press Windows Key + R, type services.msc, and press Enter.
- Look for McAfee services. Scroll through the list looking for anything with “McAfee” in the name.
- Disable them. Right-click each McAfee service and select “Properties.” Change “Startup type” to “Disabled” and click “Stop.” Then click “Apply” and “OK.”
Run an Antivirus Scan
Install a different antivirus (Windows Defender is built-in and free) and run a full system scan. This will catch any McAfee files or malware that might have been hiding:
- Windows Defender (built-in): Click the Windows Security icon in the system tray > “Virus & threat protection” > “Run a scan.” Choose “Full scan” and let it run (this takes 30 minutes to an hour).
- Alternative: Malwarebytes. Download the free version from Malwarebytes.com, install it, and run a full scan. This is excellent at catching remnants that Windows Defender misses.
Troubleshooting Stuck Installations
Sometimes McAfee refuses to uninstall. Here’s what to do:
McAfee Won’t Uninstall at All
Cause: McAfee is locked by a running process or Windows Update is running.
Fix:
- Restart your computer in Safe Mode. Press Windows Key + I to open Settings, go to “System” > “Recovery” > “Restart now” (under “Advanced startup”). Choose “Troubleshoot” > “Advanced options” > “Startup Settings” > “Restart.” When your computer restarts, press 4 for Safe Mode.
- In Safe Mode, run the MCPR removal tool again. McAfee processes won’t be running, so the tool can remove files more effectively.
- Restart normally and verify removal.
Uninstall Hangs or Gets Stuck
Cause: McAfee is trying to scan files during uninstall, or a Windows service is blocking it.
Fix:
- Force-quit the uninstaller. Press Ctrl + Alt + Delete, open Task Manager, find the uninstall process (usually named “unins000.exe” or similar), and click “End Task.”
- Wait 30 seconds, then restart your computer.
- Try uninstalling again using the MCPR tool in Safe Mode (see above).
“McAfee Agent” Service Won’t Stop
Cause: McAfee’s background service is protected.
Fix:
- Open Services (press Windows Key + R, type services.msc).
- Find “McAfee Agent” or similar.
- Right-click it and select “Properties.”
- Change “Startup type” to “Disabled.”
- Click “Stop” button, then “Apply” and “OK.”
- Restart your computer.
- Try uninstalling again.
Frequently Asked Questions
Is it safe to manually delete McAfee files from Program Files?
– Mostly yes, but be careful. Only delete folders with “McAfee” in the name. Don’t delete anything else. If Windows says a file is in use, leave it alone and try again after restarting. The MCPR tool is safer because it knows exactly what to remove.
Will uninstalling McAfee leave my computer unprotected?
– No. Windows has built-in antivirus called Windows Defender (or Windows Security). It activates automatically once McAfee is gone. You’ll be protected, though Windows Defender is more basic than premium antivirus. If you want stronger protection, install a different antivirus like Bitdefender or Kaspersky before uninstalling McAfee.
How long does the MCPR tool take to run?
– Typically 5-15 minutes depending on how much McAfee installed itself. Don’t interrupt it or close the window. Let it complete fully, even if it seems stuck for a few minutes.
Can I uninstall McAfee if I forgot my admin password?
– Not easily. You need administrator rights to uninstall antivirus software. If you forgot your password, you’ll need to reset it through your Microsoft account or use Windows password reset tools. This is beyond the scope of this guide, but search for “Windows password reset” for options.
What if McAfee uninstalls but then reinstalls itself?
– This is rare but happens if McAfee has a scheduled task that auto-reinstalls it. Open Task Scheduler (press Windows Key + R, type taskschd.msc) and delete any McAfee-related tasks. Also check your Downloads folder—if the McAfee installer is still there, delete it.
Should I use a third-party uninstaller tool like Revo Uninstaller?
– Revo Uninstaller and similar tools can help, but the MCPR tool is better because it’s made by McAfee specifically for McAfee. Third-party tools sometimes miss important files. Use MCPR first, then Revo if you want extra cleanup.
Is it necessary to restart after uninstalling?
– Yes. Restarting clears McAfee processes from memory and allows Windows to clean up file locks. Without restarting, some files might still be in use and can’t be fully removed. Always restart before verifying the uninstall.
Can I uninstall McAfee while using another antivirus?
– Yes, but do it carefully. Having two antivirus programs running simultaneously causes slowdowns and conflicts. Disable real-time scanning in McAfee first (see Method 2 above), then uninstall it. After it’s gone, enable the new antivirus. Don’t overlap them.
What does “McAfee WebAdvisor” do, and do I need to remove it separately?
– WebAdvisor is a browser extension that warns you about dangerous websites. It installs as a separate component. The MCPR tool removes it, but if it lingers, manually remove it from your browsers (see Step 3 under Method 3). It’s harmless if left behind, but it slows down browsing slightly.
Will uninstalling McAfee affect my computer’s performance?
– Absolutely yes—in a good way. McAfee is resource-heavy. After uninstalling, you’ll notice faster startup times, quicker browsing, and less lag. Your computer will feel snappier because McAfee isn’t constantly scanning in the background.


