

Listen, if you’ve ever tried to make caramel popcorn and ended up with a burnt, clumpy mess—or worse, a bowl of popcorn that tastes like sweetened cardboard—you’re not alone. The thing is, how to make caramel popcorn isn’t actually complicated. It just requires understanding a few key principles that separate the sticky-sweet stuff you crave from disaster. I’m going to walk you through exactly how to make caramel popcorn that rivals anything from a fancy candy shop, using techniques that actually work.
The real secret? It’s not some fancy ingredient or expensive equipment. It’s controlling your heat, timing your caramel right, and knowing how to coat popcorn evenly without turning it into a brick. Once you nail this, you’ll never buy the bagged stuff again.
Getting Your Popcorn Base Right
Before you even think about caramel, you need good popcorn. And I mean really good popcorn—not the stale stuff that’s been sitting in your pantry for six months.
Here’s the deal: fresh popcorn kernels pop better, they’re fluffier, and they’ll hold caramel coating way better than old kernels. Old kernels have lost moisture, so they pop smaller and denser. When you try to coat them with caramel, you end up with uneven coverage and a grainy texture.
Your popcorn options:
- Air-popped popcorn – This is your best bet. Use an air popper or the microwave method. Air-popped popcorn is light, fluffy, and absorbs caramel evenly. No oil means the caramel sticks better.
- Stovetop popping – Pop kernels in a pot with a little coconut oil or butter. This works fine, but the oil can sometimes interfere with caramel adhesion if you’re not careful.
- Microwave bags – Honestly? Skip these. They’re convenient, but the seasoning and oils in pre-made bags mess with your caramel coating.
For how to make caramel popcorn, I recommend starting with about 8-10 cups of freshly popped popcorn. That’s roughly 3-4 tablespoons of kernels, depending on your popper. Pop it fresh, let it cool for a minute or two, then remove any unpopped kernels (those will break your teeth, trust me).
Pro Tip: If you’re using stovetop-popped popcorn with oil, spread it on a baking sheet and let it sit for 5 minutes to cool completely. This helps the caramel set better and prevents soggy popcorn.
Making the Perfect Caramel Sauce
This is where most people mess up. They either burn the caramel (it tastes bitter and acrid) or they don’t cook it long enough (it stays soft and sticky instead of hardening). The key to how to make caramel popcorn is understanding caramel chemistry.
Caramel is just sugar that’s been heated until it melts and turns brown. The longer you cook it, the darker and more bitter it becomes. For popcorn, you want a medium-dark amber color—dark enough for deep flavor, but not so dark it tastes burnt.
Here’s the recipe for caramel sauce:
- 1 cup brown sugar (packed)
- 6 tablespoons butter
- ¼ cup light corn syrup
- ½ teaspoon salt
- ½ teaspoon vanilla extract
- ¼ teaspoon baking soda
Steps to make the caramel:
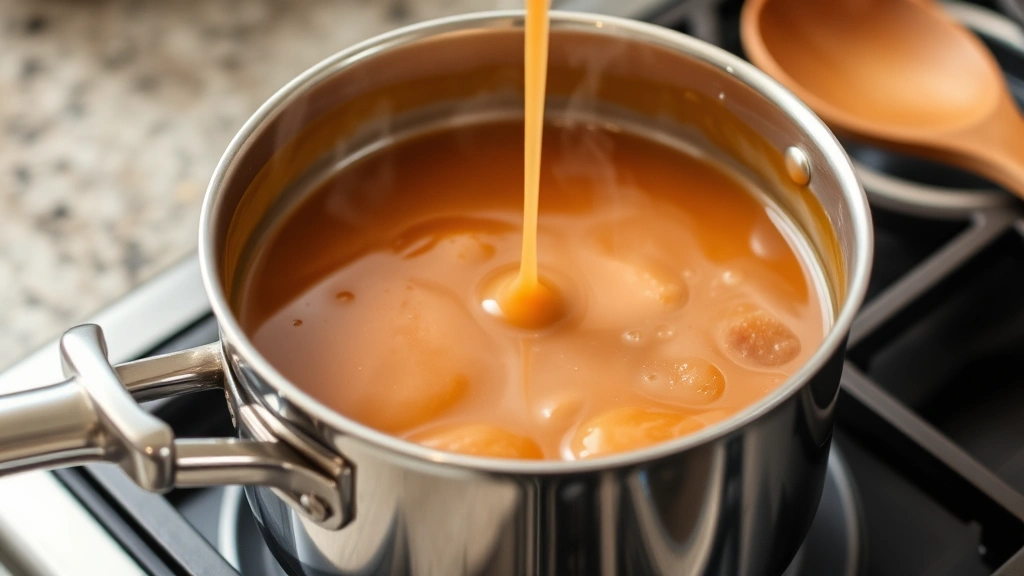
- Combine in a saucepan: Add brown sugar, butter, and corn syrup to a medium saucepan. The corn syrup prevents crystallization—think of it like insurance against a grainy caramel.
- Heat over medium: Stir constantly until the mixture reaches a boil. This usually takes 3-4 minutes. You’re looking for a full rolling boil, not just tiny bubbles around the edges.
- Stop stirring: Once it’s boiling, stop stirring and let it cook for exactly 1 minute. Set a timer. This is crucial—this minute is where the caramel develops its color and flavor.
- Remove from heat: Take the pan off the heat immediately. The residual heat will continue cooking the caramel slightly.
- Add salt and vanilla: Stir in salt and vanilla extract. Be careful—it might bubble slightly.
- Add baking soda: This is the secret ingredient. The baking soda reacts with the caramel, creating tiny air bubbles that make the coating crispy instead of chewy. Stir it in—it’ll foam up. That’s normal.
Your caramel should be the consistency of thick honey. If it’s too thick, you can thin it slightly with a teaspoon of water, but do this carefully—add water drop by drop and stir. If it’s too thin, let it cool for a minute or two and it’ll thicken up.
Safety Warning: Caramel gets extremely hot—around 300°F. Don’t touch it directly, and be careful when stirring. If you splash it on your skin, run cold water over it immediately and seek medical attention if it’s a serious burn.
The Coating Technique That Actually Works
This is where most homemade caramel popcorn fails. People either drizzle caramel over popcorn (uneven coating) or toss it all at once (clumpy mess). The solution? Slow, deliberate tossing with a spatula or wooden spoon.
Here’s the method:
- Prepare your workspace: Pour your popcorn into a large bowl. Have your caramel ready but let it cool for 30 seconds—if it’s too hot, it’ll make the popcorn soggy.
- Drizzle slowly: Pour the caramel in a thin stream around the popcorn while continuously tossing with a wooden spoon or spatula. Don’t dump it all at once. Think of it like drizzling salad dressing—you want even distribution.
- Toss constantly: Keep tossing for about 2-3 minutes until every piece of popcorn looks coated. Some pieces will have more caramel than others, and that’s okay. The goal is coverage, not perfection.
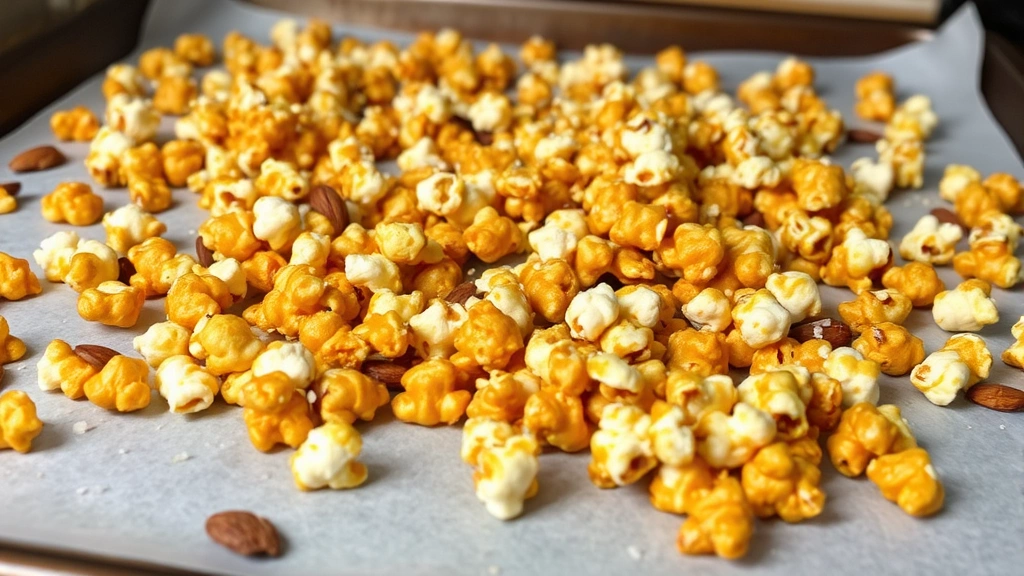
- Spread on baking sheet: Transfer the coated popcorn to a large baking sheet lined with parchment paper. Spread it in a single layer. If there are clumps, gently break them apart with your fingers (or a spatula if it’s still too hot).
The parchment paper is critical—it prevents sticking and makes cleanup way easier. Don’t skip this step.
Baking and Crisping Your Caramel Popcorn
Now comes the part that transforms your caramel popcorn from good to perfect: the oven bake. This step dries out the caramel coating and makes it crispy instead of chewy.
The baking process:
- Preheat your oven: Set it to 250°F. This is a low temperature—high heat will burn the caramel.
- Bake for 45 minutes: Spread your coated popcorn on the baking sheet and bake for 45 minutes. Yes, 45 minutes. I know it seems long, but this is what makes it crispy.
- Stir every 15 minutes: At the 15-minute mark, stir the popcorn with a spatula. Do it again at 30 minutes. This ensures even baking and prevents burning on the edges.
- Cool completely: Remove from the oven and spread the popcorn on a clean baking sheet or paper towels. Let it cool for at least 30 minutes before eating. This is when the caramel hardens and crisps up.
If you skip the cooling step, you’ll bite into popcorn that feels soft and sticky. The cooling is what makes it snap when you bite it.
Pro Tip: If your oven runs hot, start checking at 40 minutes. Every oven is different. You’re looking for the caramel to look slightly darker and the popcorn to smell toasty—not burnt.
Storage and Shelf Life
Here’s the thing about homemade caramel popcorn: it’s only as good as how you store it. If you leave it exposed to air, it gets stale. If you store it with too much moisture, it gets soggy.
The right way to store caramel popcorn:
- Use airtight containers: Glass jars with tight lids or plastic containers with sealed lids work great. Avoid plastic bags—they don’t seal well enough.
- Layer with parchment: If you’re stacking it, put parchment paper between layers to prevent pieces from sticking together.
- Keep it cool and dry: Store in a pantry or cabinet, not on the counter. Heat and humidity are enemies of caramel popcorn.
- Shelf life: Properly stored caramel popcorn lasts about 5-7 days before it starts getting stale. After that, it’s still edible, but the texture degrades.
If your popcorn does get soft, you can re-crisp it. Spread it on a baking sheet and bake at 250°F for 10-15 minutes. It won’t be quite as good as fresh, but it’ll be better than stale.
Flavor Variations and Mix-Ins
Once you’ve mastered basic how to make caramel popcorn, you can get creative. The beauty of this recipe is how flexible it is.
Easy flavor additions:
- Sea salt: Sprinkle fleur de sel or sea salt on the popcorn right after coating, while the caramel is still sticky. The salt-sweet combo is addictive.
- Spices: Add ½ teaspoon of cinnamon, cayenne pepper, or smoked paprika to the caramel sauce before cooking.
- Nuts: Toss in roasted almonds, pecans, or cashews after the caramel coating. You can add them before baking or after cooling.
- Chocolate drizzle: After everything cools, melt 4 ounces of dark chocolate and drizzle it over the popcorn. Let it set for 10 minutes before eating.
- Maple or honey: Replace half the brown sugar with maple syrup or honey for a different flavor profile.
If you’re adding mix-ins like nuts or seeds, do it right after the popcorn comes out of the oven while the caramel is still slightly warm. This helps everything stick together.
Common Problems and How to Fix Them
Clumpy caramel popcorn: This happens when you dump all the caramel at once instead of drizzling slowly. Next time, add the caramel in a thin stream while tossing constantly. If it already happened, break the clumps apart with your hands before spreading on the baking sheet.
Burnt or bitter taste: You overcooked the caramel. The boiling time should be exactly 1 minute, not more. Also, make sure your oven temperature is accurate—use an oven thermometer to check. If it’s running hot, adjust the temperature down by 25°F.
Sticky and chewy instead of crispy: You either didn’t bake it long enough or your oven temperature was too low. Next time, bake for the full 45 minutes at 250°F. Also, make sure you’re letting it cool completely before eating—at least 30 minutes.
Uneven coating: This usually means you’re not tossing enough while drizzling the caramel. Slow down, toss more, and take your time. The coating should be even but not necessarily thick on every piece.
Popcorn tastes stale: You stored it wrong. Use airtight containers, not open bowls or bags. If it’s already stale, re-crisp it in a 250°F oven for 10-15 minutes.
If you’re interested in other sweet treats, you might enjoy learning how to make Squid Game cookies or exploring how to make apple cider for fall gatherings. Both are fun projects that pair well with homemade caramel popcorn.
For more detailed guidance on candy-making techniques, Better Homes & Gardens offers excellent candy-making resources, and King Arthur Baking Company has detailed baking science explanations that apply to caramel work. You can also check Serious Eats for in-depth candy chemistry information if you want to understand the science behind why caramel behaves the way it does.
Frequently Asked Questions
Can I make caramel popcorn without baking soda?
– Technically yes, but I wouldn’t recommend it. The baking soda is what makes the caramel crispy instead of chewy. Without it, you’ll end up with caramel corn that’s soft and sticky. If you absolutely can’t use baking soda, your popcorn will still taste good—just expect a different texture.
Why does my caramel popcorn stick to my teeth?
– This means your caramel didn’t crisp up properly. Either you didn’t bake it long enough, your oven temperature was too low, or you didn’t let it cool completely. Next time, bake for the full 45 minutes and cool for at least 30 minutes before eating. If it already happened, re-crisp it in a 250°F oven for 10-15 minutes.
Can I use white sugar instead of brown sugar?
– You can, but brown sugar gives a richer, more complex flavor. If you use white sugar, the caramel will be lighter in color and taste more one-dimensional. If you want to try it, use the same amount of white sugar as the recipe calls for brown sugar.
How do I know when the caramel is done cooking?
– The mixture should reach a full rolling boil, then cook for exactly 1 minute. At that point, it should be medium-dark amber in color. If you have a candy thermometer, it should read around 240-245°F. Don’t rely on color alone—timing is more important.
Can I make caramel popcorn ahead of time?
– Yes, but only for a few days. Make it, cool it completely, and store it in airtight containers. It’ll stay fresh for about 5-7 days. After that, it gets stale. If you need it longer, freeze it in airtight containers for up to 2 weeks, though the texture won’t be quite as good when thawed.
What if my caramel is too thick to drizzle?
– Let it cool for another minute or two—it’ll thin out slightly as it cools. If it’s still too thick, add water one drop at a time and stir. Don’t add too much water or you’ll make it too thin and it won’t coat properly.
Is there a substitute for corn syrup?
– Corn syrup prevents crystallization, but you can substitute it with honey or agave syrup in equal amounts. Your caramel might be slightly different in texture, but it’ll still work. Some people skip it entirely and just accept that their caramel might be a tiny bit grainier.
Can I make caramel popcorn in bulk?
– Absolutely. Double or triple the recipe as needed. Just make sure you have a large enough bowl for tossing and enough baking sheets for spreading. Bake in batches if necessary. The process is the same—just more volume.


