
A garbage disposal is one of those kitchen upgrades that seems intimidating until you actually do it. The truth? How to install garbage disposal is a totally manageable weekend project if you know what you’re doing and take safety seriously. I’ve seen homeowners turn a 3-hour job into a 10-hour nightmare because they skipped steps or didn’t respect the electrical side of things. This guide walks you through every stage—from shutting off power to testing your final installation—so you can avoid those headaches.
Most people worry about two things: plumbing connections and electrical safety. Both are legitimate concerns, but neither is rocket science. The key is methodical work, the right tools, and understanding why each step matters, not just following a checklist blindly.
Safety First: Power and Plumbing Prep
Before you touch anything, kill the power. This is non-negotiable. Head to your breaker box and flip the switch controlling your kitchen outlets—or better yet, the entire kitchen circuit. If you’re not 100% sure which breaker it is, flip it and have someone test the outlets with a lamp. Don’t guess. Garbage disposals are electric motors, and electricity doesn’t forgive mistakes.
Next, turn off the water supply under the sink. You’ll find a shutoff valve (usually a small oval handle) on the hot water line. Turn it clockwise until it stops. If there’s no shutoff valve, you’ll need to install one before proceeding—this is actually a good safety upgrade anyway.
Pro Tip: Tape the breaker switch in the OFF position or put a note on it. This prevents someone else from flipping it back on while you’re working. Sounds paranoid? It’s saved lives.
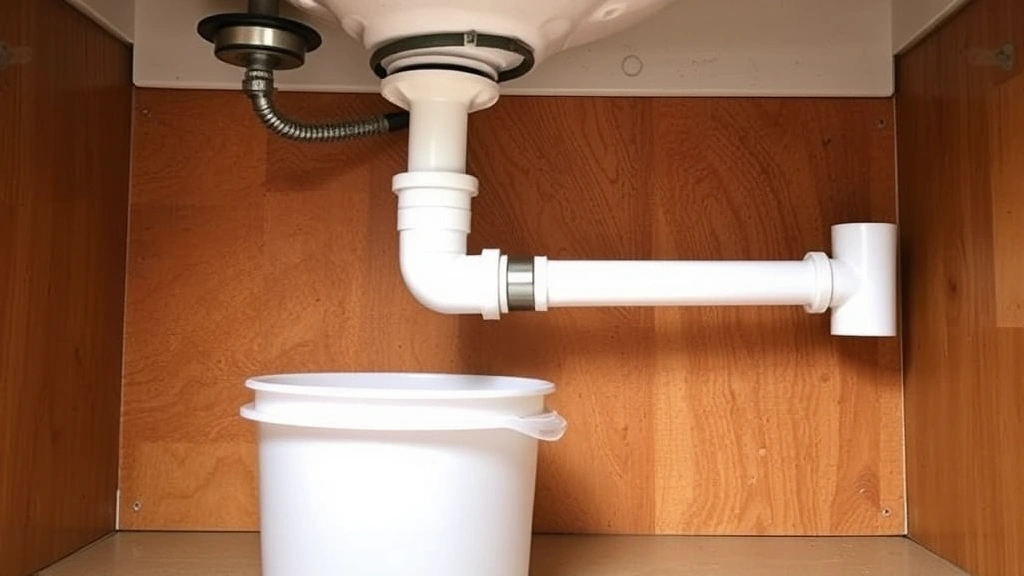
Clear out everything under the sink. You need room to work, and you don’t want cleaning supplies or food containers in your way. Grab a bucket or old towels—water will spill when you disconnect the P-trap.
Tools and Materials You’ll Actually Need
Here’s what’s sitting on my bench for a garbage disposal installation:
- Adjustable wrench (or two—one for holding, one for turning)
- Screwdrivers (both Phillips and flathead, multiple sizes)
- Plumber’s putty (the grey stuff, not caulk)
- Flashlight or headlamp (working under a sink is dark)
- Bucket (for catching water from the P-trap)
- Slip-joint pliers (grips pipes without marring them)
- Hacksaw or PVC saw (only if you need to cut drain lines)
- Wire nuts (usually included with the disposal, but have extras)
- Electrical tape (for securing wires)
- Teflon tape (for any threaded connections)
- The garbage disposal unit itself (duh)
- Mounting hardware (comes with most units)
- Drain lines and fittings (depends on your setup, but have a P-trap ready)
Don’t cheap out on the disposal itself. A quality unit from brands like InSinkErator, Waste King, or Moen will last 10+ years. Budget disposals fail fast and are just as much work to replace.
Removing Your Old Disposal (or Starting Fresh)
If you’re replacing an existing disposal, disconnect the electrical connection first. You’ll see either a plug (unplug it) or hardwired connections (disconnect the wires and remove the wire nuts). Take a photo before you disconnect anything—it’s a lifesaver if you forget the configuration.
Next, disconnect the drain lines. The P-trap (the U-shaped pipe) is your main concern. Place a bucket underneath, then loosen the slip nuts (the large nuts connecting the P-trap to the sink tailpiece and wall drain). Hand-tighten first, then use pliers if needed. Water will pour out—that’s normal.
Now for the mounting ring. Most disposals use a three-bolt system. From underneath the sink, you’ll see bolts holding the unit to a collar. Loosen all three bolts evenly (don’t fully remove one side first—it’ll tilt and be a pain). Once loose, the old disposal should drop free. It’s heavy, so support it as it comes down.
Safety Warning: Never reach into a disposal drain opening. Even unplugged, there’s a risk of accidental activation. Always assume it’s dangerous until you’ve confirmed the power is off at the breaker.
Once the old unit is out, clean the sink opening. Use a rag to wipe away old plumber’s putty and debris. A clean surface is essential for a good seal on the new unit.
Installing the Mounting Ring and Collar
This is where precision matters. The mounting ring sits directly under the sink opening. Most new disposals come with a rubber gasket, a metal flange, and a mounting collar with three bolts.
Here’s the sequence:
- Apply a ring of plumber’s putty around the sink opening (about ½ inch thick). Think of it like caulk, but it’s removable and doesn’t harden.
- Insert the sink flange (the part that sits in the opening) from above. It should sit flush.
- From underneath, slide the rubber gasket onto the tailpiece of the flange.
- Thread the mounting collar onto the tailpiece, hand-tight first.
- Tighten the three bolts evenly in a star pattern (bolt 1, then bolt 3, then bolt 2). This prevents the collar from tilting.
- Wipe away excess putty from around the flange with a damp rag.
The mounting ring should be rock solid with no wobble. If it moves, loosen the bolts and retighten. A loose collar will cause leaks and grinding noises.
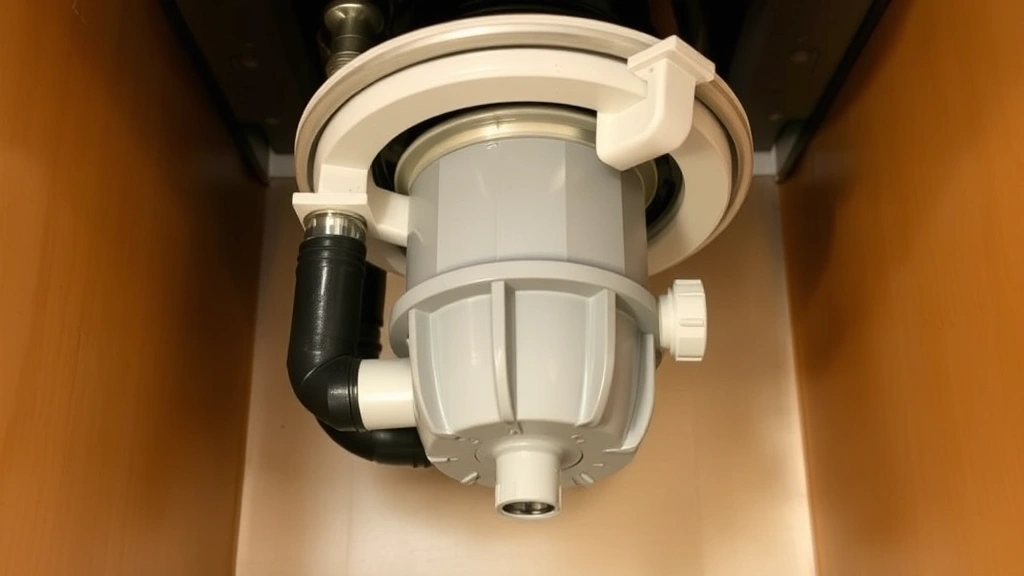
Connecting the Drain Plumbing
Now you’re connecting the discharge side of the disposal to your existing drain line. This is straightforward plumbing, but it has to be airtight and watertight.
If you have an old P-trap, you can reuse it if it’s in good condition. If it’s corroded or damaged, replace it with a new one (they’re cheap). The P-trap connects the disposal outlet to the wall drain.
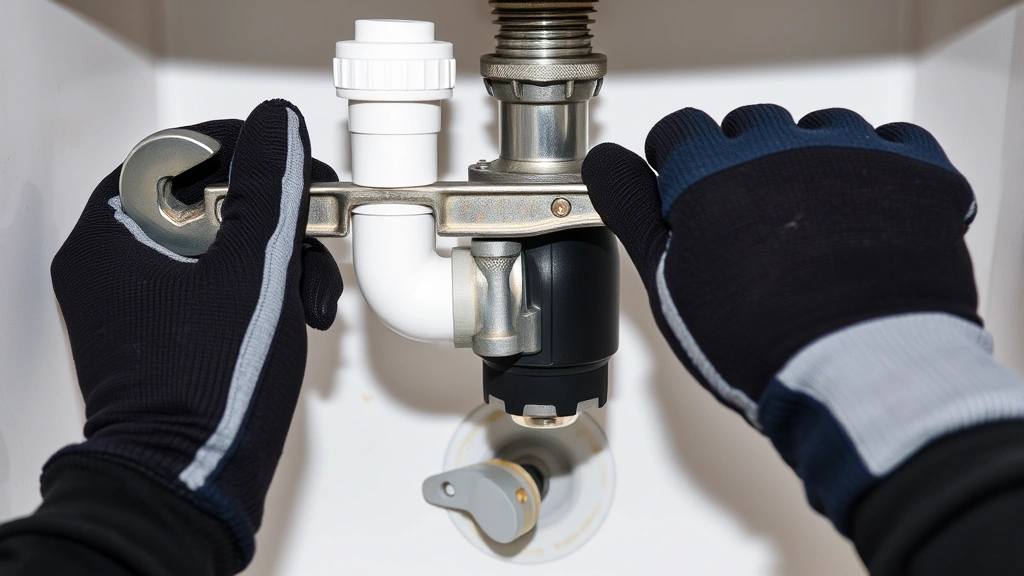
- Attach the discharge tube to the outlet of the disposal. This is usually a slip-fit connection with a slip nut. Hand-tighten, then snug it with pliers.
- Connect the P-trap to the discharge tube. Again, slip nuts and hand-tightening first.
- Connect the other end of the P-trap to the wall drain (or existing drain line).
- Tighten all slip nuts firmly but not excessively. You want them tight enough that they don’t leak, but loose enough that you can hand-loosen them later if needed.
Turn on the water at the shutoff valve and run the sink for 10 seconds. Check all connections for drips. A slow drip at a slip nut usually means it needs another quarter-turn with pliers.
Pro Tip: If you have a dishwasher, you’ll need to connect its drain line to the disposal inlet. There’s usually a knockout plug in the side of the disposal. Knock it out with a screwdriver and hammer, then attach the dishwasher drain hose with a hose clamp.
Electrical Wiring and Power Connection
This is the step that makes people nervous, and rightfully so. Electricity demands respect. But if you follow the rules, it’s safe.
First, confirm the power is OFF at the breaker. Use a non-contact voltage tester (they’re $10 at any hardware store) to verify there’s no power in the outlet. Touch the tester to the outlet—if it lights up, the power is still on. Do not proceed until it doesn’t light up.
Most modern disposals have a plug that connects to a standard outlet. If your outlet is dead (power is off), simply plug the disposal into it. Done. But some installations require hardwiring, which is more involved.
For hardwired installations:
- The disposal has three wires: black (hot), white (neutral), and green or bare copper (ground).
- Your circuit also has these three wires.
- Match them: black to black, white to white, ground to ground.
- Use wire nuts to connect them. Twist the wires together first, then screw the wire nut on clockwise until tight.
- Wrap each connection with electrical tape for extra security.
- Tuck all wires into the junction box and secure the cover.
If you’re unsure about any electrical work, consult This Old House’s disposal guide or hire a licensed electrician. It’s not worth the risk.
Once everything is connected, flip the breaker back on and test the disposal. It should run smoothly without grinding or rattling noises.
Testing and Troubleshooting Common Issues
Power on. Turn on the cold water. Flip the disposal switch. It should hum and grind for a few seconds, then stop when you release the switch. That’s normal.
Feed a few ice cubes down the drain while running it. This helps clean the blades and tests the grinding action. You should hear a satisfying crunch.
Common problems and fixes:
- Disposal won’t turn on: Check the breaker. Check the outlet with a lamp. If the outlet is dead, the breaker may have tripped. Flip it off, wait 30 seconds, then flip it back on.
- Grinding noise but nothing happens: Something is jammed. Turn it off immediately, unplug it, and reach in with tongs or pliers to remove the obstruction. Never put your hand in a disposal, even when it’s off.
- Water leaks from the sink flange: The plumber’s putty seal failed. You’ll need to disassemble the mounting ring, clean off old putty, apply new putty, and reassemble.
- Water leaks from the P-trap: Tighten the slip nuts with pliers. If it still leaks, the gasket may be damaged and the P-trap needs replacement.
- Foul smell: Run the disposal with cold water and ice cubes for 30 seconds. Pour ½ cup of baking soda down the drain, followed by ½ cup of white vinegar. Let it sit for 15 minutes, then flush with hot water.
For more detailed troubleshooting, Family Handyman has an excellent garbage disposal repair guide that covers most issues you’ll encounter.
Once everything is working, you’re done. Seriously. That’s the whole process. Most installations take 2-4 hours if you’re methodical.
One final note: keep a log of when you installed it. Disposals typically last 8-12 years. Knowing the installation date helps you plan for replacement before it fails catastrophically (and they always fail when you’re hosting Thanksgiving dinner).
Frequently Asked Questions
Do I need a plumber to install a garbage disposal?
– No, but you need to understand basic plumbing and electrical work. If you’re comfortable with a wrench and a screwdriver, you can do this yourself. If you’re uncomfortable with electrical connections, hire a licensed electrician for that part only—it’ll cost $100-200 and is worth the peace of mind.
Can I install a garbage disposal if I don’t have an existing one?
– Yes, absolutely. You’ll need to install a new sink flange and P-trap, but the process is the same. The main difference is you’re starting from scratch instead of replacing an old unit.
What size disposal do I need?
– For most households, a ¾ horsepower disposal is plenty. If you cook heavy meals or have a large family, consider 1 horsepower. Anything smaller than ¾ HP will jam frequently and frustrate you.
Can I connect my dishwasher drain to the disposal?
– Yes, and you should. The dishwasher drain connects to the disposal inlet, which then drains through the disposal outlet. This prevents standing water in the dishwasher.
Is it safe to put bones or pasta down a disposal?
– Bones are fine (small ones). Pasta is actually a no-no—it swells with water and can clog the drain. Stick to food scraps, not starchy foods or grease.
Why is my disposal leaking from the bottom?
– The seal between the motor housing and the grinding chamber has failed. This usually means the disposal needs replacement. It’s not a repair you can DIY safely.
How often should I clean my disposal?
– Once a week, run it with cold water and ice cubes for 10 seconds. Monthly, use the baking soda and vinegar method. This keeps it fresh and prevents buildup.
Can I use hot water in my disposal?
– Use cold water while grinding. Hot water can cause grease to liquefy and coat the blades, reducing efficiency. Cold water keeps grease solid so it breaks apart cleanly.
What’s the difference between continuous feed and batch feed disposals?
– Continuous feed runs while you feed scraps down. Batch feed requires you to load scraps, then activate it. Batch feed is safer (no accidental activation), but continuous feed is more convenient. Most homes use continuous feed.
Do I need a special outlet for the disposal?
– A standard 120V outlet works fine. Some installations use a dedicated circuit, which is ideal. Check your local electrical code—some jurisdictions require a dedicated outlet for safety.
How long does a garbage disposal last?
– 8-12 years with normal use. Budget disposals fail sooner. Premium units (like InSinkErator) often last 15+ years. Proper maintenance extends the lifespan.
Can I install a garbage disposal myself if I’ve never done plumbing before?
– Yes, but take your time. Watch a video tutorial (not just read instructions). Test your work at each stage. If you’re uncomfortable with any step, stop and consult an expert. There’s no shame in asking for help.


