
Double spacing in Word is one of those things that seems simple until you’re staring at your document wondering why it looks cramped or why your professor’s requirements aren’t being met. Whether you’re formatting an essay, a research paper, or a professional document, knowing how to do double spacing in Word is a skill that’ll save you time and frustration. The good news? It takes about 30 seconds once you know where to look.
Think of line spacing like the breathing room in your document. Single spacing is tight. Double spacing gives your text room to breathe, makes it easier to read on paper, and is often required by academic institutions or style guides like APA and MLA. Let’s walk through exactly how to get it done, whether you’re working with a new document or fixing an existing one.
The Quick Method: Select All & Adjust
This is the most straightforward approach, and it works in virtually every version of Microsoft Word. Here’s what you do:
- Press Ctrl+A (or Cmd+A on Mac) to select all text in your document.
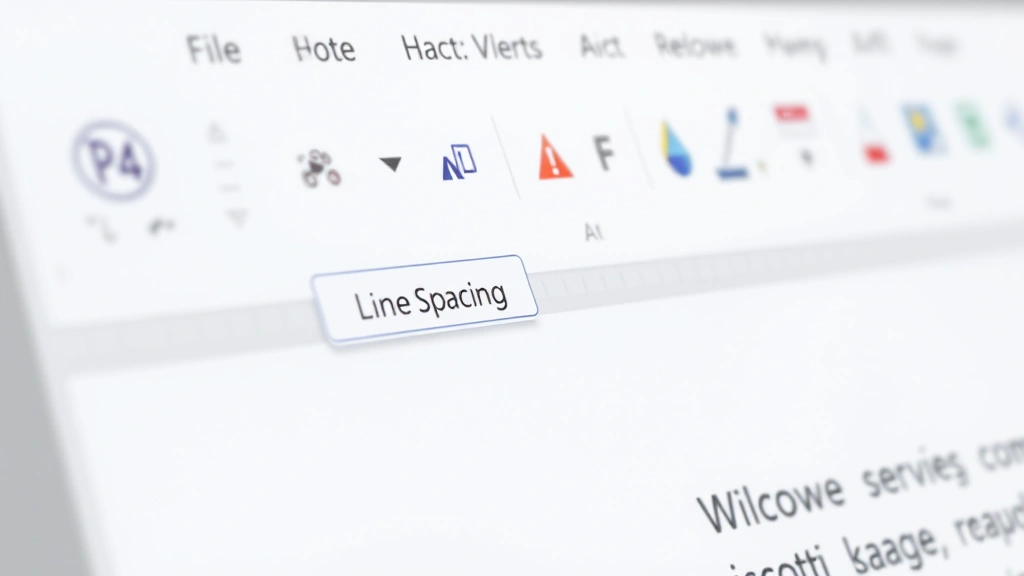
- Look at the Home tab on the ribbon at the top of your screen.
- Find the Line Spacing button—it usually looks like lines with arrows pointing up and down.
- Click the dropdown arrow next to it.
- Select 2.0 from the menu.
Done. Your entire document is now double-spaced. If you only want to apply double spacing to certain paragraphs, just select those paragraphs instead of using Ctrl+A. This method works because Word’s line spacing tool gives you preset options, and 2.0 is the standard for double spacing.
The reason this matters: many students and professionals don’t realize you can apply spacing to just part of a document. So if you have an introduction that’s single-spaced and a body section that needs to be double-spaced, you can do that without reformatting the whole thing.
Using the Paragraph Dialog Box
If the quick method feels too button-heavy, or if you want more granular control, the Paragraph dialog is your friend. This is also where you’ll find yourself if you need to adjust spacing between paragraphs in addition to line spacing.
- Select the text you want to format (or use Ctrl+A for all text).
- Right-click and choose Paragraph from the context menu. Alternatively, go to the Home tab and click the small arrow in the bottom-right corner of the Paragraph group.
- The Paragraph dialog box will open. Look for the Indents & Spacing tab (it’s usually already selected).
- Find the Line spacing dropdown, which typically shows “Single” by default.
- Click the dropdown and select Double.
- Click OK.
This method is particularly useful if you’re also adjusting paragraph spacing (the space before and after paragraphs). Real talk: this dialog box can feel overwhelming at first because there are a lot of options, but you really only need to focus on that one line spacing dropdown.
Pro tip: While you’re in the Paragraph dialog, you can also set spacing before and after paragraphs. Many academic styles want 0pt before and after, which means the only space between paragraphs is the double line spacing itself. Check your style guide to be sure.
Keyboard Shortcut (Fastest Way)
If you’re a keyboard warrior and want to apply double spacing without touching the mouse, there’s a shortcut:
- Select all text: Ctrl+A (Windows) or Cmd+A (Mac).
- Press Ctrl+2 (Windows) or Cmd+2 (Mac).
That’s it. Your document is now double-spaced. This keyboard shortcut is built into Word and works in almost every version. There’s also Ctrl+1 for single spacing and Ctrl+5 for 1.5 spacing, so you can toggle between them quickly.
This is the method I use most often because it’s fast and doesn’t require hunting through menus. If you’re writing a lot of documents and need to switch between spacing formats, learning these shortcuts will make you feel like a productivity wizard.
Double Spacing an Existing Document
So you’ve already written a 5,000-word essay in single spacing, and now your professor says it needs to be double-spaced. Don’t panic. Converting an existing document is the same process as starting fresh.
- Open your document.
- Press Ctrl+A to select everything.
- Use any of the methods above (quick method, dialog box, or keyboard shortcut) to apply double spacing.
The document will reformat instantly. One thing to watch out for: if you’ve manually added extra line breaks (pressing Enter multiple times to create space), those won’t go away when you apply double spacing. You’ll need to find and remove those manually or use Find & Replace to clean them up. Go to Home > Find & Replace (or press Ctrl+H) and search for paragraph marks if you want to get fancy.
Another heads-up: if your document has tables or text boxes, the spacing inside those might not change when you apply document-wide spacing. You may need to manually adjust those elements. It’s rare, but it happens.
Setting Double Spacing as Your Default
If you’re writing academic papers all the time and you’re tired of applying double spacing every single time, you can set it as your default. This means every new document you create in Word will automatically be double-spaced.
- Open a blank document in Word.
- Apply double spacing using any of the methods above.
- Go to Home > Styles (look for the Styles group on the ribbon).
- Right-click on Normal (the default style) and select Modify.
- In the dialog that opens, click Format > Paragraph.
- Set line spacing to Double and click OK.
- Click OK again to close the Modify Style dialog.
- When prompted, select Yes to apply this change to all new documents based on the Normal template.
Now, every time you create a new document, it’ll start with double spacing already applied. This is a game-changer if you’re in school or if your workplace requires double-spaced documents by default.
A word of caution: changing the Normal style affects all your documents going forward. If you sometimes need single-spaced documents, this might not be the best move. You could instead create a separate template just for double-spaced documents, but that’s getting into more advanced territory.
Common Issues & Fixes
Double spacing isn’t showing up even though I applied it.
Check a few things: First, make sure you actually selected the text before applying spacing. If you only had the cursor in one spot without selecting anything, the formatting won’t apply. Second, zoom in or look at the document in Print Layout view to see the spacing clearly. Sometimes on screen it’s hard to tell. Third, if you’re using a style that has specific spacing built in, that might override your double spacing. Try applying the Normal style first, then add double spacing.
The spacing looks weird—some lines are closer together than others.
This usually happens if you have different font sizes or if there are manual line breaks mixed in. Check your document for inconsistent formatting. Also, if you have images or objects in your document, they might affect how spacing looks around them. Word tries to fit images within the line spacing, which can create visual inconsistencies.
I applied double spacing, but my page count went way up.
That’s normal. Double spacing literally doubles the vertical space used by your text, so a 10-page single-spaced document will become roughly 20 pages when double-spaced. If this is a problem (like you’re over a page limit), you might need to trim content rather than adjust spacing. Check your requirements—sometimes professors or publishers are flexible if you explain the situation.
Can I apply different spacing to different parts of my document?
Absolutely. Select just the paragraphs you want to change and apply the spacing to that selection. This is useful if you have an abstract that needs single spacing and a body that needs double spacing, which is common in academic papers. Just be careful to select exactly what you need—it’s easy to accidentally leave out a paragraph.
Double Spacing in Different Word Versions
The methods above work in Word 2016, 2019, 2021, and Microsoft 365 (the subscription version). If you’re using an older version like Word 2010 or 2007, the ribbon layout is slightly different, but the principle is the same: look for the Line Spacing button in the Paragraph section and select 2.0.
If you’re using Word Online (the browser version), the process is similar but the interface is slightly simplified. Go to Home > Line Spacing and select double spacing from the dropdown. Word Online has fewer options than the desktop version, but double spacing is always available.
For Mac users: The process is virtually identical. Use Cmd+A instead of Ctrl+A, and Cmd+2 for the keyboard shortcut. The menu options are in the same places, just with Mac styling.
If you’re collaborating with someone using Google Docs instead of Word, the process is different—you’d go to Format > Line spacing and select double spacing there. But that’s a whole different tutorial.
Why Line Spacing Matters More Than You Think
You might be wondering: why do professors and style guides care so much about double spacing? There are a few practical reasons. First, double spacing makes documents easier to read in print, especially if someone is marking up your paper with feedback. Second, it’s a professional standard for academic and publishing work—it signals that you know how to format properly. Third, it’s easier to read on paper for people with certain visual impairments. According to accessibility guidelines, adequate spacing is one factor in document readability.
Beyond academics, understanding line spacing helps you create better-looking documents in general. A resume in double spacing looks too spread out, but a novel manuscript almost always needs double spacing. Knowing when to use what makes you look professional and competent.
If you’re interested in other Word formatting skills, you might want to check out how to delete pages in Word, which comes in handy when you’ve got extra blank pages cluttering up your document. Or if you’re working with multiple documents, learning how to edit a PDF on Mac could be useful for converting and formatting documents across different platforms.
Quick Reference: Line Spacing Options
Word gives you several spacing options beyond just single and double:
- Single (1.0): Standard spacing, no extra room between lines.
- 1.15: Slightly more than single, sometimes used for readability without taking up too much space.
- 1.5: Middle ground between single and double. Common in some professional documents.
- Double (2.0): The standard for academic papers and manuscripts.
- Proportional: Lets you set a custom percentage.
- At least: Sets a minimum spacing but allows more if needed for large fonts.
- Exactly: Fixed spacing regardless of font size.
- Multiple: Sets spacing as a multiple of single spacing (e.g., 2.5x).
For most people, you’ll only ever use single, 1.5, and double. The custom options are there if you’re doing something specialized, but they’re rarely necessary.
Pro Tips for Working with Spaced Documents
Pro Tip: If you’re printing a double-spaced document and want to save paper, you can print at 95-97% scale. It’ll still look double-spaced but save a page or two. Just make sure this doesn’t violate your assignment requirements—some professors specifically want the document at full scale.
Safety Warning: Don’t try to fake double spacing by inserting extra line breaks or blank paragraphs. Professors and editors can spot this immediately, and it looks unprofessional. Use the actual line spacing feature.
When you’re sharing documents with others, remember that line spacing is part of the formatting. If someone opens your double-spaced document in a different program or on a different device, the spacing should remain intact as long as it’s a .docx file. If you’re converting to PDF or another format, double-check that the spacing preserved correctly.
For more advanced Word skills, you might explore how line spacing interacts with styles and templates. Many organizations have custom templates with specific spacing already built in. If you’re working with templates, you can usually override the spacing for specific sections without affecting the whole document.
Frequently Asked Questions
What’s the difference between line spacing and paragraph spacing?
– Line spacing controls the vertical distance between lines within a paragraph. Paragraph spacing controls the space before and after entire paragraphs. Think of line spacing as the space between individual sentences and paragraph spacing as the gap between blocks of text. You can adjust both independently.
Is double spacing the same as 2.0 spacing?
– Yes, they’re the same thing. “Double spacing” and “2.0 spacing” refer to the exact same formatting. Word uses the 2.0 notation to be precise about the measurement.
Can I apply double spacing to just one paragraph?
– Absolutely. Select only that paragraph and apply double spacing. The rest of your document will remain unchanged. This is useful if you want to emphasize a particular section or if different parts of your document have different spacing requirements.
Why does my double-spaced document look single-spaced on screen?
– This is usually a zoom issue. Try zooming to 100% or switching to Print Layout view. Sometimes at certain zoom levels, spacing can look compressed on screen even though it’s correct. Print preview will show you what it actually looks like on paper.
Does double spacing work the same way in Word Online as in the desktop version?
– Mostly yes. The spacing will be applied the same way, but Word Online has a simplified interface. The keyboard shortcuts might not work in Word Online, so use the menu instead. The actual formatting will be identical.
If I apply double spacing and then add more text, will it automatically be double-spaced?
– Yes. Once you’ve set double spacing for a section or your entire document, any new text you add in that section will inherit the double spacing automatically. This is because spacing is part of the paragraph formatting.
Can I set double spacing for just headings while keeping the body single-spaced?
– Yes, but it’s a bit more involved. You’d need to select just the headings and apply double spacing to them, or modify the heading style to include double spacing. Most of the time, you want consistent spacing throughout, but if you need this, it’s possible through style modification.
What happens to tables when I apply double spacing to my document?
– Tables usually maintain their own internal spacing and won’t be affected by document-wide line spacing settings. If you need to adjust spacing inside a table, you’ll need to do that separately by selecting the table cells and adjusting their spacing.
Is there a way to see exactly what my spacing is set to?
– Yes. Select the text you want to check, then open the Paragraph dialog (right-click > Paragraph or Home > Paragraph). The current line spacing will be shown in the Line spacing dropdown. This is helpful if you’re troubleshooting or need to verify formatting.
Can I undo double spacing if I change my mind?
– Definitely. Press Ctrl+Z immediately after applying double spacing to undo it. Or select the text again and change the spacing back to single. You can also use Ctrl+1 as a shortcut to revert to single spacing.


