
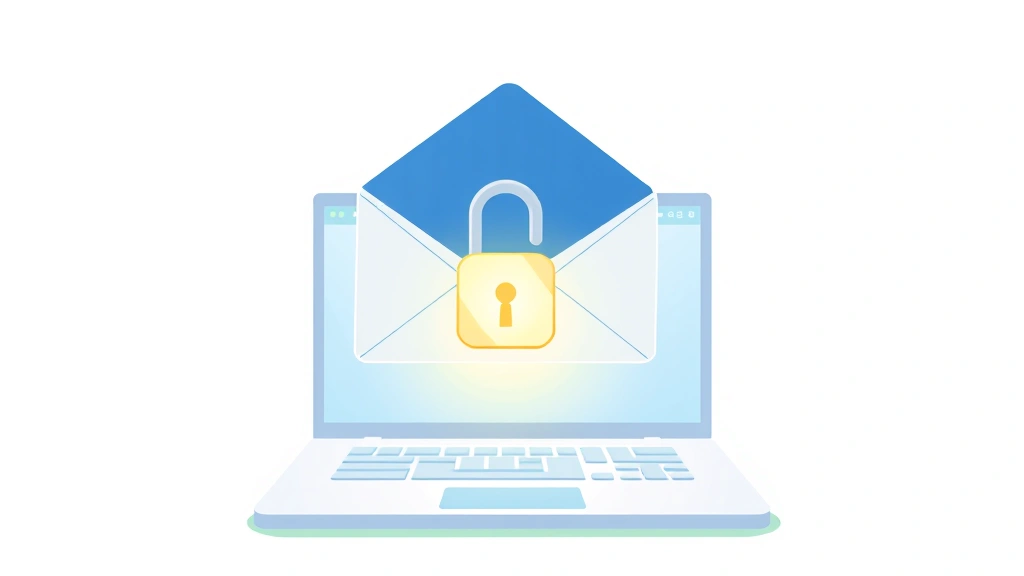
You’re about to hit send on an email with sensitive information—client data, financial details, passwords—and you pause. Should you really be sending this unencrypted? The truth is, most people don’t know how to send a secure email in Outlook, and that’s a legitimate security gap. Outlook has built-in tools to protect your messages, but they’re buried in menus most users never explore. This guide walks you through every method to lock down your emails, from basic encryption to advanced security features. No tech degree required.
Why Secure Email Matters
Here’s the uncomfortable reality: email is fundamentally insecure. When you send an unencrypted message, it travels across multiple servers and networks like a postcard in the mail—anyone handling it can read it. According to OSHA guidelines on data protection, organizations handling sensitive employee or client information have a responsibility to encrypt communications. Think of unencrypted email like leaving your front door unlocked while you’re away. It might be fine most of the time, but the risk is always there.
Outlook’s security features exist specifically to close that door. Whether you’re sharing medical records, financial data, legal documents, or just want peace of mind, knowing how to send a secure email in Outlook is non-negotiable in 2024. The good news? It takes seconds once you know where to click.
Pro Tip: Not all Outlook versions have the same security features. Microsoft 365 subscribers get the full toolkit, while older versions of Outlook may have limited encryption options. Check your subscription level first.
How to Encrypt a Message in Outlook
The simplest way to send a secure email in Outlook is using built-in encryption. Here’s the step-by-step process for both desktop and web versions.
Desktop Outlook (Windows & Mac)
- Open a new email or reply to an existing message.
- Click “Options” in the top ribbon (or “Message” on Mac).
- Select “Encrypt” from the dropdown menu. You’ll see encryption options appear.
- Choose your encryption level:
- Encrypt Only – Recipient must have a Microsoft account to decrypt.
- Encrypt and Sign – Adds verification that the email is genuinely from you.
- Type your message and add attachments as normal.
- Click Send. The recipient will receive a secure link to read the message.
Outlook Web (Outlook.com or Office 365)
- Start composing your email.
- Look for the lock icon near the bottom of the compose window (or click “…” for more options).
- Toggle “Encrypt” to ON.
- Optionally set an expiration date for how long the recipient can access the message.
- Send normally.
That’s it. The recipient gets a notification email with a secure link. They don’t need special software—just a web browser. This is the beauty of modern Outlook encryption: it works seamlessly across platforms.
Using Office Message Encryption (OME)
Office Message Encryption (OME) is the enterprise-grade version of Outlook’s encryption. If your organization uses Microsoft 365, you likely have access to this. OME goes beyond basic encryption—it lets you control what happens to your email after it’s sent. That’s powerful.
What OME Can Do
- Revoke access to a message you’ve already sent (similar to how to recall an email in Outlook, but more reliable).
- Set expiration dates so emails self-destruct after a certain time.
- Prevent forwarding of sensitive messages.
- Require authentication before the recipient can read the message.
How to Enable OME
- In Outlook Web, click the lock icon while composing.
- Select “Encrypt” to enable encryption.
- Click the lock icon again to access advanced OME settings.
- Toggle on “Do Not Forward” if you want to prevent sharing.
- Set an expiration date if the message should expire (e.g., “This email expires in 7 days”).
- Send the email.
Recipients will see a “Read the message” button instead of the email content directly in their inbox. This extra step ensures they’re accessing the secure version, not a cached copy.
Adding Digital Signatures for Authentication

Encryption protects content. Digital signatures prove identity. When you digitally sign an email, you’re essentially stamping it with a certificate that proves it came from you and hasn’t been tampered with. This is crucial for legal documents, contracts, and high-stakes communications.
How to Set Up Digital Signatures
- Obtain a digital certificate from a trusted Certificate Authority (like DigiCert, Sectigo, or GlobalSign). Your IT department might provide this.
- In Outlook Desktop, go to File > Options > Trust Center > Trust Center Settings.
- Click “Email Security” in the left panel.
- Under “Signing Certificates,” click “Browse” and select your certificate.
- Check the box: “Sign all outgoing messages.”
- Click OK and apply changes.
Now every email you send will be digitally signed. Recipients will see a verification badge (usually a blue ribbon or checkmark) indicating the message is authentic. If someone tries to alter the message after you send it, the signature breaks and recipients are alerted.
Security Warning: Digital signatures only work if your recipient’s email client supports them. Outlook fully supports digital signatures, but Gmail, Apple Mail, and other clients may display them differently or not at all. Always verify with recipients before relying on signatures for critical communications.
Using BCC to Protect Recipient Privacy
Here’s a security move that doesn’t get enough attention: using BCC (Blind Carbon Copy) to protect your recipients’ email addresses. When you send an email to multiple people using the “To” field, every recipient can see all the other recipients’ addresses. That’s a privacy leak and a phishing risk.
For a detailed guide on this technique, check out our article on how to BCC in Outlook. The short version: put your own email in the “To” field, then add all recipients in the BCC field. Now nobody sees anybody else’s email address.
When to Use BCC
- Sending to mailing lists (newsletters, announcements, etc.)
- Protecting client privacy in professional settings.
- Preventing reply-all disasters where someone accidentally emails the whole list.
- Avoiding data harvesting by bad actors who scrape email addresses from visible recipient lists.
It’s a simple habit that pays dividends for security and professionalism.
Setting Expiration Dates and Password Protection
Sometimes you need to send sensitive information that should only be readable for a limited time. Outlook lets you set expiration dates on encrypted messages—after the deadline, the recipient can’t access the email anymore, even if they saved the link.
How to Set Message Expiration (Outlook Web)
- Compose your email and enable encryption (click the lock icon).
- Click the lock icon again to open advanced settings.
- Look for “Expire after” or “Set expiration date.”
- Choose a timeframe: 1 day, 7 days, 30 days, or a custom date.
- Send the email.
This is particularly useful for temporary access scenarios—sharing a password with a contractor for one week, sending confidential documents to a lawyer before a deadline, or distributing time-sensitive financial reports.
Password-Protected Attachments
Outlook doesn’t natively password-protect individual attachments, but you can encrypt the entire message (which protects attachments) or password-protect files before attaching them. If you’re sending a PDF, Word document, or Excel file, most of these formats support built-in password protection:
- PDF: Use Adobe Acrobat or Preview (Mac) to add password protection before attaching.
- Word/Excel: Go to File > Info > Protect Document > Encrypt with Password.
- Zip files: Use WinRAR or 7-Zip to create password-protected archives.
Then, send the password separately through a different channel (phone call, SMS, a separate encrypted email) to ensure the recipient has both the file and the key to unlock it.
Best Practices for Secure Email
Knowing how to send a secure email in Outlook is half the battle. The other half is developing habits that keep your communications consistently safe. Here are the moves that actually matter.
1. Encrypt by Default When Handling Sensitive Data
Don’t wait until you’re sending something critical to learn encryption. Make it automatic. If your role involves any sensitive information—HR data, medical records, financial details, legal documents—encrypt everything. It takes one extra click and eliminates the risk of accidentally sending unencrypted information.
2. Use Strong Subject Lines Without Spoiling Content
Your subject line isn’t encrypted, so never put sensitive details there. Instead of “Password: Tr0pic@lSunset123,” write “Login credentials (encrypted below).” The subject line should signal the message’s purpose without exposing the secret.
3. Verify Recipient Addresses Before Sending
A huge percentage of email breaches happen because someone types the wrong recipient address. Double-check that you’re sending to the right person. Pro move: if Outlook has autocomplete suggestions, verify the suggestion matches your intended recipient—typosquatting attacks sometimes register similar email addresses.
4. Don’t Rely Solely on Outlook for Sensitive Data
Email is a communication tool, not a secure storage system. For highly sensitive information (like passwords, API keys, or medical records), consider using a password manager, secure document sharing platform, or encrypted file service instead. Email encryption is great, but it’s not Fort Knox.
5. Educate Your Team
If you work in an organization, your security is only as strong as your least-informed colleague. Share this guide. Set up training on encryption. Make it part of your culture. According to CISA (Cybersecurity and Infrastructure Security Agency), human error is the leading cause of data breaches—not software vulnerabilities.
6. Understand Your Organization’s Policies
Some companies have specific requirements about how to handle certain types of data. Check with your IT or compliance department before sending sensitive information. They might require OME, specific encryption standards, or even prohibit certain types of data via email altogether.
7. Keep Your Outlook Updated
Security patches matter. Microsoft regularly updates Outlook to fix vulnerabilities. Enable automatic updates and don’t ignore those “restart to update” notifications. An outdated version is an open door.
Real Talk: Encryption doesn’t make you invincible. A compromised password, malware on your computer, or a phishing attack can still expose your data. Encryption is one layer of defense in a multi-layered security strategy. Combine it with strong passwords, two-factor authentication, and good judgment.
Frequently Asked Questions
Can I encrypt emails on my phone or mobile Outlook app?
– Yes, but it depends on your version. Outlook for iOS and Android support encryption, but the interface is different from desktop. Look for the lock or shield icon while composing. If you don’t see encryption options, your organization might not have enabled it for mobile clients. Contact your IT department to confirm.
What happens if the recipient doesn’t have a Microsoft account?
– They can still read your encrypted email. They’ll receive a link to an OME portal where they can authenticate using their email address or a one-time passcode. No Microsoft account required—the system generates a temporary access method for them.
Does encryption slow down email delivery?
– Negligibly. Encryption adds a few milliseconds to the sending process, but you won’t notice it. The recipient might take slightly longer to access the secure link, but it’s usually instant. If you’re experiencing slow email, encryption isn’t the culprit.
Can I encrypt an email after I’ve already sent it?
– Not retroactively. Once an unencrypted email is sent, it’s out there. However, if you’re using Office Message Encryption (OME), you can revoke access to an already-sent email, which prevents the recipient from reading it going forward. For more details on undoing mistakes, see our guide on how to retract an email in Outlook.
Is Outlook encryption compliant with HIPAA, GDPR, or other regulations?
– Outlook encryption meets many regulatory standards, but compliance depends on how your organization is configured and what you’re encrypting. Microsoft 365 Enterprise plans include features designed for HIPAA and GDPR compliance. If you’re in a regulated industry, work with your compliance team to verify your setup meets requirements. Don’t assume—verify.
What’s the difference between encrypting and signing an email?
– Encryption hides the content so only the intended recipient can read it. Signing proves the email came from you and hasn’t been altered. They serve different purposes. You can encrypt without signing, sign without encrypting, or do both. For maximum security on sensitive documents, do both.
Can recipients forward encrypted emails?
– By default, yes. But if you enable the “Do Not Forward” option in Office Message Encryption, recipients can’t forward, copy, or print the message. They can still read it, but they can’t share it. This is useful for confidential documents.
How long does a recipient have to read an encrypted email?
– Without an expiration date, indefinitely. But you can set emails to expire after 1 day, 7 days, 30 days, or a custom date. After expiration, the recipient gets an error when trying to access the message. It’s not deleted from their inbox, but the content becomes unreadable.
Does encryption work with email attachments?
– Yes. When you encrypt a message, all attachments are encrypted too. They’re protected the same way as the message body. The recipient downloads them through the secure OME portal, so they never travel unencrypted.
What if my recipient says they didn’t receive the encrypted email?
– Check your sent folder to confirm it was sent. Have them check spam/junk folders—encrypted emails sometimes trigger overzealous filters. Ask them to check their email address is correct (typos happen). If they’re using an email client that doesn’t support OME well (like some corporate mail systems), they might need to access the message through the OME web portal instead. Have them look for the notification email from Microsoft with the secure link.


