

A dead car battery is one of those problems that hits different—it’s not just inconvenient, it’s stressful. You’re stuck, and suddenly you’re wondering if you need to call a mechanic and drop $200+ on labor alone. Here’s the real talk: changing a car battery yourself is genuinely one of the easiest DIY jobs you can do, and it’ll save you serious cash. This guide walks you through exactly how to change car battery safely, step by step, whether you’re a total beginner or just haven’t done it in years.
Most people can swap a battery in 15–30 minutes with just basic tools. No special skills required. No magic tricks. Just you, a wrench, and a little bit of know-how.
Preparation and Safety First
Before you touch anything, let’s talk safety. Car batteries contain sulfuric acid and can produce explosive hydrogen gas. That sounds scary, but it’s only dangerous if you’re careless. The good news: basic precautions eliminate almost all risk.
Safety Warning: Always wear safety glasses and work gloves. Never smoke, use sparks, or create any ignition source near the battery. Keep the battery away from children and pets. If you spill battery acid on skin, flush immediately with water and seek medical attention.
Here’s what you need to do before starting:
- Turn off the engine and let it cool for a few minutes.
- Turn off all electrical components—headlights, radio, interior lights, everything. This protects your car’s electronics.
- Park on level ground and set the parking brake.
- Open the hood and locate the battery (usually in the engine bay, sometimes in the trunk).
- Check your owner’s manual for your specific battery type and location. It takes 30 seconds and saves headaches.
The reason for turning everything off? Modern cars have sensitive computer systems. A sudden power loss can confuse them. Turning things off first gives you a controlled shutdown.
What You’ll Need
Here’s the minimal toolkit. You don’t need much:
- New battery (correct size and type for your vehicle—check the owner’s manual or current battery label)
- Adjustable wrench or socket set (usually 8mm, 10mm, or 13mm, depending on your car)
- Safety glasses and work gloves
- Battery terminal cleaner (optional but useful—see how to clean battery corrosion for details)
- Battery carrier or sturdy box (batteries are heavy; don’t drop them)
That’s it. Seriously. You don’t need a $500 diagnostic tool or a fancy battery charger for a simple swap.
One pro tip: before you go to the auto parts store, snap a photo of your current battery or note the part number. This ensures you get the exact replacement. Most stores will cross-reference it for free anyway, but having the info speeds things up.
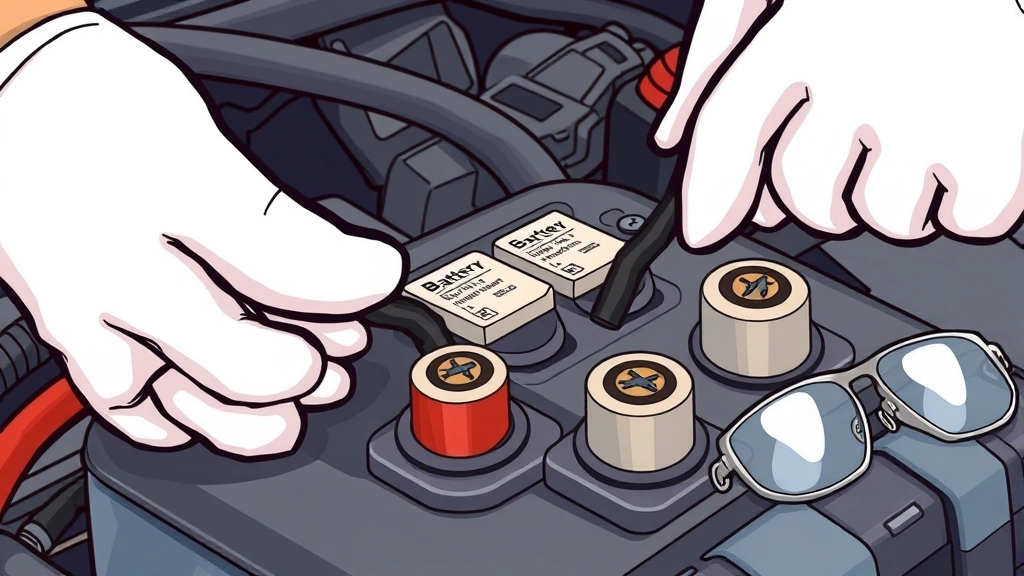
Disconnect the Old Battery
This is the most critical step, and it’s where most people mess up. Always disconnect the negative terminal first, then the positive. This order matters because it prevents accidental shorts.
Here’s the step-by-step:
- Locate the terminals. You’ll see two cable connectors on top (or side) of the battery. The positive terminal is marked with a red cover or + symbol. The negative is black or marked with a −.
- Loosen the negative terminal first. Use your wrench to turn the bolt counterclockwise. Don’t remove it completely—just loosen it enough to wiggle the connector off. If it’s stuck, gently rock it side to side.
- Slide the negative cable off the post. Set it aside where it won’t touch the battery terminal.
- Repeat with the positive terminal. Same process: loosen, wiggle, slide off. This time, be extra careful not to let the wrench touch both the positive terminal and any metal part of the car simultaneously—that creates a short.
- Secure both cables. Tape them back or position them so they can’t accidentally touch the battery posts. This is important.
For a deeper dive on disconnection, check out how to disconnect car battery.
Pro Tip: Some cars have a plastic cover over the positive terminal. If yours does, pop it off first. It’s usually just clipped on.
Remove the Old Battery
Now the battery is electrically disconnected. Time to physically remove it.
Car batteries weigh 30–50 pounds depending on the type. That’s heavy enough to hurt your back if you’re not careful. Use proper lifting technique: bend your knees, keep your back straight, and use your legs.
- Locate the battery hold-down bracket. It’s usually a metal strap or clamp bolted to the battery tray. Most cars have one.
- Remove the bolt(s) holding the bracket. Usually one or two bolts. Keep them in a safe place—you’ll need them for the new battery.
- Lift the bracket away. Set it aside.
- Carefully lift the battery straight up. Don’t tilt it. If it’s stuck, rock it gently side to side. Never force it.
- Place it in your battery carrier or box. Don’t drop it. Damaged batteries can leak acid.
If your car has the battery in the trunk, the process is identical—just in a different location.
According to Family Handyman, most battery replacements take less than 30 minutes for someone doing it for the first time. If you’re taking longer, you’re probably overthinking it.
Install the New Battery
This is the reverse of removal, but pay attention to orientation. Batteries only fit one way, and forcing it is a great way to damage connectors.
- Check the terminal positions. The positive and negative posts should align with your disconnected cables. If they don’t match, you have the wrong battery. Stop and exchange it.
- Lower the new battery into the tray. Keep it level. Don’t force it.
- Reinstall the hold-down bracket. Tighten the bolt(s) firmly but don’t over-tighten—you can strip the threads.
- Double-check alignment. Make sure the battery is sitting flat and secure.
Think of it like parking a car in a garage—it should slide in smoothly without forcing.
Reconnect the Terminals
Now reverse the disconnection process. This time, connect positive first, then negative. This order is the opposite of disconnection, and it’s equally important.
- Attach the positive cable first. Slide the red connector onto the positive post. Tighten the bolt clockwise until it’s snug. Don’t overtighten—snug is enough.
- Attach the negative cable. Same process: slide on, tighten. You’re done with the connections.
- Check both connections. Gently try to wiggle each connector. They should be tight enough that they don’t move. If they do, tighten a bit more.
Pro Tip: If your battery terminals are corroded or crusty, now’s a good time to clean them. See how to clean battery corrosion for the full process. Clean terminals mean better electrical contact and longer battery life.
Test and Verify
You’re almost done. Time to make sure everything works.
- Close the hood. Make sure it latches properly.
- Sit in the driver’s seat. Don’t start the engine yet.
- Turn on the headlights. They should be bright and steady. If they’re dim or flickering, you have a connection issue. Get out and check both terminals again.
- Try the interior lights. Same deal—they should be bright.
- Start the engine. It should crank smoothly and start normally. If it cranks slowly or doesn’t start, you might have a weak battery or connection problem. Turn everything off, recheck your terminal connections, and try again.
- Let it run for a minute. Listen for any odd noises. Everything should sound normal.
If the engine starts and runs normally, you’re done. Seriously. That’s it. Close the hood, pat yourself on the back, and enjoy the $150–$300 you just saved.
According to This Old House, most DIY battery replacements are successful on the first try when you follow basic safety steps. The key is taking your time and not rushing.
One final check: if your car has a backup battery or memory saver (common on newer vehicles), you might need to reset some settings like radio presets or clock. Check your owner’s manual for specifics. It’s a minor inconvenience and usually takes five minutes.
Frequently Asked Questions
What if my battery terminals are corroded?
– Corrosion (that white, blue, or green crusty stuff) happens over time and reduces electrical contact. Before installing your new battery, clean the terminals with a wire brush or battery terminal cleaner. A mixture of baking soda and water also works. Just make sure everything is dry before reconnecting. See how to clean battery corrosion for step-by-step instructions.
How do I know what size battery to buy?
– Check your owner’s manual first—it’ll list the exact battery type and size (usually a code like 24F or 35). You can also check the label on your old battery or ask an auto parts store associate. They can cross-reference your vehicle’s year, make, and model. Don’t guess. Wrong size batteries don’t fit or don’t provide enough power.
Can I change the battery myself if I have no mechanical experience?
– Absolutely. This is genuinely one of the easiest car maintenance tasks. If you can use a wrench and follow instructions, you can do this. Thousands of people with zero mechanical background do it every year.
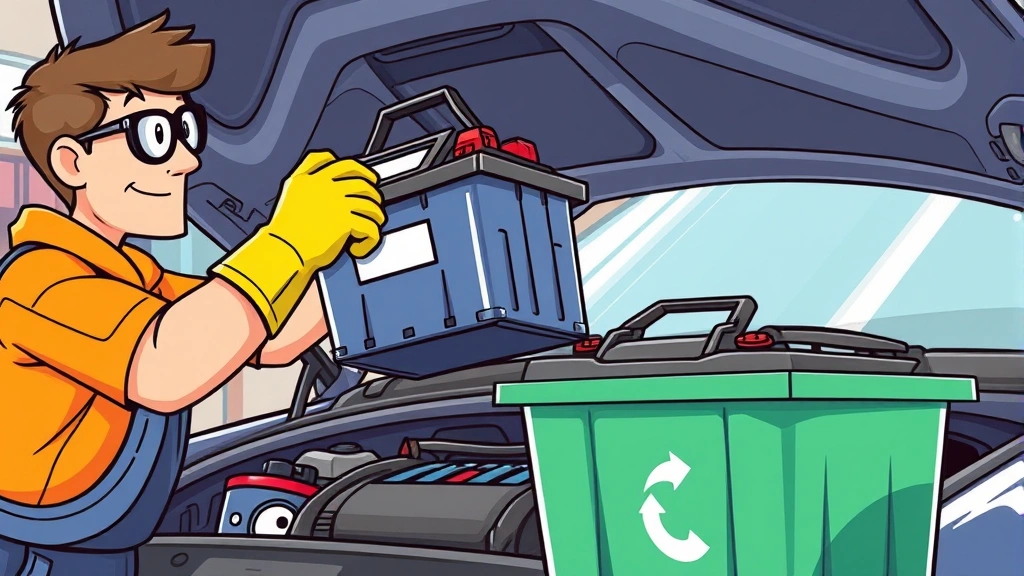
What should I do with my old battery?
– Don’t throw it in the trash. Car batteries are recyclable and contain valuable materials. Most auto parts stores will take your old battery for free when you buy a new one. Some even offer a small credit. If not, check your local recycling center—they usually accept batteries.
My car won’t start after I installed the new battery. What went wrong?
– Most likely, your terminal connections aren’t tight enough. Turn everything off, open the hood, and check both the positive and negative connections. They should be snug and not wiggle. Tighten if needed. If that doesn’t work, make sure you didn’t accidentally reverse the positive and negative cables. If they’re correct and tight, the new battery might be defective (rare). Contact the store where you bought it.
Do I need to reset anything in my car after changing the battery?
– Most older cars don’t need anything reset. Newer cars might lose radio presets, clock settings, or other minor settings. Check your owner’s manual. Resetting is usually just reprogramming your radio stations or adjusting the clock—no big deal.
How long does a new car battery last?
– Most modern car batteries last 3–5 years, depending on climate and driving habits. Hot climates shorten battery life. Cold climates extend it (counterintuitive, but true). Regular maintenance and clean terminals help. If you’re getting less than 3 years, something else might be draining the battery—have a mechanic check your alternator and electrical system.
Is it safe to change the battery in the rain?
– Avoid it if possible. Wet conditions increase the risk of shorts and make connections harder to see. If you absolutely must do it in the rain, work quickly, keep water away from the battery and terminals, and wear insulated gloves. Better yet, wait for dry weather if you can.
Do I need to disconnect the negative terminal first, or does it matter?
– It matters. Always disconnect negative first, then positive. When reconnecting, do the opposite: positive first, then negative. This order prevents accidental shorts that could damage your car’s electronics or create a spark. It’s not a suggestion—it’s the correct procedure.
What if I can’t loosen the terminal bolts?
– They can get stuck over time. Try spraying penetrating oil (like WD-40) around the bolt, wait 5–10 minutes, then try again. Use a wrench that fits snugly—a loose wrench will slip and strip the bolt. If it’s still stuck, apply more oil and wait longer. Don’t force it; you’ll damage the terminal. Patience wins here.


