How to Clean Stainless Steel Appliances: Easy and Amazing Tips
Stainless steel appliances add a sleek, modern look to any kitchen, but keeping them fingerprint-free and gleaming requires the right technique. Learning how to clean stainless steel appliances doesn’t have to be complicated—with the right products and methods, you can restore that showroom shine in minutes. This guide walks you through professional-grade cleaning strategies that work on refrigerators, dishwashers, ovens, and more.
The key to maintaining stainless steel is understanding that the grain runs in one direction, and cleaning with (not against) that grain prevents streaking and scratching. Most homeowners struggle because they use the wrong products or apply too much pressure, but our proven methods eliminate both issues.
Essential Supplies for Cleaning Stainless Steel
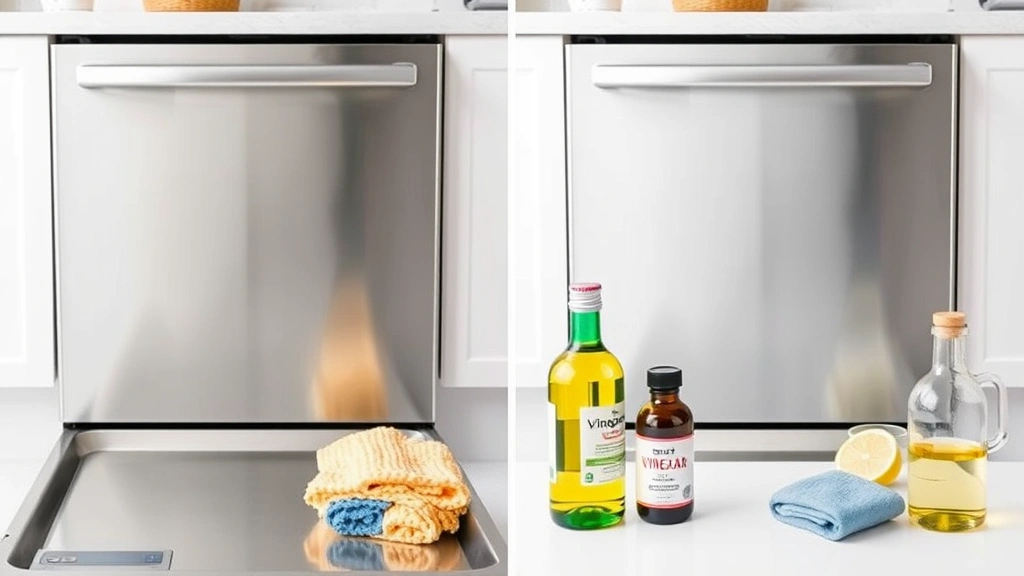
Before you start how to clean stainless steel appliances, gather these materials to ensure professional results. Having everything on hand prevents mid-task frustration and ensures you use appropriate products for your specific appliance type.
- Microfiber cloths – Lint-free and scratch-resistant; essential for streak-free results
- Distilled white vinegar – Natural degreaser that cuts through buildup without damaging the finish
- Olive oil or mineral oil – Restores shine and creates a protective barrier
- Rubbing alcohol – Removes stubborn fingerprints and disinfects
- Baking soda – Gentle abrasive for scrubbing without scratching
- Stainless steel cleaner – Commercial option for deep cleaning (choose reputable brands)
- Soft-bristled brush – For textured surfaces without causing damage
- Spray bottle – For even distribution of cleaning solutions
According to WikiHow’s comprehensive appliance guides, microfiber cloths are non-negotiable because paper towels leave lint that sticks to the oily residue on stainless steel. Many people overlook this detail, leading to a cloudy, unsatisfying finish.
Preparation Steps Before You Start
Proper preparation makes how to clean stainless steel appliances significantly easier and more effective. Start by unplugging your appliance or turning off its power to ensure safety during the cleaning process. This simple step prevents accidental activation and protects you from electrical hazards.
Next, remove any loose debris, crumbs, or dust from the surface using a dry microfiber cloth. This prevents you from dragging dirt across the stainless steel when you apply liquid cleaners, which can cause fine scratches. Wipe in the direction of the grain to avoid working against the metal’s natural pattern.
Check the appliance’s manual for any manufacturer-specific cleaning recommendations or restrictions. Some premium stainless steel finishes have special coatings that require particular care. If you own a washing machine with stainless steel components, similar preparation principles apply to prevent damage to the drum or exterior.
The Grain Direction Method
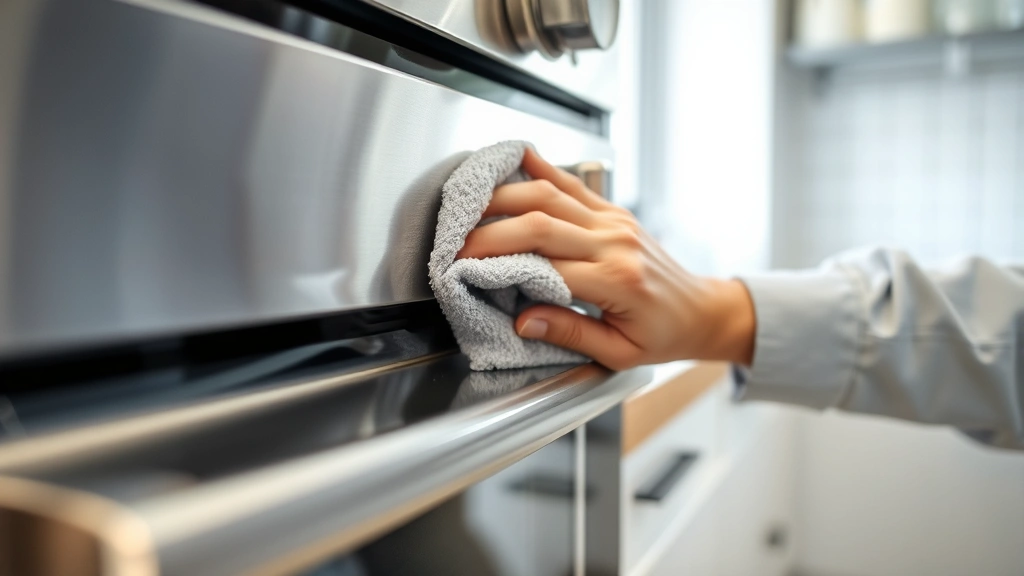
The most critical technique in how to clean stainless steel appliances is working with the grain rather than against it. Stainless steel has a directional grain pattern that’s invisible to the naked eye but becomes obvious when you understand how light reflects off it. Always wipe in one consistent direction following this grain.
To identify the grain direction, run your finger gently across the surface—you’ll feel a slightly smoother path in one direction. This is your grain direction. When you clean against the grain, you’re essentially scratching the metal in reverse, which creates a dull, streaky appearance.
Apply your chosen cleaning solution (vinegar, commercial cleaner, or rubbing alcohol) to your microfiber cloth rather than directly onto the appliance. This gives you better control and prevents excess liquid from seeping into seams or electrical components. Use moderate pressure—you’re not trying to strip the surface, just remove dirt and fingerprints.
For large appliances like refrigerators, divide the surface into manageable sections and clean one section at a time. This prevents the solution from drying unevenly and ensures consistent results across the entire surface. Work from top to bottom so gravity assists your cleaning efforts.
Removing Fingerprints and Smudges
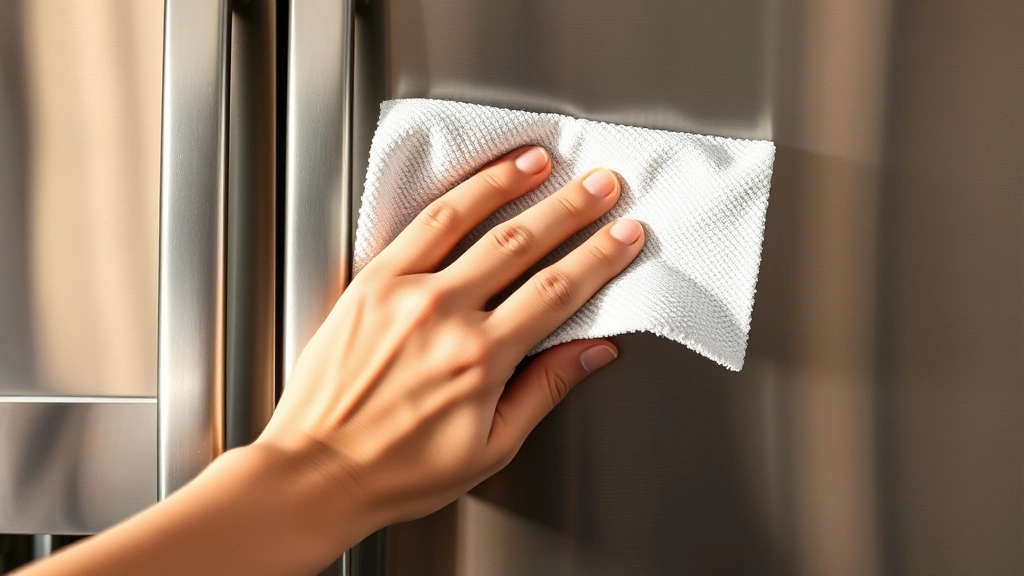
Fingerprints are the most visible problem when learning how to clean stainless steel appliances, and they require a specific approach. Human skin oils leave distinct marks that become more noticeable as they accumulate. The solution depends on whether you’re dealing with fresh or stubborn smudges.
For fresh fingerprints, dampen a microfiber cloth with distilled water and wipe in the grain direction. This removes most surface oils without requiring harsh chemicals. If water alone doesn’t work, add a few drops of rubbing alcohol to your cloth and repeat the process. Alcohol evaporates quickly and leaves no residue.
Stubborn, dried fingerprints require a slightly stronger approach. Mix equal parts white vinegar and water in a spray bottle, lightly mist your cloth (not the appliance), and wipe the affected area. The acidity in vinegar breaks down oil buildup while remaining gentle enough for regular use. As reviewed by Consumer Reports, vinegar-based solutions consistently outperform expensive specialty cleaners for everyday fingerprint removal.
After removing fingerprints, immediately buff the area with a dry microfiber cloth to prevent water spots from forming. Water spots occur when mineral-rich tap water dries on the surface, so using distilled water and prompt drying prevents this issue entirely.
Tackling Tough Stains and Buildup
Occasionally, how to clean stainless steel appliances involves dealing with stubborn stains that resist basic cleaning methods. These might include rust spots, burned-on food, or hard water deposits. Each type requires a slightly different approach to remove without damaging the underlying metal.
For rust spots, create a paste using baking soda and water (three parts baking soda to one part water). Apply this paste directly to the rust spot and gently scrub with a soft-bristled brush or non-abrasive sponge. The mild abrasive action removes rust without scratching the stainless steel finish. Rinse thoroughly with distilled water and dry immediately.
Burned-on food or grease buildup requires stronger treatment. Soak the affected area with a cloth dampened in white vinegar for 5-10 minutes to soften the buildup. Then gently scrub with a soft brush using circular motions (not against the grain, since you’re working on a specific spot). For extremely stubborn buildup, repeat the vinegar soak and scrubbing process.
Hard water deposits appear as white, chalky spots and respond well to vinegar treatment. Spray undiluted white vinegar on the affected area, let it sit for 2-3 minutes, then wipe with a microfiber cloth. The acidity dissolves mineral deposits without requiring physical scrubbing. This method also works effectively for cleaning other household items affected by mineral buildup.
Never use steel wool, scouring pads, or abrasive cleaners on stainless steel. These tools scratch the surface and create permanent damage that collects dirt and appears darker than the surrounding area. Stick to soft brushes and microfiber cloths exclusively.
Applying a Protective Coating
The final step in properly learning how to clean stainless steel appliances involves applying a protective coating that enhances shine and repels fingerprints. This step transforms your cleaned appliance from merely clean to genuinely gleaming. Several options work effectively, from natural to commercial solutions.
Olive oil is the most popular natural option for creating a protective coating. After cleaning and drying your appliance completely, apply a small amount of olive oil to a clean microfiber cloth and buff the surface in the grain direction. The oil fills microscopic pores in the stainless steel, creating a water-resistant barrier that repels fingerprints and dust. Use minimal oil—excess creates a greasy appearance rather than a professional shine.
Mineral oil serves as an excellent alternative to olive oil, offering similar benefits without the potential for rancidity. Some people prefer mineral oil because it doesn’t have a food-related scent, making it feel more appropriate for appliance maintenance. Apply it identically to olive oil using a microfiber cloth.
Commercial stainless steel polish offers convenience and consistent results. These products combine cleaning agents with protective oils in a single application. Choose reputable brands and follow manufacturer instructions carefully. Apply with a microfiber cloth in the grain direction, then buff to remove excess product. Commercial polishes typically last longer than natural oils, protecting your appliances for 2-4 weeks before reapplication becomes necessary.
Avoid silicone-based sprays marketed for stainless steel. While they create temporary shine, silicone buildup over time creates a cloudy, streaky appearance that becomes increasingly difficult to remove. Stick with oil-based or wax-based products for better long-term results.
Weekly and Monthly Maintenance Schedule
Establishing a routine maintenance schedule makes how to clean stainless steel appliances effortless and prevents buildup that requires intensive cleaning. Consistency matters more than intensity when maintaining stainless steel appliances.
Weekly maintenance:
- Wipe fingerprints daily with a dry microfiber cloth
- Once weekly, dampen a cloth with distilled water and wipe the entire surface in the grain direction
- Buff dry immediately with a clean microfiber cloth
- Address any spills or splatters immediately to prevent staining
Monthly maintenance:
- Deep clean with vinegar solution following the methods described above
- Apply protective oil coating after deep cleaning
- Inspect for any rust spots or damage requiring attention
- Clean interior surfaces if applicable (refrigerator coils, dishwasher filters)
If you own multiple stainless steel appliances, similar cleaning principles apply across all of them. For example, if you’re learning how to clean a washing machine with a stainless steel drum, the exterior cleaning follows identical methods to your refrigerator or dishwasher. Consistency across all your appliances creates a cohesive, well-maintained appearance throughout your kitchen.
Common Mistakes to Avoid
Understanding what not to do is equally important as knowing the correct methods for how to clean stainless steel appliances. Many people unknowingly damage their appliances through well-intentioned but incorrect cleaning practices.
Mistake 1: Using tap water exclusively. Tap water contains minerals that leave spots on stainless steel. Always use distilled water for the final rinse or when making cleaning solutions. This single change dramatically improves results and prevents mineral buildup over time.
Mistake 2: Cleaning against the grain. This creates visible scratches and a dull appearance. Always identify and follow the grain direction consistently. When in doubt, test on an inconspicuous area first.
Mistake 3: Applying too much cleaning product. More product doesn’t mean better results. In fact, excess cleaner leaves residue that attracts dust and creates a cloudy finish. Use minimal amounts and buff thoroughly to remove all product.
Mistake 4: Using abrasive tools. Steel wool, scouring pads, and abrasive sponges permanently scratch stainless steel. Stick exclusively to soft microfiber cloths and soft-bristled brushes. As reviewed by The Spruce’s appliance care guide, this single practice prevents 90% of stainless steel damage.
Mistake 5: Mixing cleaning products. Never combine vinegar with commercial cleaners or bleach-based products. Chemical reactions can create toxic fumes or damage the stainless steel finish. Stick with one cleaning method per session.
Mistake 6: Neglecting regular maintenance. Waiting until stainless steel looks terrible before cleaning requires more effort and stronger products. Weekly light cleaning prevents buildup and maintains appearance with minimal effort.
Mistake 7: Using silicone-based products. These create temporary shine but lead to long-term buildup and cloudiness. Stick with oil-based protective coatings for better results.
FAQ
Can I use lemon juice to clean stainless steel appliances?
Yes, lemon juice works similarly to white vinegar for cleaning stainless steel. The citric acid cuts through grease and mineral deposits effectively. However, ensure you use fresh lemon juice rather than bottled versions containing preservatives. Apply it the same way as vinegar—dampen a cloth rather than spraying directly on the appliance—and follow with thorough drying. Some people prefer lemon juice because it leaves a fresher scent than vinegar.
How often should I apply protective oil to my stainless steel appliances?
Apply protective oil monthly or whenever the shine begins to fade. The frequency depends on your kitchen environment, humidity levels, and how often you touch the appliances. Kitchens with high humidity may require more frequent applications, while dry climates might need less frequent treatment. Start with monthly applications and adjust based on how long the shine lasts.
Is it safe to use commercial stainless steel cleaners on all appliances?
Most commercial cleaners work on refrigerators, dishwashers, and ovens, but always check your appliance’s manual first. Some high-end or specialty finishes have specific requirements. Never use commercial cleaners on stovetop burners or cooking surfaces that contact food. For those areas, stick with vinegar or baking soda solutions. Always test new products on an inconspicuous area before applying to visible surfaces.
Why does my stainless steel appliance look streaky after cleaning?
Streaking typically results from cleaning against the grain, using tap water, or leaving excess product residue. Ensure you’re wiping in the grain direction, using distilled water for rinsing, and buffing thoroughly with a dry microfiber cloth. If streaking persists, try the vinegar solution followed by immediate drying—this often resolves stubborn streaking issues.
Can I use the same cleaning method on stainless steel cookware?
Yes, the same principles apply to stainless steel pots, pans, and utensils. However, cookware requires food-safe products, so avoid commercial cleaners designed for appliances. Stick with vinegar, baking soda, and olive oil solutions. For interior cooking surfaces, never use oil-based coatings—these create a slippery, unsafe cooking surface. Focus protective coatings on the exterior only.
What’s the best way to remove water spots from stainless steel?
Water spots result from mineral deposits in tap water. Remove existing spots by wiping with a cloth dampened in white vinegar, then immediately dry with a clean microfiber cloth. To prevent future spots, always use distilled water for rinsing and dry immediately after cleaning. This preventative approach eliminates the need for frequent spot removal.
Are there eco-friendly alternatives to commercial stainless steel cleaners?
Absolutely. White vinegar, lemon juice, baking soda, and olive oil are all effective, natural alternatives to commercial products. These options cost less, work as well or better than many commercial cleaners, and eliminate exposure to harsh chemicals. According to Lifehacker’s cleaning guides, natural solutions outperform expensive alternatives for most household cleaning tasks, including stainless steel maintenance.
How do I clean the interior of a stainless steel refrigerator?
Interior cleaning differs from exterior cleaning since you’re dealing with food storage areas. Use a solution of equal parts white vinegar and water, or a mild dish soap solution. Wipe shelves and surfaces thoroughly, then rinse with clean water and dry completely. Never use oil-based products inside refrigerators. For stubborn spills or stains, a baking soda paste works gently without leaving harmful residues.
Learning how to clean stainless steel appliances transforms your kitchen’s appearance and extends your appliances’ lifespan. By following these proven methods and maintaining a consistent cleaning schedule, you’ll enjoy gleaming, fingerprint-free appliances that look showroom-ready year-round. Start with the supplies you have on hand, master the grain direction technique, and gradually incorporate protective coatings into your routine for professional results that rival commercial cleaning services.