
How to Unhide All Rows in Excel: The Simple & Essential Guide

Hidden rows in Excel can disrupt your workflow and make data analysis frustrating. Whether rows were hidden accidentally or intentionally, learning how to unhide all rows in Excel is a fundamental skill that saves time and prevents data loss. This guide walks you through multiple methods to restore visibility to your spreadsheet in seconds.
Quick Answer: Select all cells (Ctrl+A), right-click, choose “Unhide,” and click OK. For Mac users, use Command+A instead. Alternatively, use the Format menu: Format → Rows → Unhide. This works for both individual hidden rows and bulk unhiding operations across your entire worksheet.
Tools & Materials You’ll Need
- Microsoft Excel (2016 or newer) or Excel Online
- A spreadsheet with hidden rows
- Mouse or trackpad
- Keyboard (for shortcuts)
- Basic understanding of Excel navigation
Method 1: Select All & Right-Click Unhide
The fastest way to unhide all rows in Excel is using the Select All button combined with a right-click menu. This method works on Windows and Mac versions of Excel 2016 and later. It’s ideal when you need to restore visibility to multiple hidden rows simultaneously without navigating through menus.
- Open your Excel spreadsheet containing hidden rows
- Click the Select All button (the small rectangle in the top-left corner where row and column headers meet)
- Right-click anywhere on the row headers (the numbered column on the left)
- Select “Unhide” from the context menu
- Click OK to confirm the action
All previously hidden rows will now be visible. This method is particularly effective because it selects every cell in the worksheet, ensuring no hidden rows are missed. If you only want to unhide rows in a specific range, select that range first before right-clicking.
According to WikiHow’s comprehensive Excel guides, this right-click method is the most intuitive approach for users of all skill levels. The context menu provides clear visual feedback, making it easy to confirm you’re performing the correct action.
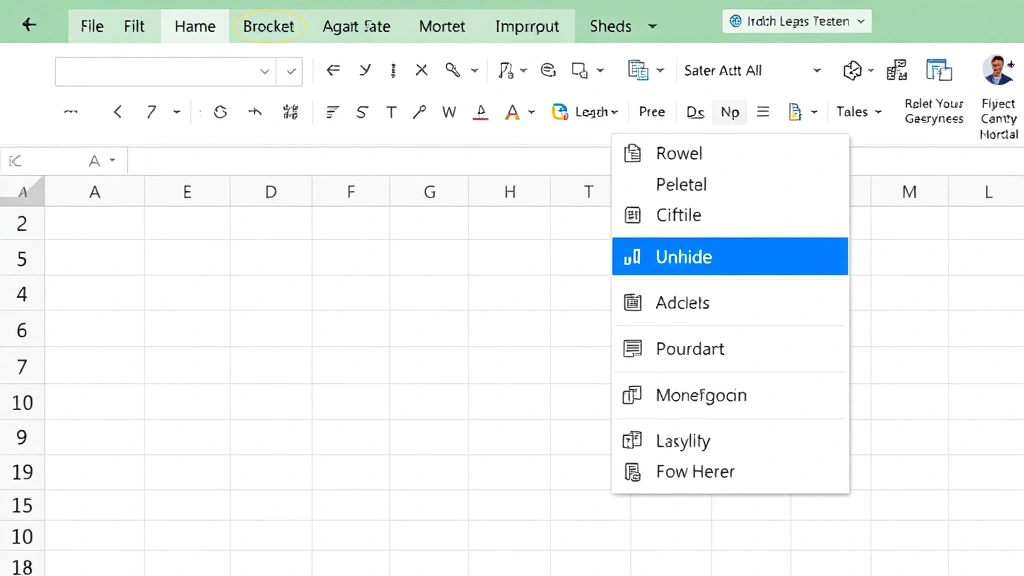
Method 2: Use the Format Menu
The Format menu provides an alternative approach to how to unhide all rows in Excel, especially useful if you prefer menu-driven navigation. This method is consistent across Windows and Mac versions and offers additional formatting options in one location.
- Select all cells using Ctrl+A (Windows) or Command+A (Mac)
- Click the Format menu in the ribbon
- Hover over “Rows” to reveal a submenu
- Click “Unhide” from the submenu options
- All hidden rows will instantly reappear
This approach is equally effective and provides a more structured workflow. Many users prefer the Format menu because it groups all row-related operations together, including hide, unhide, adjust height, and insert/delete options. The menu path remains consistent across different Excel versions, making it reliable for long-term use.
When you access the Format menu, you’ll notice other row management tools nearby. This proximity makes it easy to adjust row heights or perform additional formatting tasks after unhiding your rows. The Format menu is also accessible through keyboard navigation (Alt+O on Windows), which speeds up your workflow if you frequently manage hidden content.
Method 3: Unhide Specific Row Ranges
Sometimes you don’t need to unhide all rows—you only want to restore visibility to specific hidden rows. Learning how to target specific ranges is essential for maintaining spreadsheet organization while unhiding all rows in Excel sections selectively.
- Identify the rows before and after the hidden section (e.g., rows 5 and 10, with rows 6-9 hidden)
- Click on row 5’s header and drag down to row 10 to select the entire range
- Right-click the selected rows
- Choose “Unhide” from the context menu
- Only the hidden rows within your selection will become visible
This selective approach prevents unnecessary visibility changes and keeps your spreadsheet organized. It’s particularly valuable when working with large datasets where multiple sections contain hidden rows for different purposes. You maintain control over which sections are revealed while keeping others organized.
If you’re unsure which rows are hidden, look for gaps in the row numbering on the left side of your spreadsheet. For example, if you see rows 1-5, then rows 8-10, you know rows 6-7 are hidden. This visual cue helps you select the correct range for unhiding. When you select a range that includes hidden rows, the unhide option appears automatically in the context menu, providing clear feedback that hidden content exists within your selection.
Method 4: Excel Online & Mobile Apps
Excel Online and mobile applications offer slightly different interfaces for unhiding all rows in Excel, but the fundamental process remains simple. These versions are increasingly popular for remote work and on-the-go spreadsheet management.
Excel Online (Web Version): Open your spreadsheet in Excel Online, select all cells (Ctrl+A), then right-click and choose “Unhide.” The web version mirrors the desktop experience, making the transition seamless. Excel Online automatically saves changes, so no manual saving is required after unhiding rows.
Excel Mobile Apps: On tablets and smartphones, select all cells by tapping the Select All button (top-left corner), then tap and hold to access the context menu. Choose “Unhide” to restore row visibility. Mobile versions may have slightly different menu layouts, but the core functionality remains consistent. As reviewed by CNET’s technology reviews, Excel’s mobile apps provide robust functionality despite screen size limitations.
One advantage of Excel Online is real-time collaboration—when you unhide rows, other users viewing the spreadsheet see the changes immediately. This makes it ideal for team projects where multiple people need access to the same data simultaneously. Mobile apps sync changes across all your devices, ensuring consistency whether you’re working on a phone, tablet, or desktop computer.
Why Rows Get Hidden in Excel
Understanding why rows become hidden helps you prevent accidental hiding and troubleshoot spreadsheet issues more effectively. Rows are hidden for various legitimate reasons in professional spreadsheets, and knowing these reasons helps you work with hidden content intentionally.
Intentional Hiding: Users hide rows to simplify data presentation, reducing visual clutter while preserving underlying data. When creating reports or presentations, hiding supporting calculations or detailed breakdowns creates cleaner, more professional-looking documents. This is particularly common in financial spreadsheets where summary rows appear prominently while detailed transaction rows remain hidden.
Accidental Hiding: Sometimes rows are hidden unintentionally through misclicked buttons or keyboard shortcuts (Ctrl+- on Windows). If you notice missing row numbers in your sequence, accidental hiding is likely the culprit. Fortunately, how to unhide all rows in Excel is straightforward, so recovering from these mistakes takes seconds.
Template-Based Hiding: Many Excel templates come with pre-hidden rows for organizational purposes. When you download a budget template or financial model, some rows may be hidden by default to focus attention on key inputs. Understanding this helps you navigate unfamiliar spreadsheets more confidently.
Hidden rows don’t delete data—they simply make it invisible. All formulas, calculations, and values remain intact. When you unhide rows, you’re not recovering lost information; you’re simply restoring visibility to existing content. This distinction is important for data integrity and explains why unhiding is always safe to perform.
How to Prevent Accidental Row Hiding
While learning how to unhide all rows in Excel is essential, preventing accidental hiding is equally important for maintaining spreadsheet stability. Several strategies protect your rows from unintended hiding.
Protect Your Sheet: One of the most effective prevention methods is protecting your worksheet. When you lock cells in Excel, you can prevent users from hiding rows without entering a password. This is particularly valuable in shared workbooks where multiple people have editing access. Sheet protection settings allow you to specify exactly which actions are permitted, including row hiding.
Disable Hide/Unhide Options: In protected sheets, you can explicitly disable the hide rows option while allowing other editing functions. This maintains spreadsheet flexibility while preventing accidental row hiding. Users can still edit cell contents, insert new rows, and perform most other operations—they simply cannot hide existing rows.
Use pin a row in Excel Features: Pinning important rows (freezing panes) provides an alternative to hiding rows while maintaining visibility of critical headers or labels. This approach is cleaner than hiding and makes your spreadsheet easier to navigate for other users.
Document Your Spreadsheet: Include a note or comment explaining which rows are intentionally hidden and why. This prevents confusion when others work with your spreadsheet and helps them understand the document structure. Use cell comments or a separate documentation sheet to provide context.
Regular Audits: Periodically check for hidden rows using the method described above. Regular audits catch accidental hiding early, before it causes problems in calculations or data analysis. Set a monthly reminder to review important spreadsheets for hidden content.
Troubleshooting Hidden Rows
Sometimes the standard unhide methods don’t work as expected. Understanding common issues helps you resolve hidden row problems efficiently.
Protected Sheet Won’t Unhide: If your sheet is protected and you cannot unhide rows, you need to unprotect it first. Go to the Review tab and click “Unprotect Sheet.” You may be prompted for a password if one was set. After unprotecting, follow the standard unhide procedures. Once you’ve unhidden the necessary rows, you can re-protect the sheet if desired.
Hidden Rows in Filtered Data: When using Excel filters, some hidden rows may be filtered rather than manually hidden. To reveal filtered rows, click the filter dropdown in the header row and select “Show All.” This is different from unhiding and requires a different approach. You can identify filtered columns by the small arrow icon in the header cell.
Partial Unhiding Issues: If you select a specific range and unhide, but some rows remain hidden outside your selection, you need to repeat the process for other ranges. Select all cells (Ctrl+A) and unhide to ensure every hidden row becomes visible. This comprehensive approach eliminates partial visibility issues.
Performance Problems with Large Files: In extremely large spreadsheets, unhiding many rows simultaneously may cause temporary slowness. This is normal—Excel needs time to recalculate and redraw the interface. Wait a few moments for the operation to complete before performing additional actions. If performance remains poor, consider closing other applications to free up system resources.
When troubleshooting, remember that how to unhide all rows in Excel is fundamentally simple. Most issues stem from sheet protection or filtered data rather than unhiding mechanics. Addressing the root cause—removing protection or clearing filters—usually resolves the problem immediately.
According to The Spruce’s detailed guides on office software, systematic troubleshooting approaches work best for spreadsheet problems. Start with the simplest solutions (standard unhide), then progress to more complex scenarios (sheet protection, filtering) only if needed.
FAQ
Q: Does unhiding rows delete any data?
A: No. Hidden rows contain all original data, formulas, and values. Unhiding simply makes this content visible again without any modifications or deletions.
Q: Can I unhide individual rows without unhiding all rows?
A: Yes. Select the rows immediately before and after the hidden section, right-click, and choose “Unhide.” This reveals only the hidden rows within your selection while keeping others hidden if desired.
Q: Why can’t I unhide rows in my Excel file?
A: Your sheet is likely protected. Go to Review → Unprotect Sheet, enter the password if prompted, then unhide rows normally. Some sheets have password protection preventing unauthorized unhiding.
Q: What’s the keyboard shortcut for unhiding rows?
A: There’s no direct keyboard shortcut for unhiding. However, you can use Ctrl+A to select all, then access the Format menu via Alt+O, then select Rows and Unhide. Alternatively, use the right-click context menu after selecting rows.
Q: Do hidden rows affect calculations in Excel?
A: No. Formulas and calculations include hidden rows in their computations. Hidden rows are invisible but functionally active. Unhiding them changes nothing about your calculations—only visibility changes.
Q: Can I see which rows are hidden before unhiding them?
A: Yes. Look at the row numbers on the left side. If you see gaps (e.g., rows 1-5, then 8-10), rows 6-7 are hidden. The missing numbers indicate hidden content.
Q: Is there a way to unhide rows in bulk across multiple sheets?
A: You must unhide rows individually for each sheet. Select all cells in the first sheet and unhide, then repeat for each additional sheet. Excel doesn’t provide a single command to unhide across multiple sheets simultaneously.
Q: Will unhiding rows change my spreadsheet’s file size?
A: No. Hidden rows are already part of your file; unhiding simply changes their visibility status. File size remains unchanged whether rows are hidden or visible.
Learning how to unhide all rows in Excel is a crucial skill for anyone working with spreadsheets regularly. Whether you’re recovering from accidental hiding or managing intentionally hidden content, the methods outlined above provide reliable solutions. The Select All and right-click method remains the fastest approach for most users, while the Format menu offers a structured alternative. With these techniques in your toolkit, you’ll confidently manage hidden rows and maintain spreadsheet clarity. For additional spreadsheet management techniques, explore how to find duplicates in Excel and other essential Excel functions that enhance your productivity. As reviewed by Family Handyman’s practical guides, mastering fundamental software skills saves time and prevents frustration in daily work.


